Each category can have its own marker icon to visualize them differently on the map. Using the WP MAPS PRO plugin you can choose between a number of available marker icons or upload your own. You can change the marker category icons from URL, media library, and pre-defined icons by the plugin.
Step 1 Go to Add Marker Category from WP Google Map Plugin and click choose button.
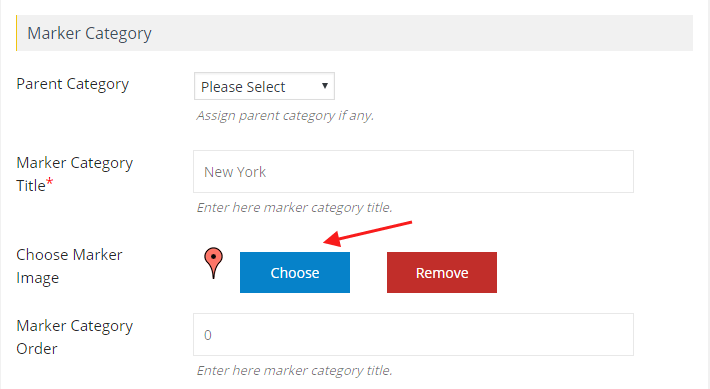
A popup will display, where you can add a marker icon from From Computer tab, From the URL tab, and from Media Library.
From Computer :
Step 2 Select any image from the computer then it will be displayed in the ‘Media library ’.
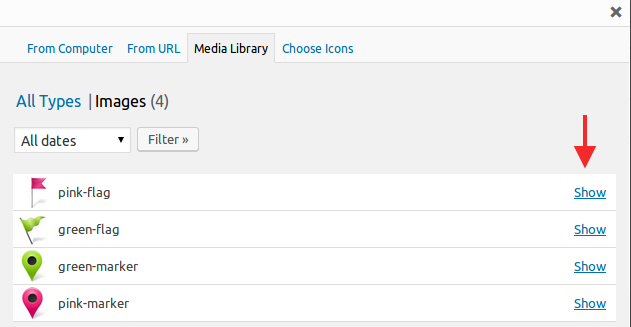
Step 3 Go to the Media Library tab and click the show link from the right side which marker or image you want to display.
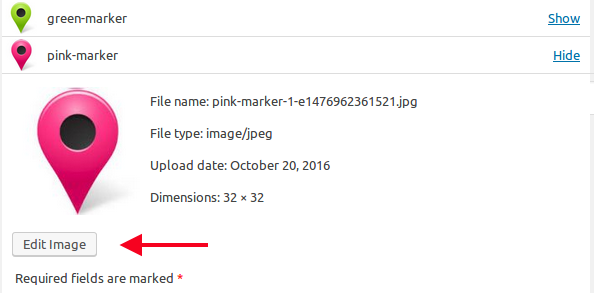
Step 3 After opening, you can edit the image size. Click on Edit image then click to insert into a post below the same popup.
Step 4 Then click Save Marker Category.
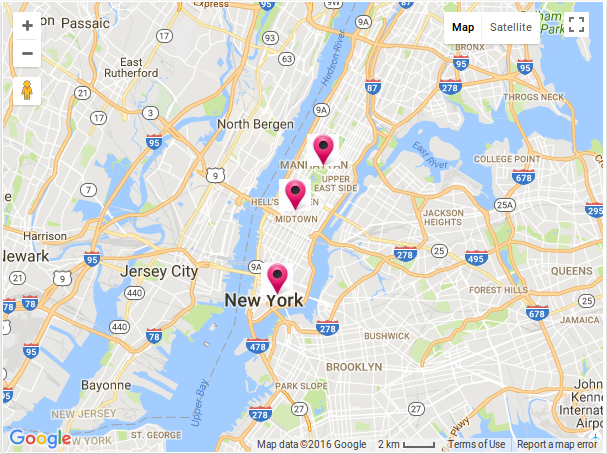
You will see your selected custom marker displayed on your map.
From URL :
Step 1 Copy Image Url from any site and paste in Url tab.
![]()
Step 2 Then click insert into post on the below of the same popup.You will see your selected custom marker display in your map.
Media Library :
All computer selected markers display in media library. You can select them click on show link and then click to insert into post.
Choose Icons :
You can select icons from Pre defined icons in choose icon tab.
![]()
Related Tutorials:
- How to customize the marker category icons
- How to change zoom level of the Google Maps on marker click
- How to display categories in tabs
- How to hide markers on page load
- How to change the title of the categories tab title
Related Examples:
- Change zoom level on a marker click on a Google Map
- Hide Markers on Page Load in google maps
- Paginated markers listing below Google Maps
- Bounce animation on marker click on a Google Map
- Paginated markers grid on Google Maps