15000+ live websites are using this google maps wordpress plugin.

Archives: Docs

WP Maps Pro supports full integration with the Advanced Custom Fields (ACF) plugin, allowing you to assign post locations directly via ACF’s Google Map field. This tutorial walks you through the full setup process.


🔧 1. Create a Custom Field Group

Step 1: Install and activate the free Advanced Custom Fields plugin from your WordPress dashboard.
After activation, you’ll see a new Custom Fields menu in the admin panel.

Activate ACF Plugin

Step 2: Go to Custom Fields → Add New to create a new field group.

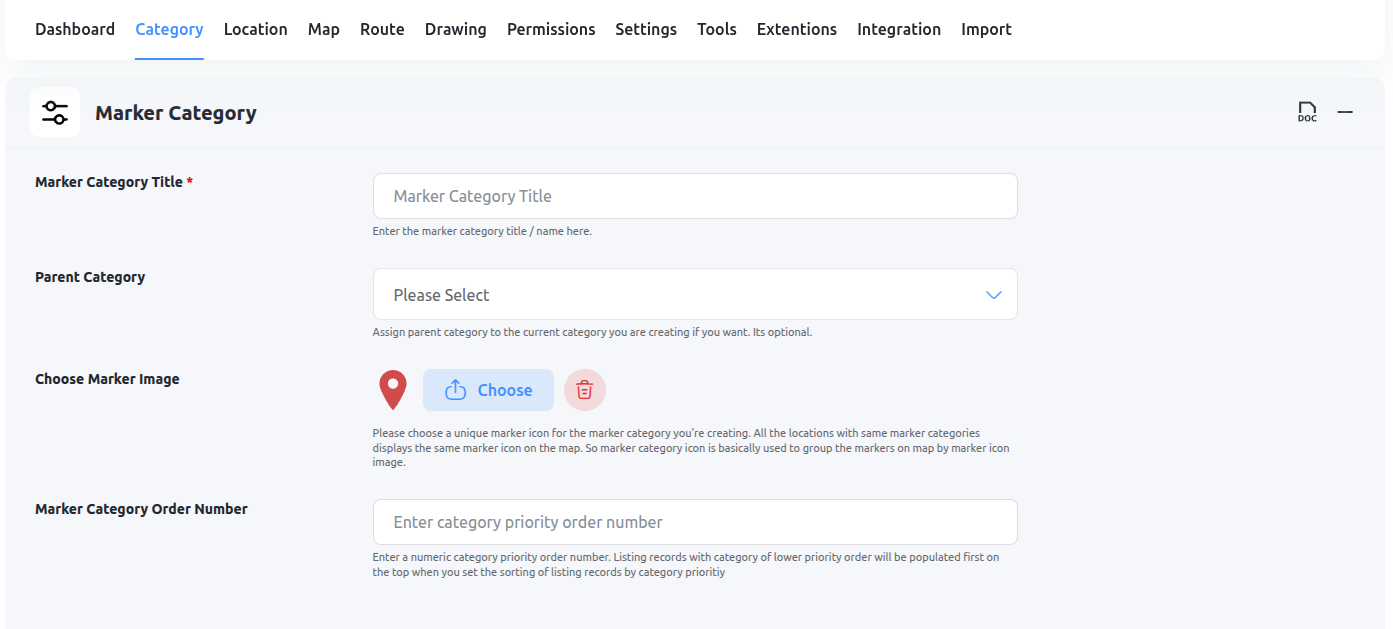
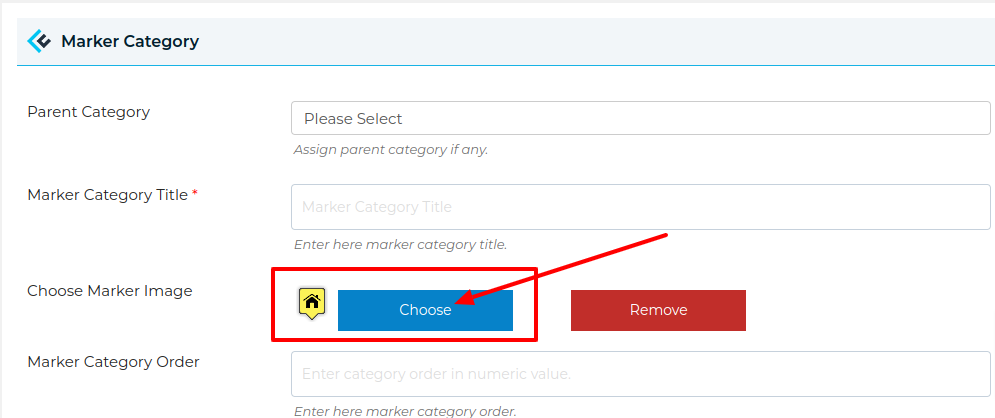
Step 3: Click the Add Field button and name the group (e.g. “Google Maps”).

Add Field Group

Step 4: Create a field labeled Location and set the Field Type to Google Map.

Create Google Map Field

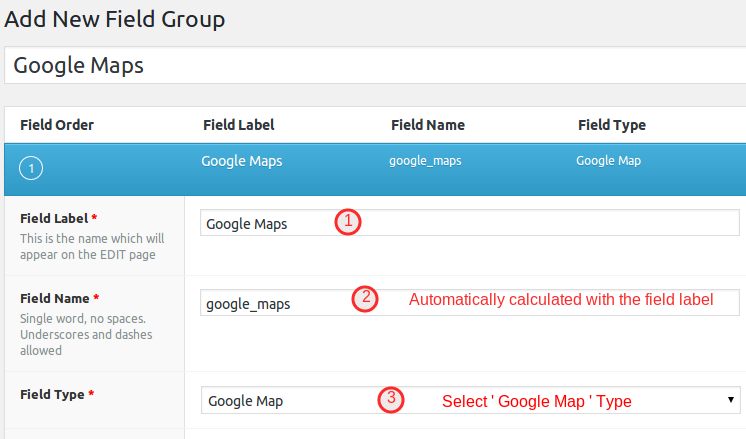
Click Publish to save the field group.


📝 2. Create a Post and Add Location

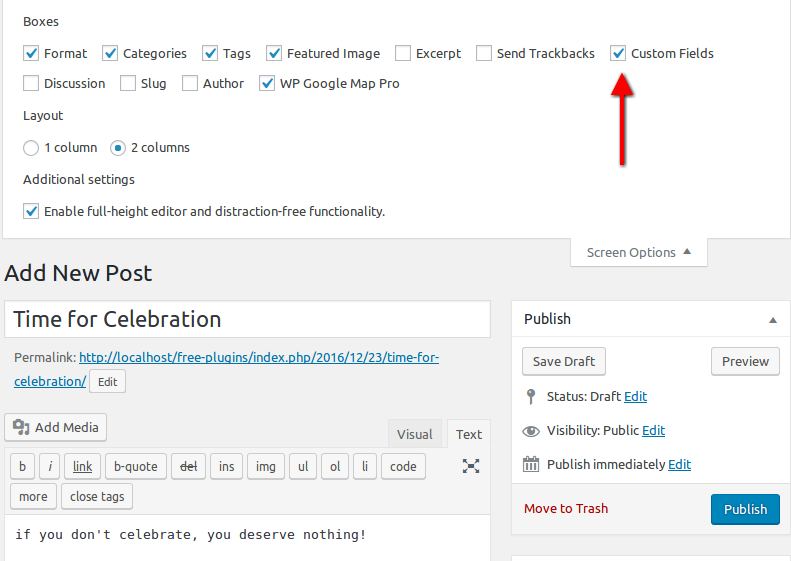
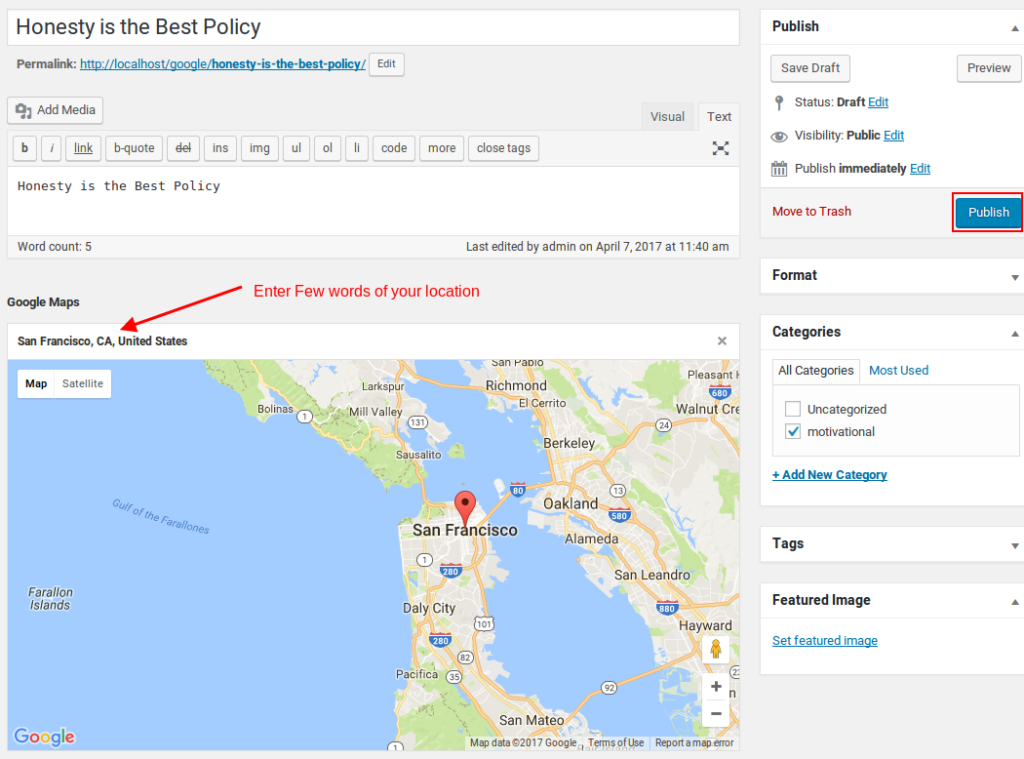
Step 5: Go to Posts → Add New and create a new post.

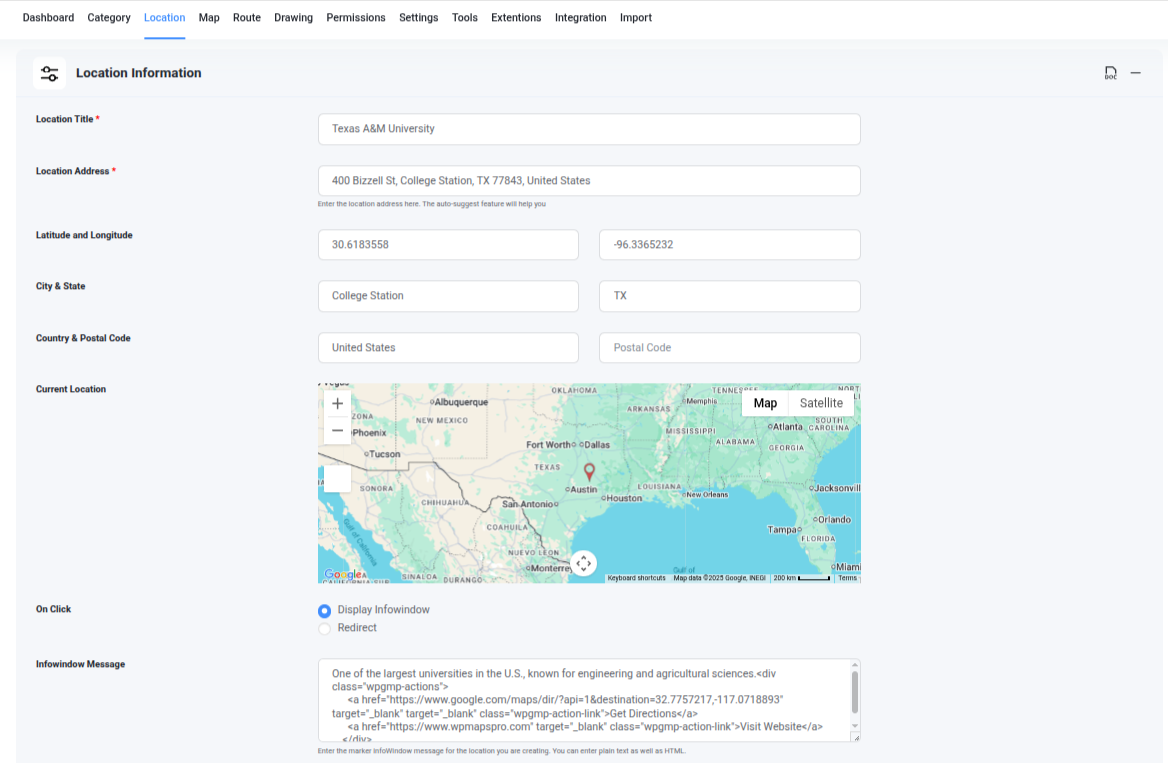
Step 6: Add title, content, and scroll down to your ACF Google Map field.

Step 7: Start typing the location name or address — Google AutoSuggest will help you select it.

Then click Publish to save the post.

Add Location in Post using ACF

Note: If the ACF map field is not working, you may need to register your Google Maps API key. Add this code to your functions.php file:

function my_acf_google_map_api( $api ) {
  $api['key'] = 'Insert your API key here';
  return $api;
}
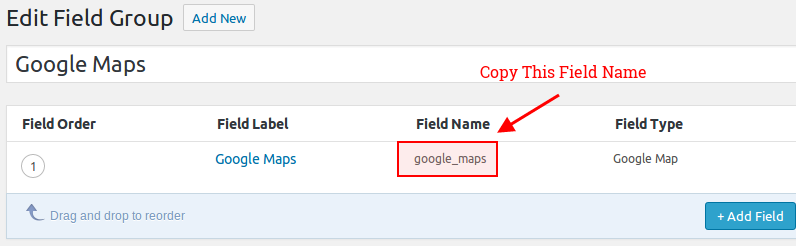
add_filter('acf/fields/google_map/api', 'my_acf_google_map_api');

📋 3. Copy the ACF Field Name

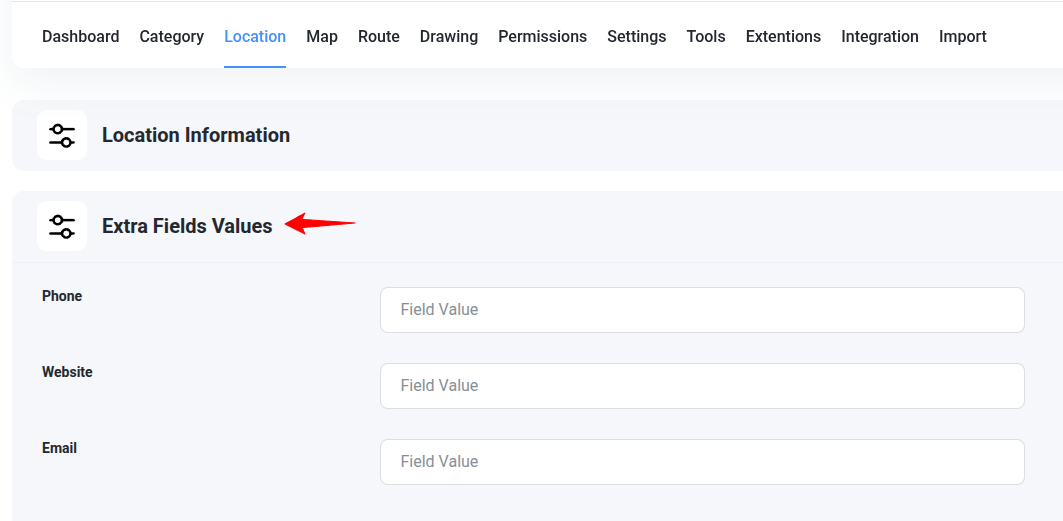
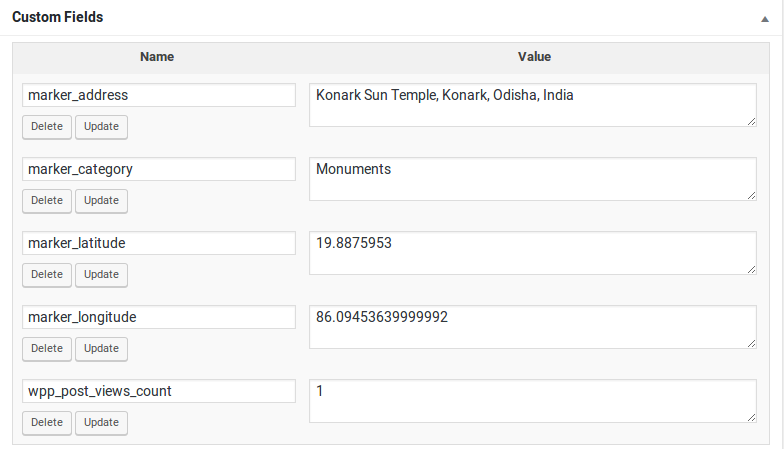
Step 8: Go to Custom Fields → Field Group and copy the Field Name (e.g. google_maps).

Copy ACF Field Name


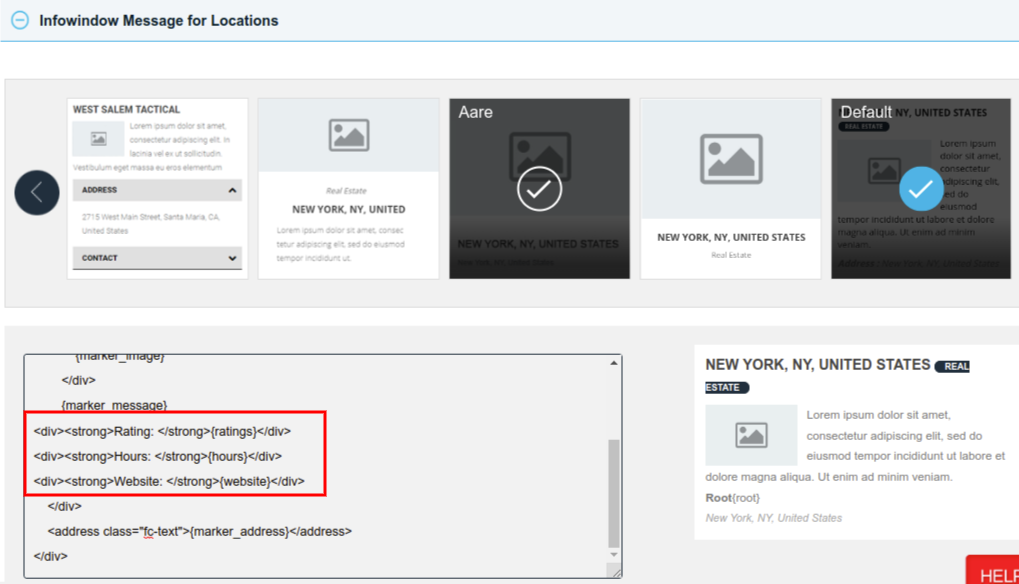
🗺️ 4. Assign ACF Location to Map

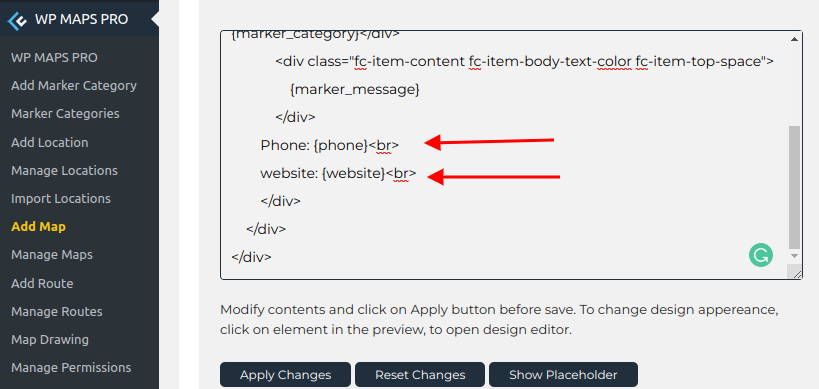
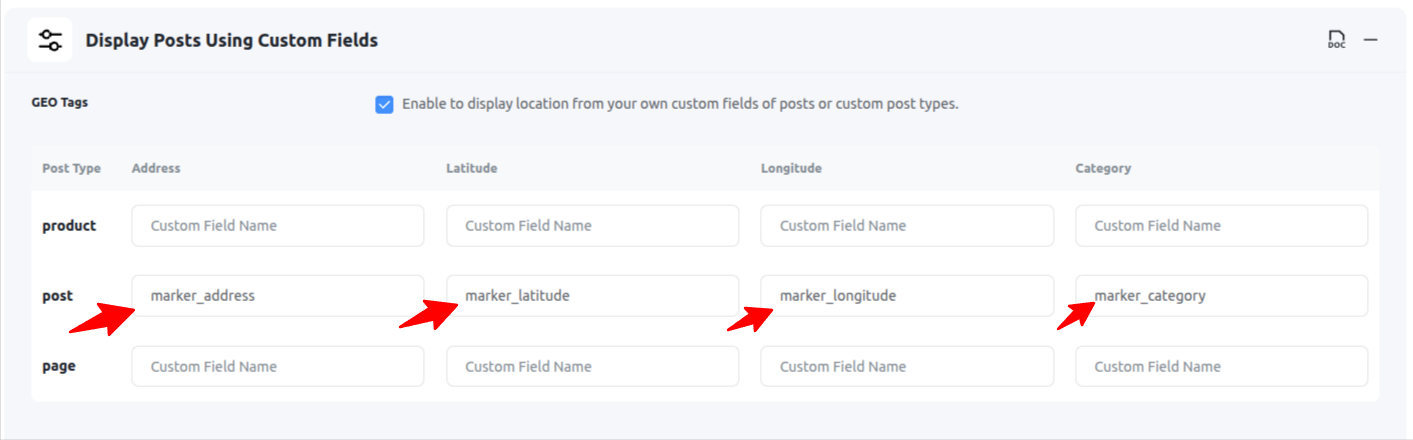
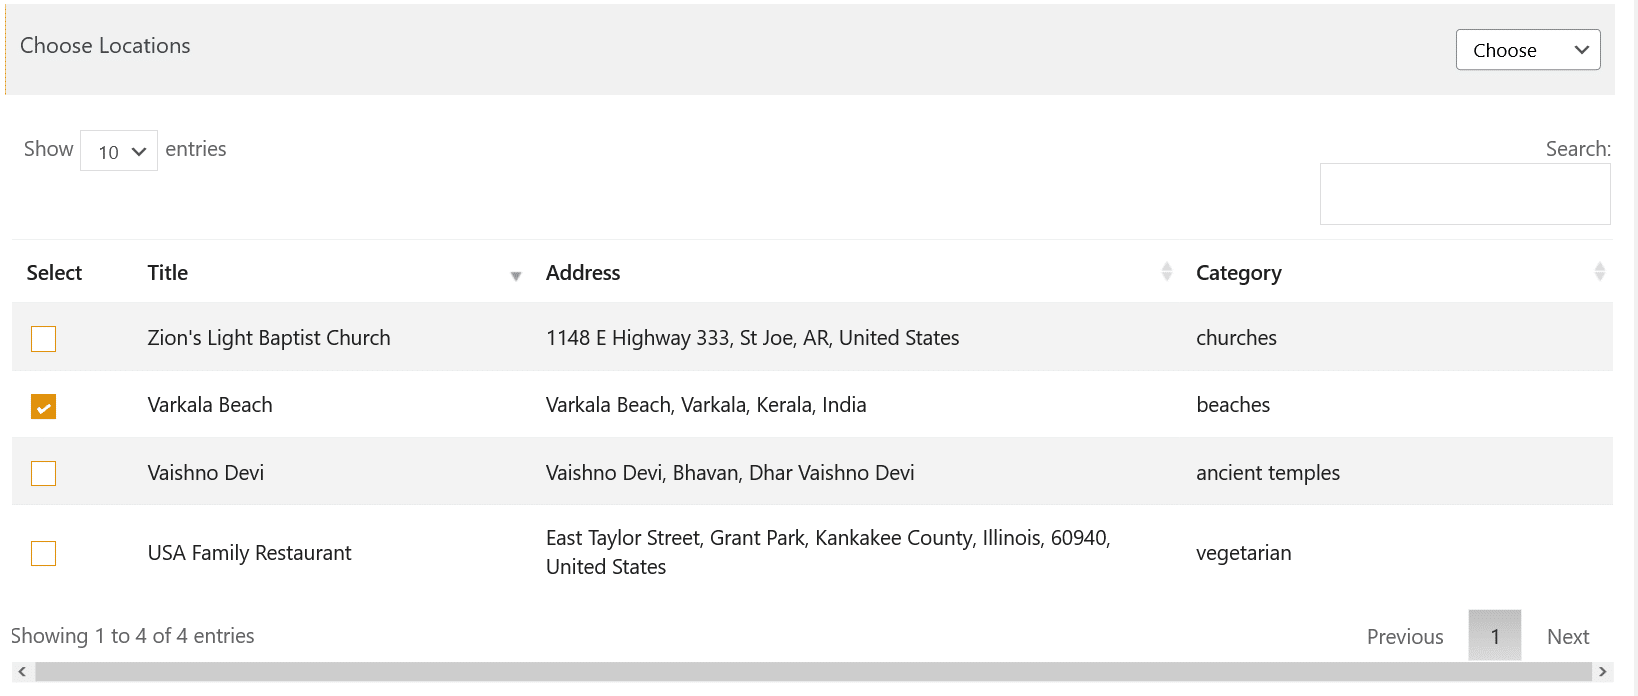
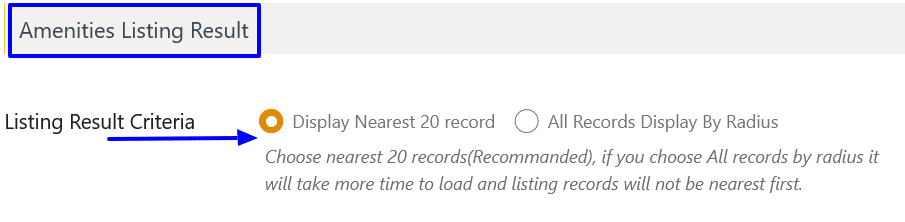
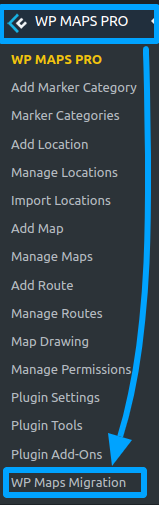
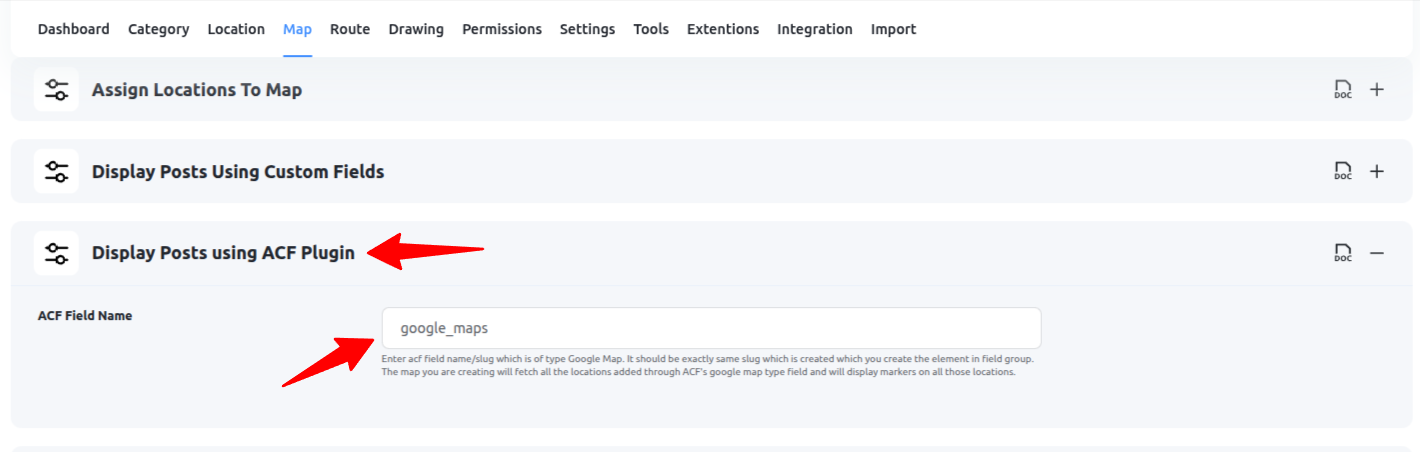
Step 9: Go to WP MAPS PRO → Add/Edit Map and scroll to the Show Posts Using ACF Plugin section.

Step 10 : Paste the ACF field name (e.g. google_maps) into the input field. Then click Save Map.

Show Posts using ACF Field


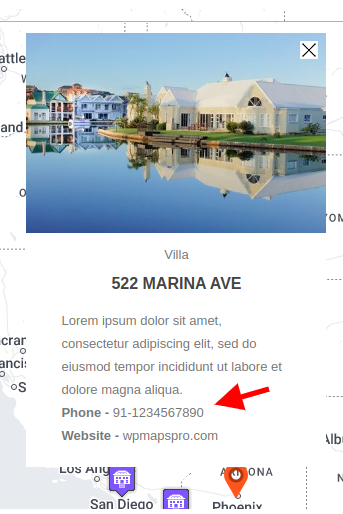
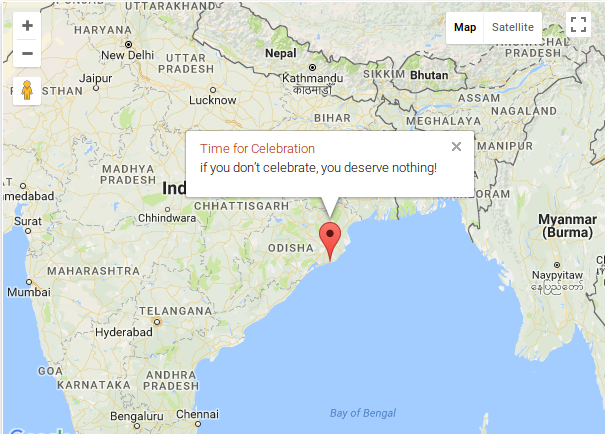
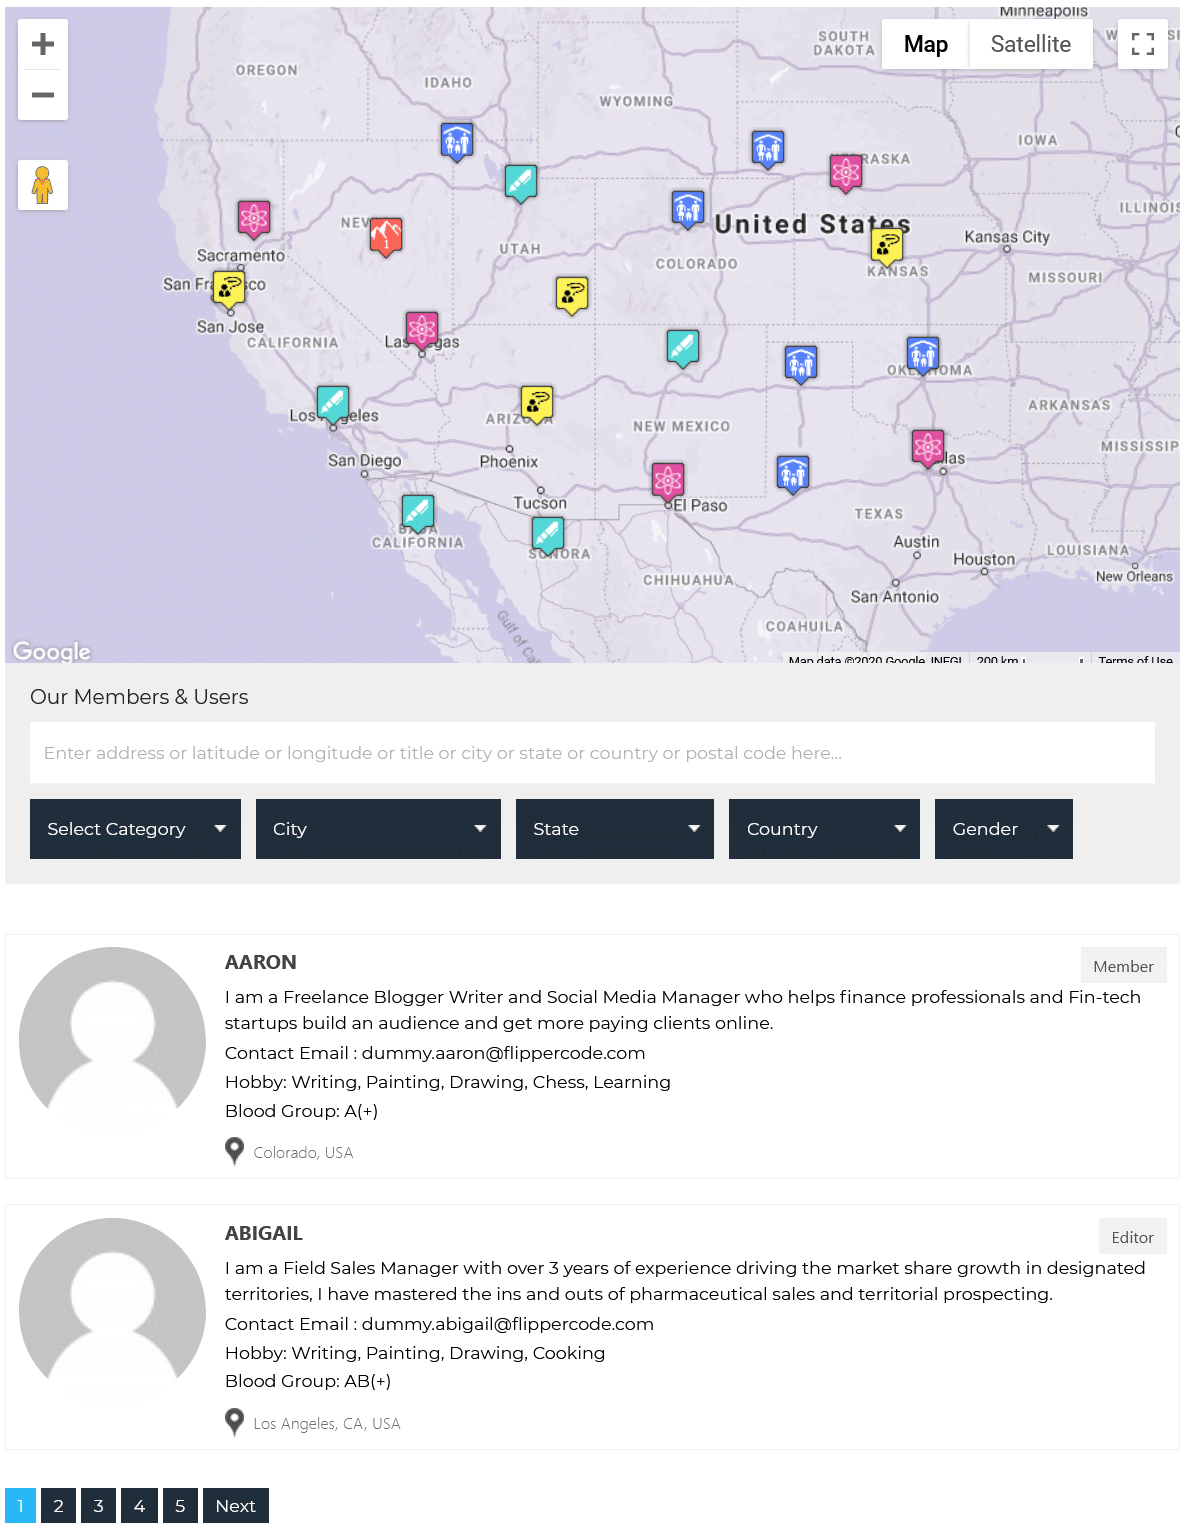
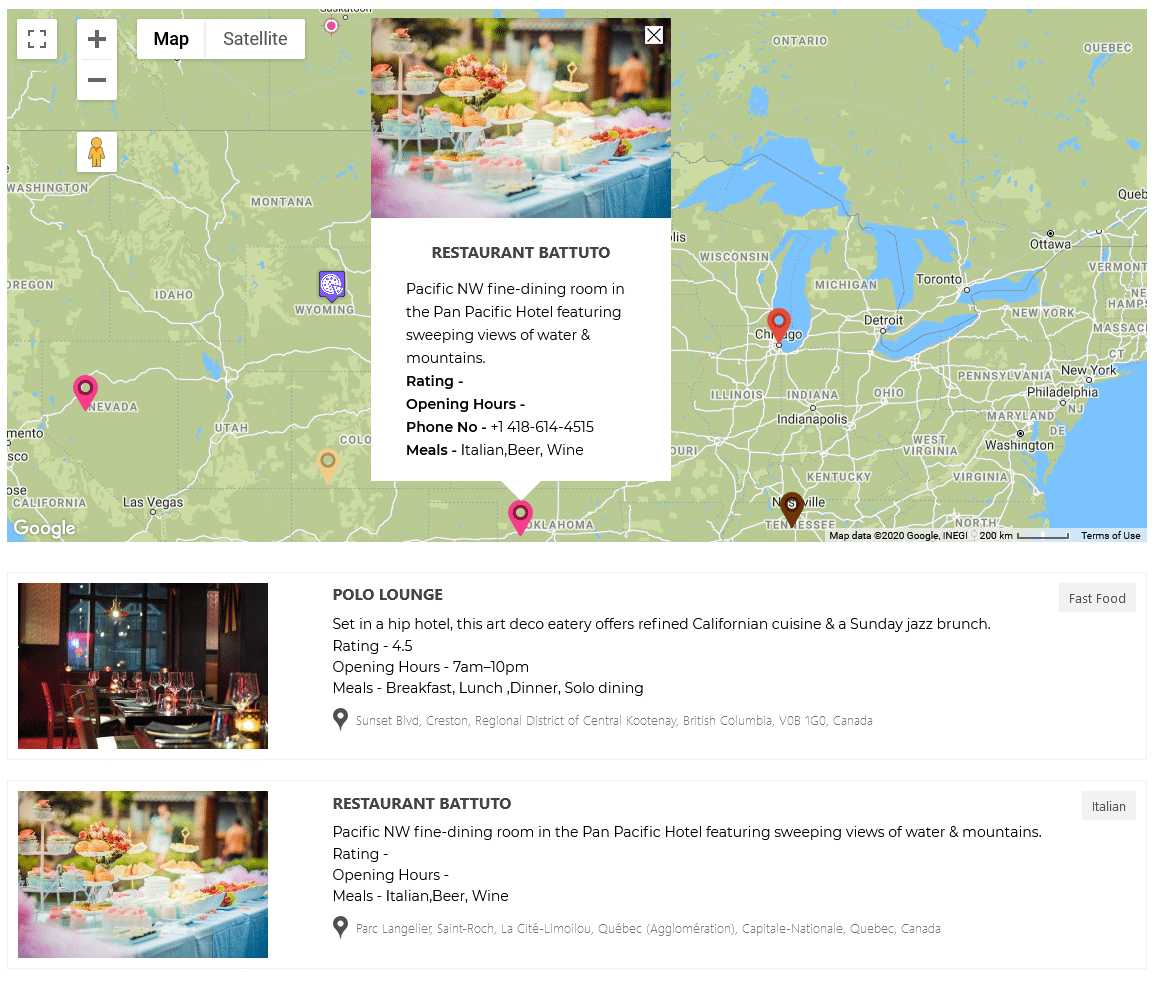
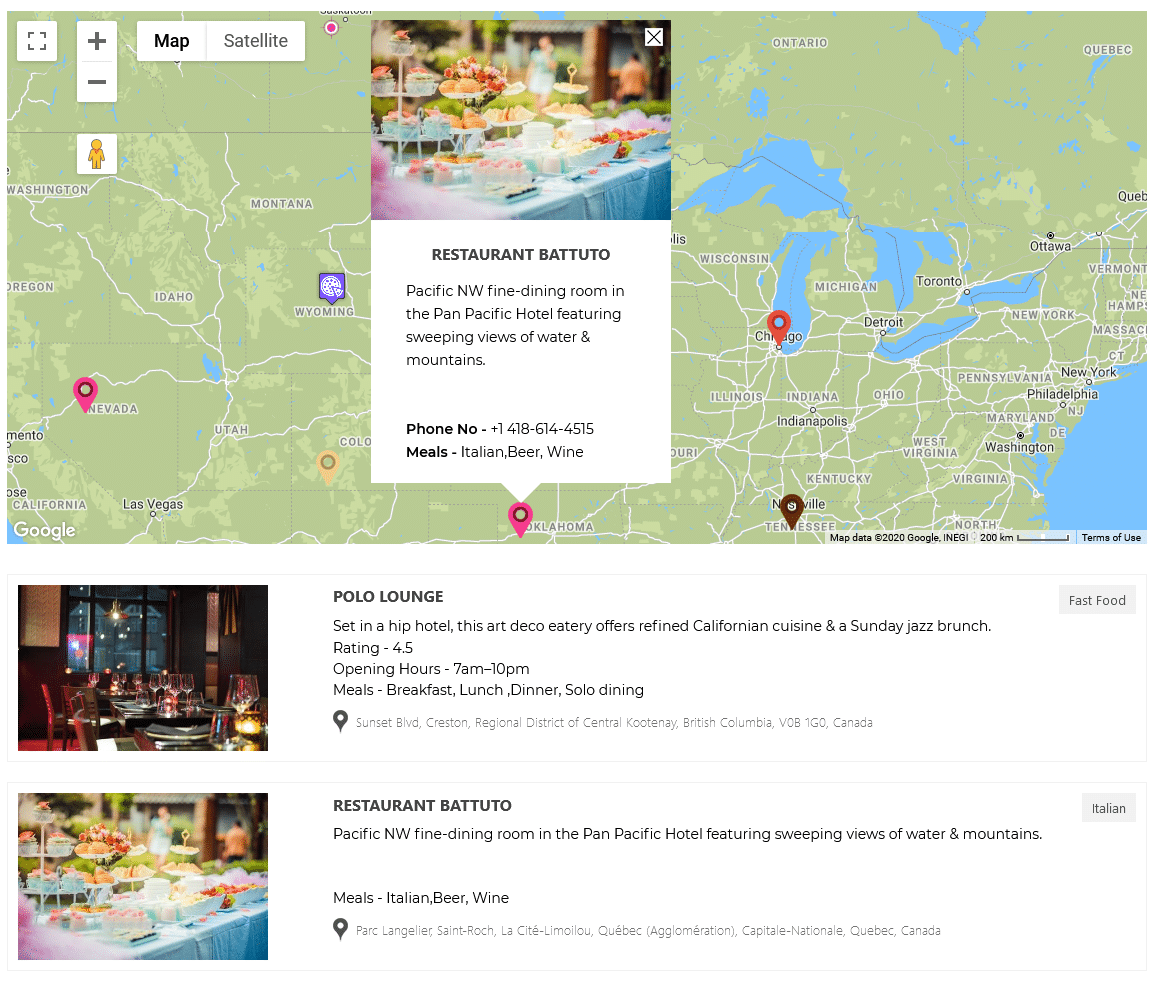
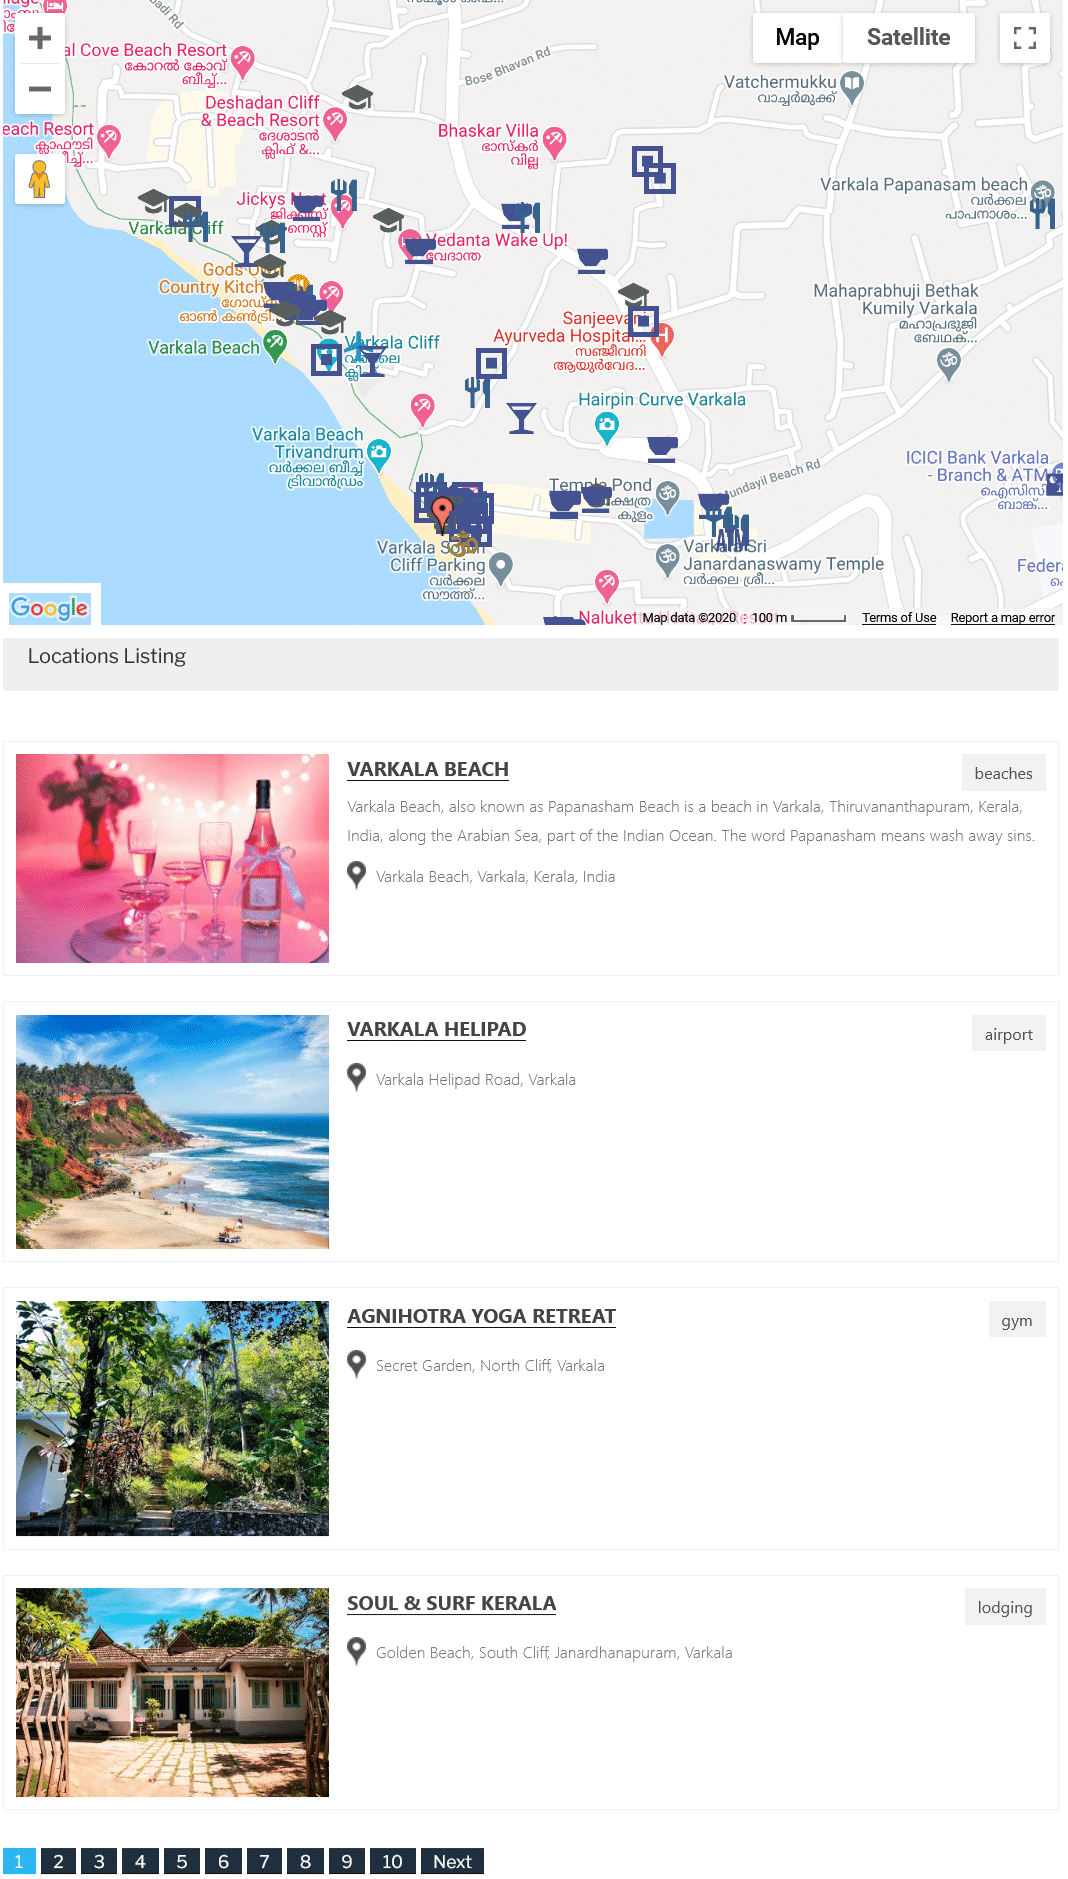
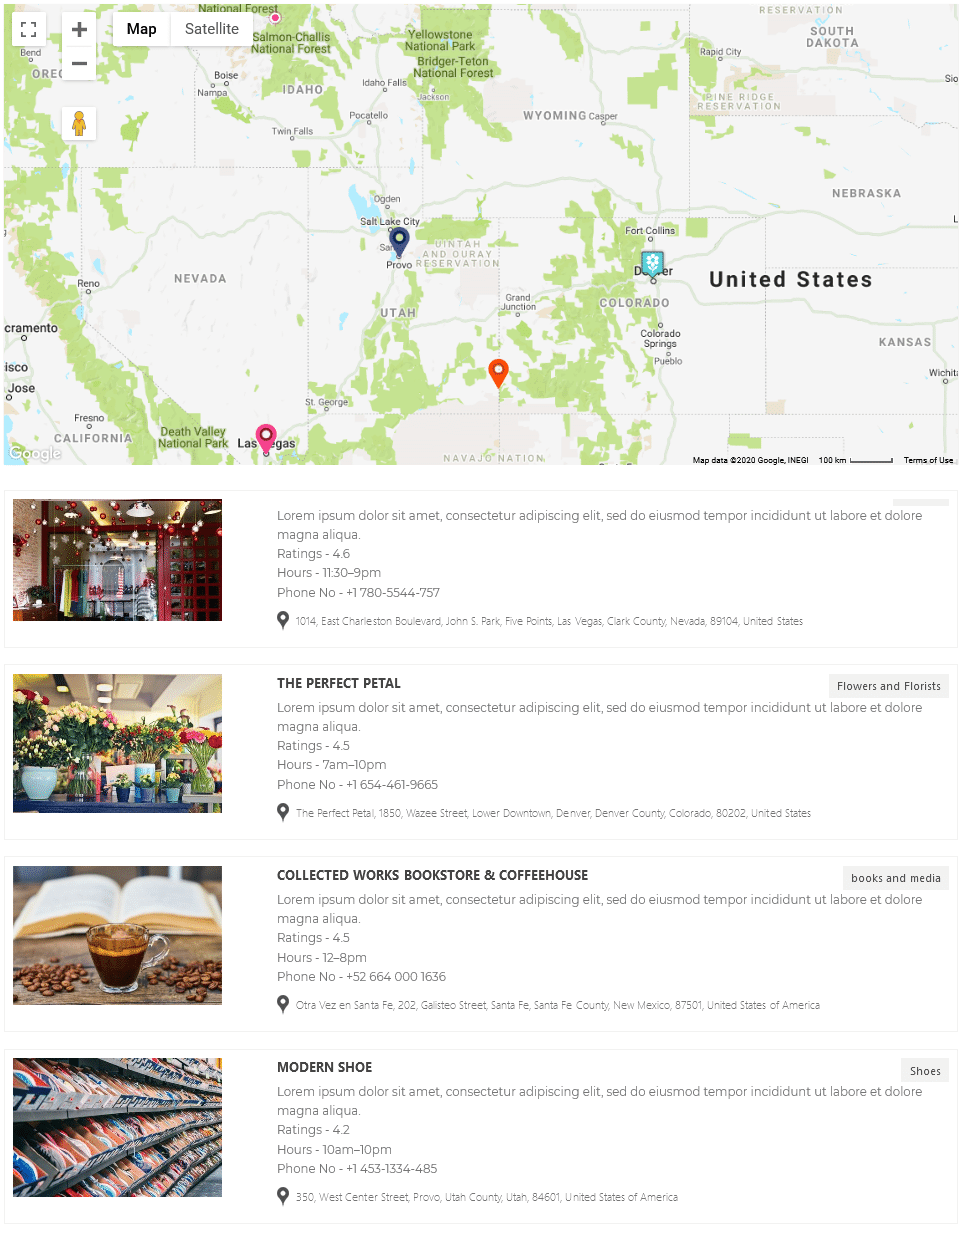
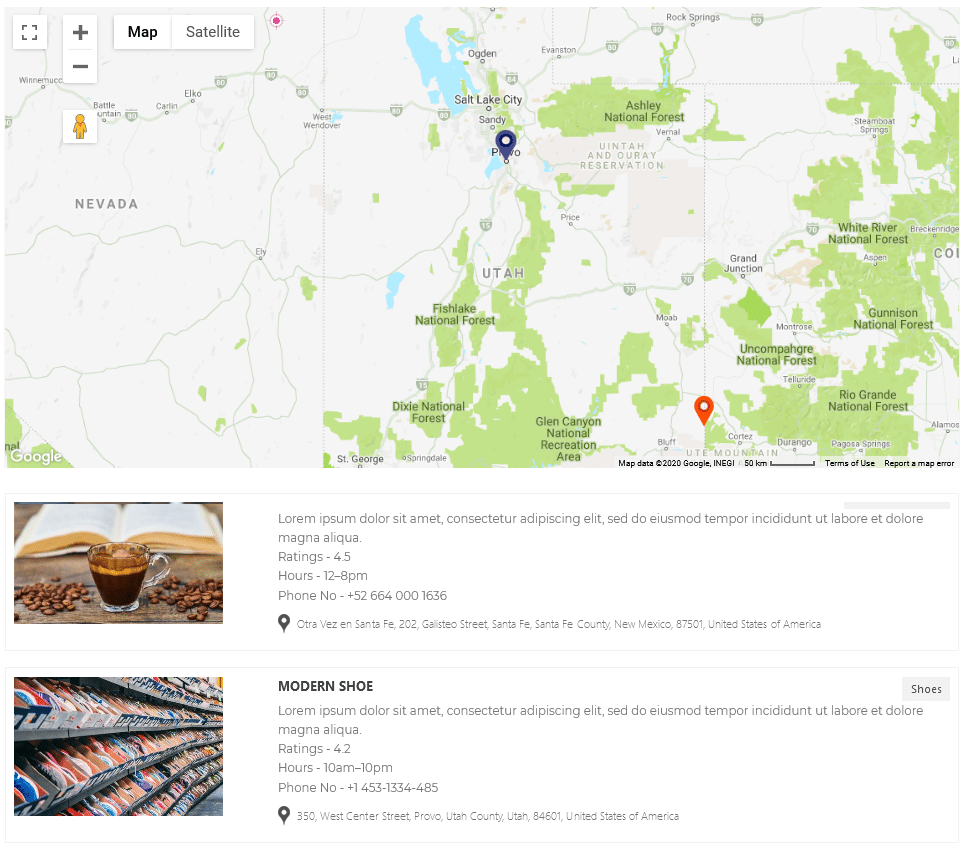
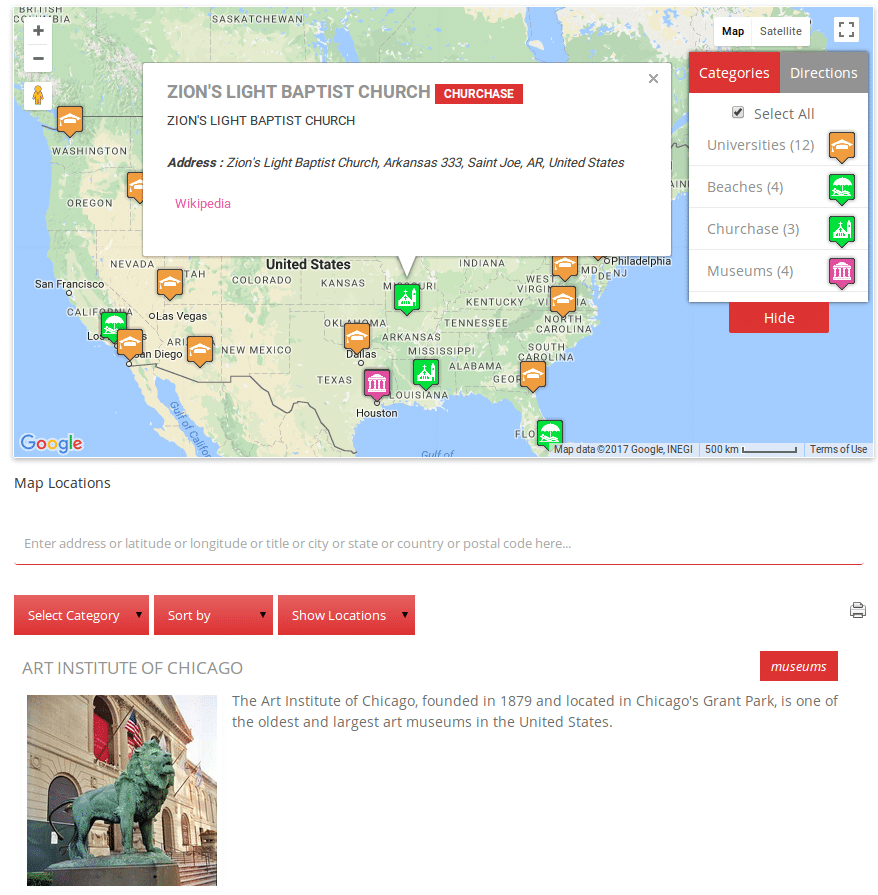
🌍 5. Display Map on the Frontend

Step 11: Go to Manage Maps, copy the shortcode for your map, and paste it into any post or page.

Follow this related tutorial: How to Display Map in Frontend

Display ACF-based Map on Frontend

That’s it! You’ve now connected ACF-powered posts to WP Maps Pro and displayed them as dynamic map markers.

Need help? Submit a support ticket — our team is here for you!

Creating a location allows you to place a marker pin on your map at a specific address. With WP Maps Pro, you can add unlimited locations and assign each one to a specific map and marker category. Here’s how to get started.


📍 Step-by-Step: Add a New Location

Step 1: Go to WP MAPS PRO → Add Location in the plugin menu.

Step 2: Fill out the Location Information form:

Add Location in WP Maps Pro

  • Location Title: A label or name for the marker.
  • Location Address: Use the Google-powered auto-suggest box to search and select a valid location.
  • Latitude & Longitude: These are auto-filled but can be edited manually if needed.
  • City, State, Country, Postal Code: These are also auto-filled and editable.
  • Current Location (Preview Map): Drag the marker to adjust position, or rely on the address field.
  • Infowindow Message: Add content (HTML supported) to show when the marker is clicked.
  • Location Image: Upload an image to display inside the infowindow for a better visual experience.
  • Apply Marker Category: Select a category created in the Add Marker Category tutorial. This determines the marker icon for the location.

Step 3
Scroll down and click the Save Location button.


🧩 Add Extra Fields in Location

Want to store more data like phone number, website link, or operating hours with your locations? WP Maps Pro lets you add unlimited custom fields using our Extra Fields feature.

This is helpful when you want to show unique details in the infowindow or listing below the map that aren’t part of the default location form.

🔧 How to Create Extra Fields:

Add Extra Fields in WP Maps Pro

  1. Go to WP MAPS PRO → Settings.
  2. Scroll down to the Create Extra Fields section.
  3. Add the label (e.g., “Phone Number”), choose a field type (Text, URL, etc.), and save.

📝 How to Use Extra Fields:

Assign Extra fields to Location

  1. Once created, extra fields will automatically appear in the Add/Edit Location form.
  2. Fill them in while creating or updating a location.
  3. Use their shortcode tags (e.g., {phone}) in your infowindow or listing templates from map settings.

Example: Add an extra field named “Phone Number” and use {phone} inside your infowindow HTML to display it dynamically.

💡 Tip: This is perfect for adding unique content like appointment links, opening hours, or even custom buttons!

🎉 Location Created Successfully!

You’ll now see a success message. Your new marker location has been added.

You can repeat this process to create as many locations as you need. After adding all your locations, the final step is to assign them to a map. If you haven’t done that yet, follow our guide on How to Create a Map.

Need help? Submit a support ticket and we’ll assist you!

WP MAPS PRO gives you the flexibility to enrich your map locations with custom data like phone numbers, websites, emails, or any other field beyond the default ones. These extra fields can be easily added to the infowindow using dynamic placeholders.


🛠 Step-by-Step Guide

🔧 Step 1: Create Extra Fields

Go to WP MAPS PRO → Plugin Settings and scroll down to the Create Extra Fields section.

Add Extra Fields in WP Maps Pro


Add fields like Phone, Website, or any custom label you want, then click Save Settings.


📍 Step 2: Assign Extra Field Values

Go to Add or Edit Location and scroll to the Extra Fields Values section.

Assign Extra fields to Location


Enter the values for each extra field (like phone number or website URL) and click Save Location.


💬 Step 3: Display Extra Fields in Infowindow

Now go to Add or Edit Map, scroll down to Infowindow Message for Locations.

Use placeholders in infowindow editor

  • Use placeholders like {phone},{website},{email} to insert your custom field values.
  • Click the Show Placeholder button to view all available placeholders.

You can add links, bold text, images, and even use conditional logic like:

{#if phone}
Call Us
{/if}

✅ Step 4: Save and Preview

Click Save Map. Visit your frontend page where the map shortcode is added. You’ll now see your extra field values in the Infowindow like this:

Extra fields in infowindow preview


📌 Summary

  • Create unlimited custom fields for locations.
  • Display them using placeholders like {email}, {website}, etc.
  • Fully supports HTML and conditional display logic.

Want to display these in the listing section too? Check our tutorial: How to Customize Location Listings.

Need help? Submit a support ticket.

With WP Maps Pro, you can display WordPress post locations on your map using custom fields. This is ideal when your posts have location data saved in meta fields and you want to plot them directly on Google Maps using geo tags.


Step 1: From the WordPress dashboard, go to Posts → Add New.

Step 2: Add your post title, content, and set a featured image.

Step 3: To enable custom fields, click on Screen Options at the top right and check the Custom Fields box. This will display the custom fields panel below the editor.

Enable Custom Fields for Post

Step 4: Add a new custom field with a name like marker_address, marker_latitude, marker_longitude and marker_category and set these values in your post. You can choose custom fields name as you want.

Add Custom Field for Post Location


Step 5: Go to Manage Maps and click Add/Edit Map. Scroll down to the Show Posts Using Custom Fields section.

Step 6: Enable the checkbox labeled Geo Tags and enter the custom field name you used (e.g. marker_address, marker_latitude, marker_longitude and marker_category) in the appropriate input.

Show Posts using Custom Fields

Step 7: Click Save Map and open the frontend page with your map. Your post will now be displayed using the location specified in the custom field.

Post Displayed on Map using Custom Fields

You can display posts, pages, or any custom post types on Google Maps using this same method — just follow the exact steps outlined above.


💡 Use Cases

  • Display blog posts or reviews with location tags
  • Show real estate listings using address fields
  • Plot event or business posts with coordinates stored in meta fields

Need help with setup? Submit a support ticket and we’ll walk you through it!

Marker categories in WP Maps Pro help you group similar locations and assign custom marker icons — including SVG support — to enhance your map’s clarity and visual appeal. They also enable category-based filtering so visitors can view only what they’re interested in.

Before proceeding, make sure you’ve already created your map and chosen a map provider (Google Maps or OpenStreetMap).


🎯 Step-by-Step: Add a Marker Category

Step 1: Go to WP MAPS PRO → Add Marker Category from the WordPress dashboard.

Step 2: Enter a name for your marker category. This will be used to group and filter markers on your map.

Add Marker Category in WP Maps Pro


Step 3: Assign a marker icon to this category.

  • Click the Choose button next to the icon field.
  • In the popup, go to the Choose Icons tab.
  • Select your desired icon (including SVG icons).
  • Scroll down and click Insert Into Post.

Choose Marker Icon
Choose Marker Category Icon

💡 Tip: SVG icons allow for scalable, crisp, and fast-loading custom markers — perfect for modern map design.

Step 4: Click the Save Marker Category button.

Manage Marker Categories


🔁 Repeat As Needed

You can create unlimited marker categories for different types of locations (e.g. Branches, Dealers, Events). Creating all categories in advance saves time when adding locations later.


🧭 What’s Next?

Now that you’ve created marker categories, the next step is to create and assign locations to your map. This tells the map where to place each marker and which category icon to use.

Need help? Submit a support ticket here — we’re here to assist!

With this User Locations On Google Maps extension, you can beautifully display the current locations of WordPress users on Google Maps.
All the user information displayed in the info-window and listing is dynamic and can be managed with the help of placeholders from the back-end.

Please make sure you have installed the WP MAPS PRO plugin and the User Locations On Google Maps
extension on your website. If you haven’t installed them yet, please download and configure these plugins first.

Display User’s Current Location on Google Maps

Step 1 Navigate to Add or Edit Map and scroll down to the “Users Location on Google Maps (Addon Settings)” section.

Addon Settings

Step 2 Enable the “Enable Addon” checkbox in this section.

Enable Addon

  • Select Roles to Display: Choose the user roles you want to display.
  • Ask Location After Days: Enter the number of days after which to ask a logged-in user for their location again.

Step 3 Click the Save Settings button.

On the map page, a browser location permission popup will appear. Click Allow to display your current location on the map.

Note: The SSL layer must be enabled (HTTPS) on your site for the location access popup to appear.

Location Permission Popup

Display Selected User Role on Map

Step 1 Navigate to the “Select Roles to Display” option in the same settings section.

Select Roles Option

Step 2 Select the roles you want to display.

Select User Roles

Step 3 Click the Save Settings button. Now, all logged-in users with the selected roles will be displayed on the map.

User Locations on Map

Manage Infowindow Message for Users

Step 4 Navigate to the “Infowindow Message for Users” section.

Step 5 Enter your desired text in the “Infowindow for Message” textbox.

Infowindow Message

Step 6 Click the “Show Placeholders” button to see available placeholders you can use in your infowindow.

Show Placeholders

Step 7 Click Save Settings.

You can see a working demo here.

Placeholders are used to display extra information about a location in the info window. WP MAPS PRO allows you to create unlimited extra fields and show them in both the map listing and marker info windows.

Sometimes, you may have multiple placeholders for different types of locations but use the same info window template for all of them. In such cases, if a placeholder has no value for a specific location, its label will still be displayed — leaving an empty label in the info window, which doesn’t look professional.

Problem:

Consider the following example where extra fields are displayed with labels:


Rating – {ratings}
Hours – {hours}
Website – {website}

In this setup, if a location does not have a rating, hours, or website, the label will still appear, but without any value, like this:

Empty Label Example

As you can see, the info window shows blank labels for fields without data.

Labels Without Data

Solution:

Wrap each label and its placeholder inside a <div> tag. This ensures that if the placeholder value is empty, the entire label and value block is hidden automatically.

Example:


<div><strong>Rating –</strong> {ratings}</div>
<div><strong>Hours –</strong> {hours}</div>
<div><strong>Website –</strong> {website}</div>

Hide Empty Labels in WP Maps Pro

By using this method, the label will only be displayed if its corresponding placeholder has a value. This keeps your info windows clean and professional.

Clean Info Window Example

Need help? Submit a support ticket and we’ll assist you!

With the NearBy Amenities Listing On Google Maps extension for WP MAPS PRO, you can easily display nearby amenities (like restaurants, ATMs, gas stations, parks, etc.) around any selected location on Google Maps. These amenities will appear both as interactive map markers and in a listing format — just like your assigned locations or places.

Requirements:
Before starting, make sure you have installed:
1. WP MAPS PRO Plugin
2. NearBy Amenities Listing On Google Maps Extension

If you haven’t installed them yet, please download, install, and activate both before proceeding.


Step-by-Step Guide to Display Nearby Amenities on Google Maps

Follow these steps to enable and customize the Nearby Amenities listing for your maps:

Step 1: Create or Edit a Map

Go to Add / Edit Map in WP MAPS PRO. Select or create a location as needed.

Select Location in WP Maps Pro

Step 2: Locate the Google Maps Amenities Section

Scroll down until you find the “Google Maps Amenities” section.

Google Maps Amenities Section

Step 3: Enable Amenities Display

Check the box for “Show Amenities” to activate amenities display.

Enable Show Amenities

Step 4: Set Radius & Measurement Unit

Select “Miles” or “KM” from the ‘Dimension’ dropdown. Then, enter your desired search radius in ‘Radius Options’.

Set Radius for Amenities

Step 5: Choose Which Amenities to Show

Select the amenities you want to display (e.g., cafes, hospitals, schools, etc.).

Select Amenities

Step 6: Configure Addon Settings

Scroll down to the “Display Nearby Amenities Google Maps (Addon Settings)” section.

Nearby Amenities Addon Settings

Step 7: Enable Amenities Data on Map

Check “Display Amenities Data on map” to show amenities directly on the map.

Enable Amenities Data on Map

Step 8: Set Load Time

Enter the number of seconds in “Amenities Load Time” to control how quickly the amenities appear after map load.

Set Amenities Load Time

Step 9: Enable Current Location Based Search (Optional)

If you want to show amenities based on the user’s current location, enable “Nearby Amenities By User Current Location”. Once users grant location access, the listing updates automatically.

Enable Amenities by Current Location

Step 10: Customize Listing Results

Go to the “Amenities Listing Result” section and choose your preferred “Listing Result Criteria”.

Set Listing Result Criteria

Step 11: Save and View

Click “Save”. On the frontend, you’ll see your selected amenities displayed on the map and in the listing view.

Amenities Display on Map


Live Demo

To see a working demo, click here.

Need help? Submit a support ticket and we’ll assist you!

The Filter Map Listing By ViewPort extension for WP MAPS PRO makes it easier for visitors to find relevant locations by showing only the listings whose markers are currently visible in the Google Maps viewport. As users zoom in or drag the map, the list automatically updates, hiding locations outside the visible area.

Requirements:
Before using this feature, ensure that you have installed:
1. WP MAPS PRO
2. Filter Map Listing By ViewPort Extension

If these are not yet installed, please download, install, and configure them first.


How to Enable the Viewport Filter for Map Listings

Step 1: Open Map Settings

Navigate to Add or Edit Map in your WordPress dashboard. Scroll down to the “Filters Maps Listing By Viewport” section.

Viewport Filter Settings Section

Step 2: Enable the Viewport Filter

Check the box for “Enable Viewport Filter” in this section.

Enable Viewport Filter Option

Step 3: Save Your Changes

Click the ‘Save’ button to apply your settings.

What Happens Next?

When you refresh your map on the frontend and move or zoom it, the listing will update automatically. Only locations within the visible area of the map will appear in the list — everything else will be hidden.

Before:

Map Listings Before Viewport Filter

After:

Map Listings After Viewport Filter


Live Demo

To see this feature in action, click here for the demo.

Need Help?

If you have any questions or need assistance, please contact our support team here.

The WP MAPS Migration add-on makes it easy to move your Google Maps (created with WP MAPS PRO) from one WordPress website to another in just seconds. This process transfers all maps, locations, routes, categories, markers, custom fields, and images without any manual setup.

With just two simple steps — Export from your old site and Import into your new site — your complete map data will be migrated.

Requirements:
Before proceeding, make sure you have installed and activated:
1. WP MAPS PRO Plugin
2. WP MAPS Migration Add-on

If you have not installed them yet, please do so before starting.


Step-by-Step Guide to Migrate WP MAPS PRO Data

Part 1: Export Google Maps from Your Old Website

Step 1: Go to WP MAPS PRO → WP Maps Migration in your WordPress dashboard.

WP Maps Migration Menu

Step 2: In the ‘Select Process’ dropdown, choose “Export To Website”.

Export Google Maps

Step 3: Click the “Download Backup” button to download all your maps along with settings, locations, routes, categories, markers, and location images.

Download Google Maps Backup

You’ll now have a .txt backup file. This file will be used to import your map data into the new site.


Part 2: Import Google Maps to Your New Website

Step 1: In the new site’s WordPress dashboard, go to WP MAPS PRO → WP Maps Migration and choose “Import From Other Website” from the ‘Select Process’ dropdown.

Import Google Maps

Step 2: (Optional) If you want to overwrite all existing WP MAPS PRO data on the new site, check the “Overwrite Existing Data” box. If not, skip to Step 3.

Overwrite Existing Google Maps

Step 3: Upload the .txt backup file you exported earlier.

Upload Google Maps Backup

Step 4: Click “Import Backup”.

Import Google Maps Backup

After a few seconds, the migration process will complete, and all your maps and data will be successfully imported.


Need Help?

If you have any questions or run into issues during migration, please contact our support team.

Install Plugin Now!

WP MAPS PRO helps you create dynamic, customizable maps using Google Maps or Leaflet — no coding required. Includes free updates, premium support, and a 30-day money-back guarantee.