Filter by Topics

WP Maps Pro allows you to create unlimited interactive maps and embed them anywhere on your WordPress site using shortcodes. Each map can be customized with unique locations, layout options, and advanced display features. This step-by-step guide walks you through creating your first map.
Step 1: Choose Your Map Provider
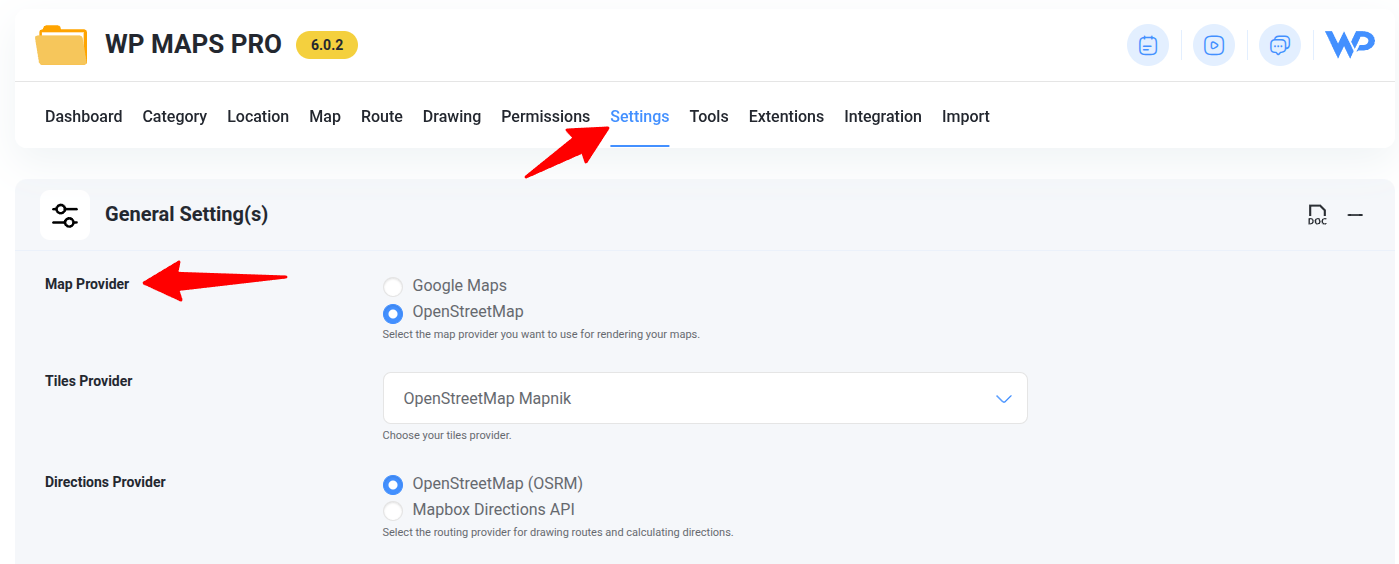
Before creating a map, decide whether you want to use Google Maps or OpenStreetMap (Leaflet) as your map provider. You can configure this under WP MAPS PRO → Settings → Map Provider.
👉 Read: Google Maps vs OpenStreetMap – Which One Should You Use?
Step 2: Add a New Map
Navigate to WP MAPS PRO → Add Map from your WordPress dashboard.
Fill out the basic map details:
- Map Title: Used to identify the map on frontend (required)
- Map Width: e.g.,
100%or600px - Map Height: Height of the map (required)
- Zoom Level: Initial zoom level (default is 0)
- Map Type: Choose from available map styles

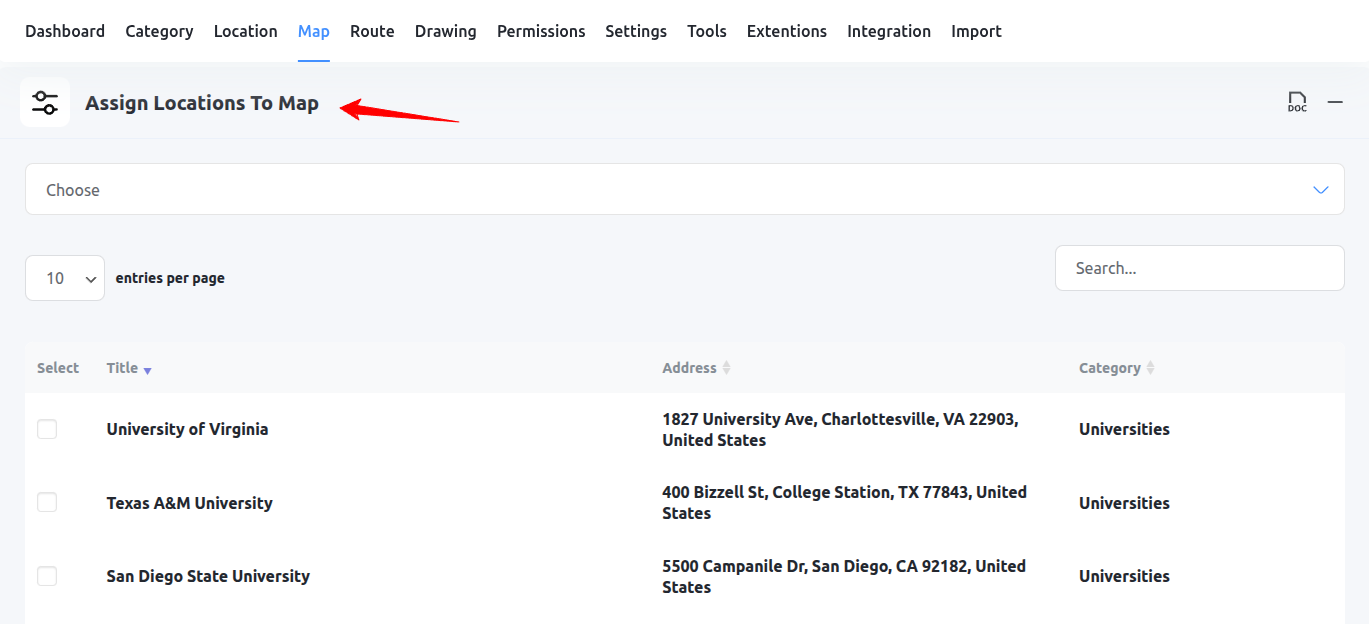
Step 3: Assign Locations to the Map
Scroll to the Assign Locations To Map section and select which locations should appear on this map.
Step 4: Customize Infowindow
Under the Infowindow Message for Locations section, choose a popup skin or edit the HTML content using the built-in editor.

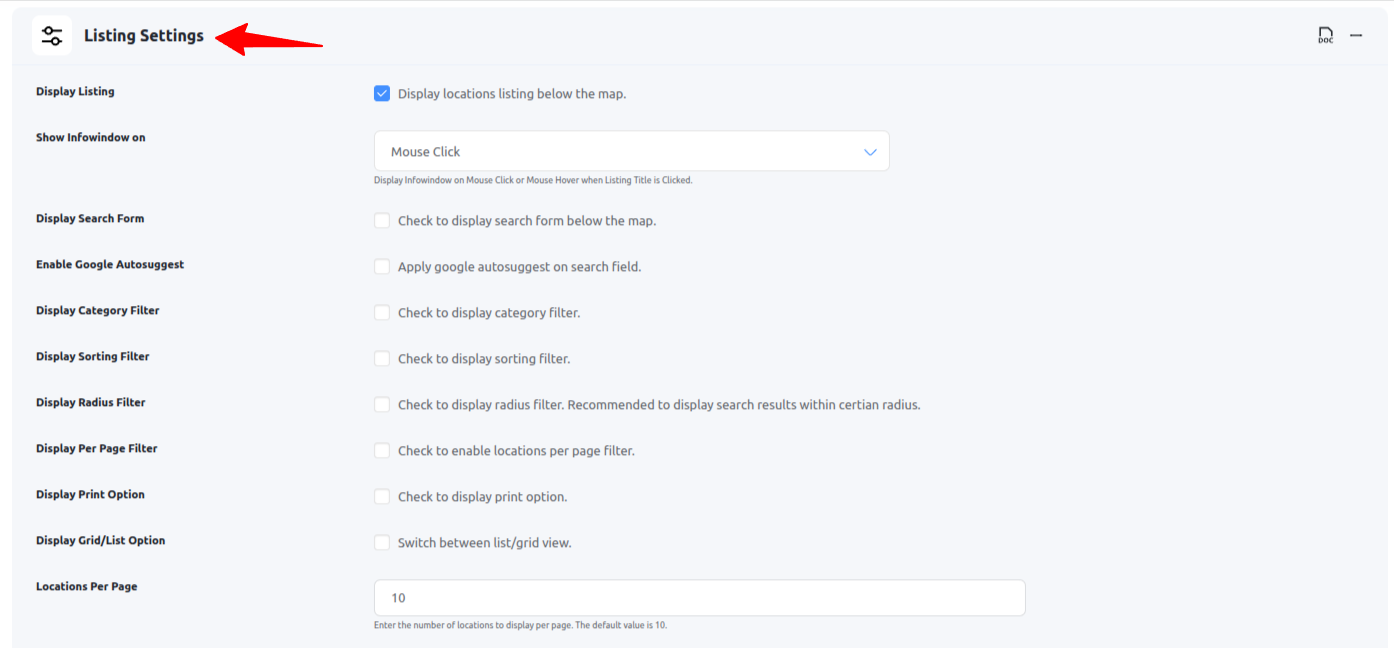
Step 5: Enable Location Listings
Want to show a list of locations below the map? Scroll to Listing Settings and check the Display Listing option.
Step 6: Customize Listing Skin
Scroll to the Listing Item Skin section and choose a design layout for your location list. You can use the visual editor to customize HTML templates too.
Step 7: Save Your Map
Click the Save Map button. Your map will now appear on the Manage Maps page.
Step 8: Copy & Embed the Shortcode
From the Manage Maps page, copy the shortcode (e.g., ) and paste it inside any post, page, or custom post type to display your map.
Haven’t installed the plugin yet? See: How to Install WP Maps Pro
That’s it! You’ve now created a fully functional Google Map using WP Maps Pro. You can add filters, cluster markers, use categories, or even show WordPress posts on maps in your next steps.
Need help? Submit a support ticket here — our team is happy to assist!