Filter by Topics

With WP MAPS PRO you can add custom filters that let visitors dynamically refine which locations appear on your Google Map. This improves relevance and creates a smoother discovery experience.
Prerequisites
- WP MAPS PRO installed and activated.
- Locations already assigned to a map via Assign Locations To Map.
Step 1: Open Your Map
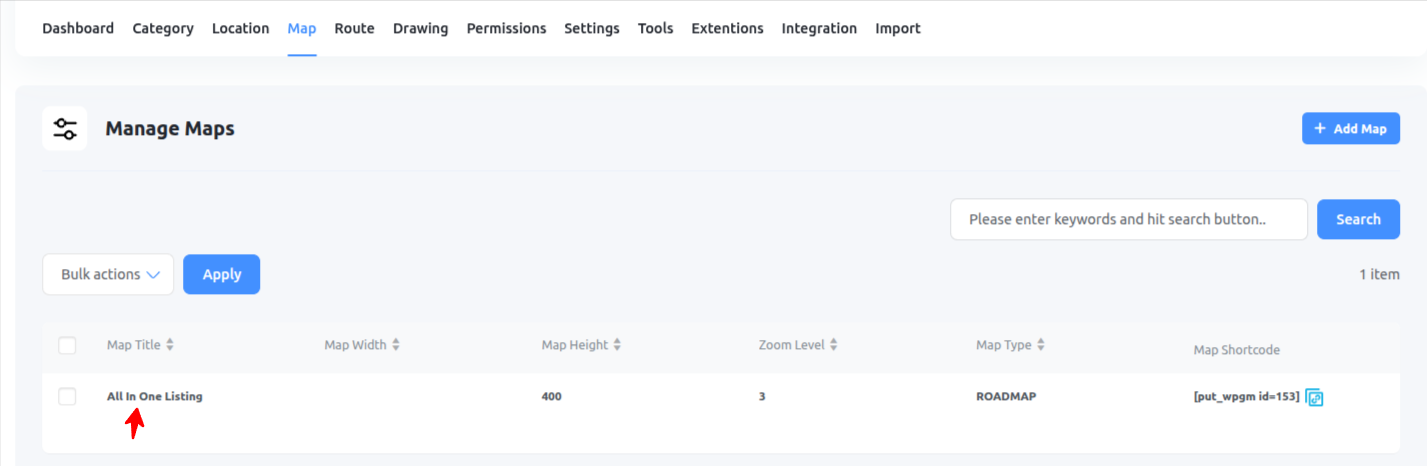
Step 1.1 Go to WP MAPS PRO → Add/Manage Map.
Step 1.2 Edit the map where you want to enable custom filters.
Step 2: Confirm Assigned Locations
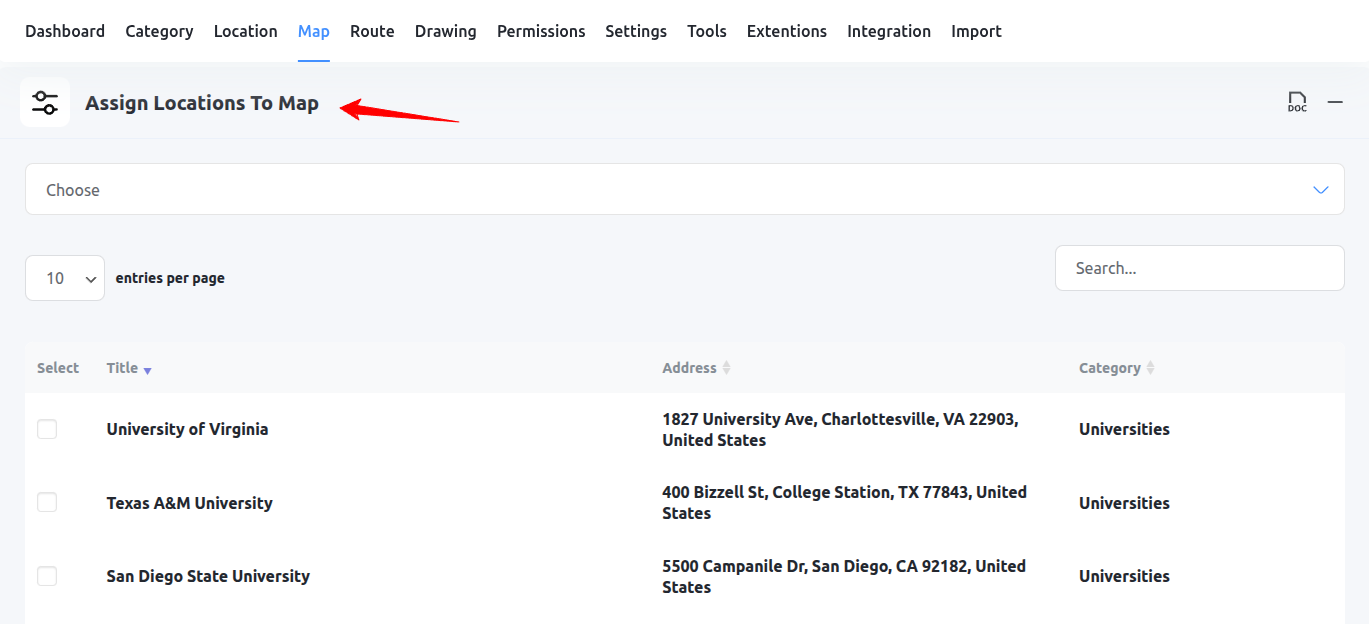
Step 2.1 In the map editor, locate Assign Locations To Map and make sure the locations you want to display are selected.
Step 3: Enable Custom Filters
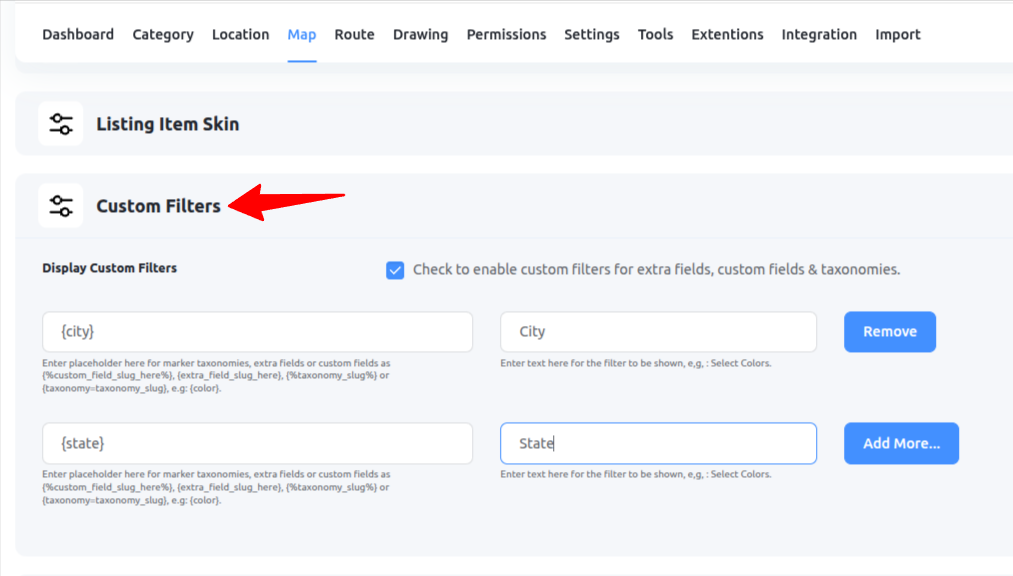
Step 3.1 Scroll down to the Custom Filters section of the map editor.
Step 3.2 Toggle Display Custom Filters to ON.
Step 4: Define Placeholders & Filter Labels
Step 4.1 In the Custom Filters inputs, add the placeholder you want to filter by. Examples:
{country}{state}{city}{category}(or any extra field placeholder you’ve created)
Step 4.2 In the adjacent field, enter the Filter Label that users will see on the frontend (e.g., “Country”, “State”, “City”).
- Placeholder:
{country}→ Label: Country - Placeholder:
{state}→ Label: State - Placeholder:
{city}→ Label: City
Step 5: Save Your Map
Step 5.1 Scroll to the bottom and click Save Map.
Step 6: Check the Frontend

Step 6.1 Visit the page where your map is embedded.
Step 6.2 Use the newly added filters to refine the displayed locations based on the selected criteria.
Tips for Better Filtering
- Keep labels clear and concise (e.g., “Country” instead of “Select Country Here”).
- Use placeholders that match existing data fields (including extra fields) for accurate results.
- Combine filters (e.g., Country + City) for more precise searches.
Need Help?
If you have questions or need a hand configuring filters, visit our
Support Center.