The WordPress Users on Google Maps add-on for WP MAPS PRO allows you to display registered users of your site on an interactive Google Map. You can show user information in markers, info windows, and listings — and even filter by user roles with custom marker icons.
Requirements
– WP MAPS PRO installed & activated
Steps to Configure WordPress Users on Google Maps
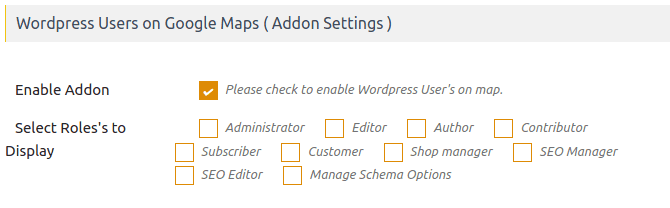
Step 1: Go to Add or Edit Map and scroll down to “WordPress Users on Google Maps (Addon Settings)”.
Step 2: Enable the “Enable Addon” checkbox and save.
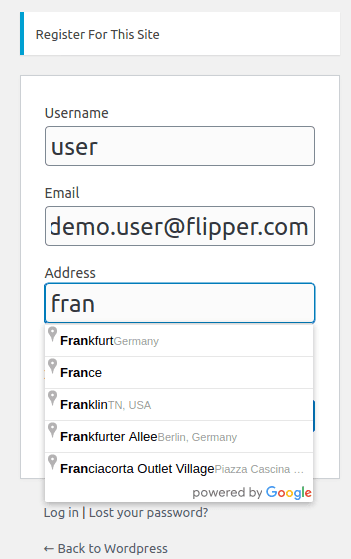
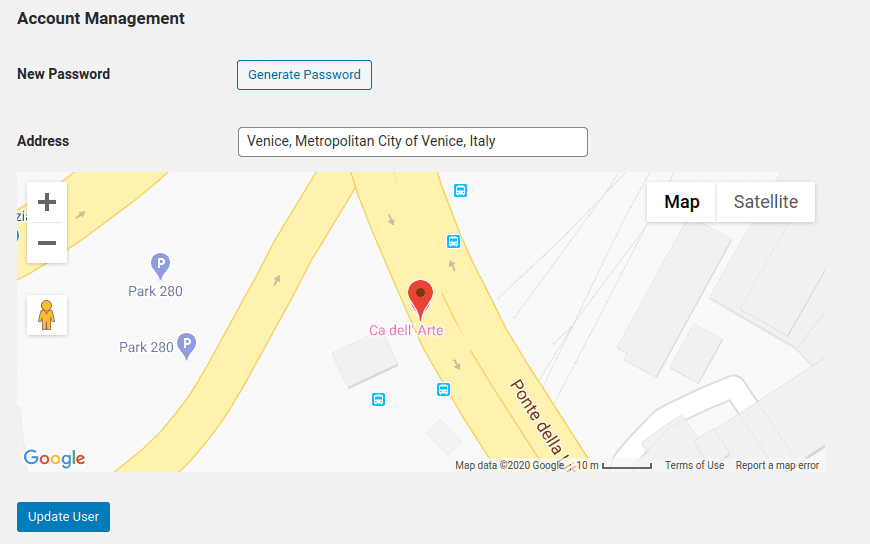
Now, an **Autosuggest Address Field** will appear on the user registration and profile edit pages.
– Example Registration Page:
– Example Admin User Edit Page:
—
Assign Marker Icons to User Roles
Step 3: Create marker categories via WP MAPS PRO → Add Marker Category. Assign categories according to user roles.
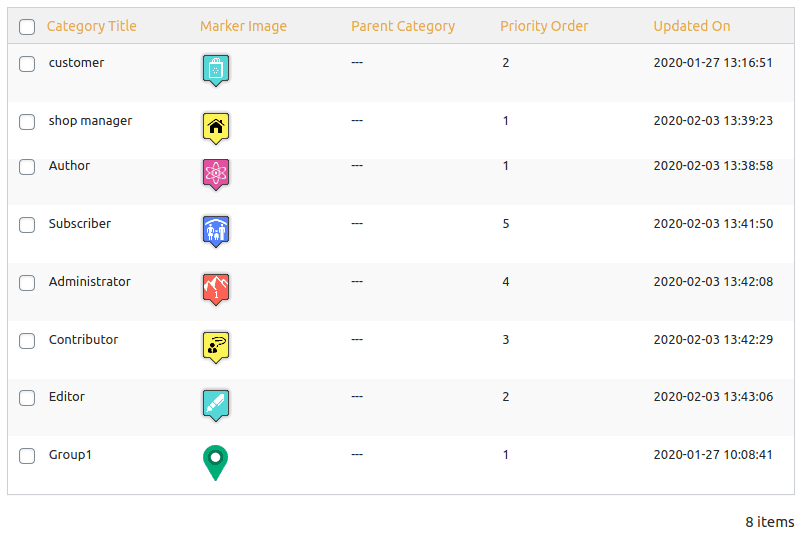
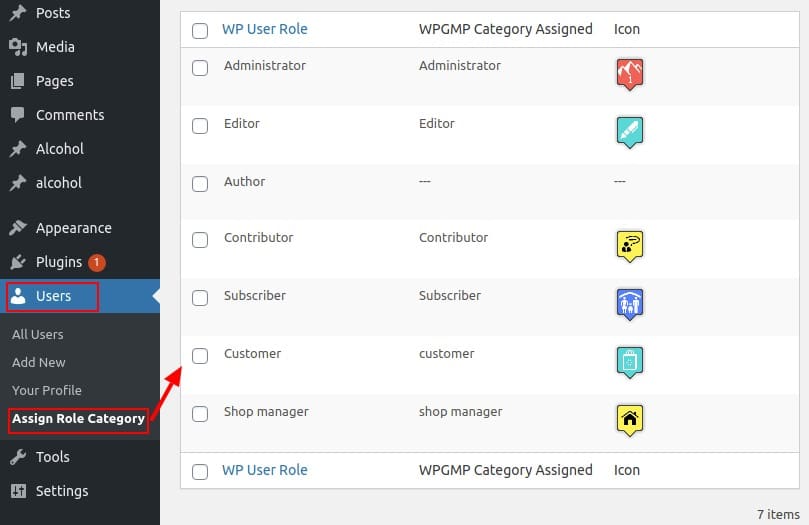
Step 4: Go to Users → Assign Role Category. For each role, assign a marker category (with icon).
—
Display Selected User Roles on the Map
Step 5: In the map settings under WordPress Users on Google Maps (Addon Settings), use the “Select Roles to Display” option to filter by specific roles.
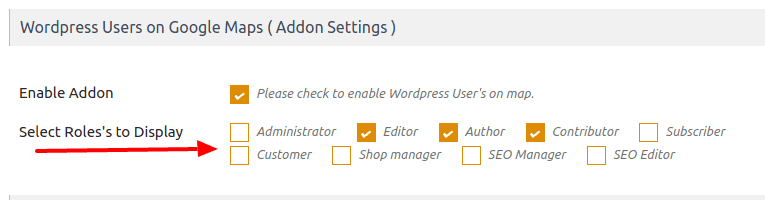
Step 6: Save your map. Only the selected user roles will now display on the map 🎉
👉 See a working demo here.
Need Help?
If you face any issues, visit our support center.
Related Tutorials:
- How to migrate Google Maps from one site to another site
- Display Google Maps with Listings in Custom Layouts & Designs
- How to display WordPress users on Google Maps
- Display Json data on Google Maps
- Add a Search Form for Google Maps in WordPress