Displaying post content over google maps is a useful feature of this plugin. You can display posts on google maps using your own custom fields or the WP MAPS PRO meta box added by this plugin. You can display the post title, post excerpt, post content, post categories, post tags and custom fields without any programming.
Step 1 In order to display the posts on the google maps created by our plugin, it is mandatory to create a map with minimal settings in first place. Go to WP MAPS PRO > Add Map plugin menu. Just enter the map title, map height under Enter Map Information. Scroll down a bit & then click on “Save Map” button that appears at the bottom.
If you wish to assign different marker icons to different posts, you will need to create marker categories also. For that, go to WP MAPS PRO > Add Marker Category plugin menu & create some marker categories. Creating a map and some marker categories is required as first step because we need to assign the marker category and map later to the post that we are going to create in the next step.
Step 2From dashboard , Go to Posts > Add New menu to create a new post. Enter the post title. In the post content editor, insert the post content which you want to display in the marker’s info window. Also add the feature image you want to add to this post.

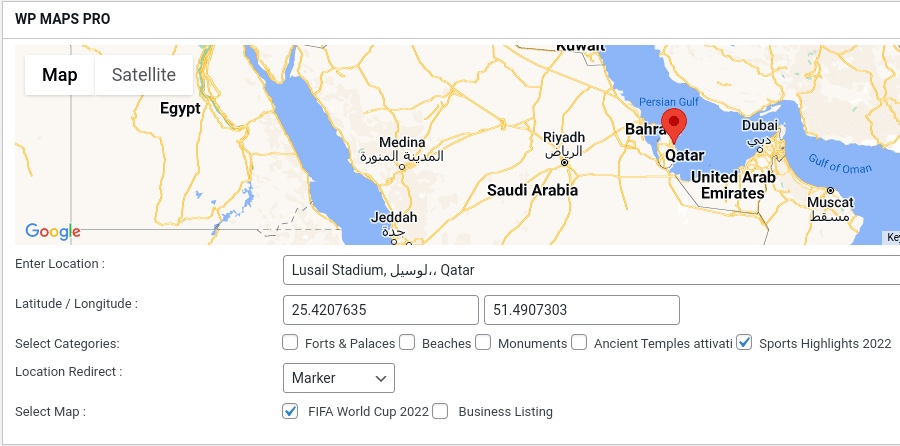
Step 3 Scroll down to WP MAPS PRO meta box, specify a location for this post via the google auto suggest enabled text box. The latitude & longitude fields will be auto-filled for you once you choose a place from google auto-suggest.
Now you need to assign a marker category to this post that will decide which icon will appear for this post on map. The final step is to assign a google map to this post which is listed near “Select Map” label. Once you assign the map to the post, now you can click on “publish” button to publish the post.
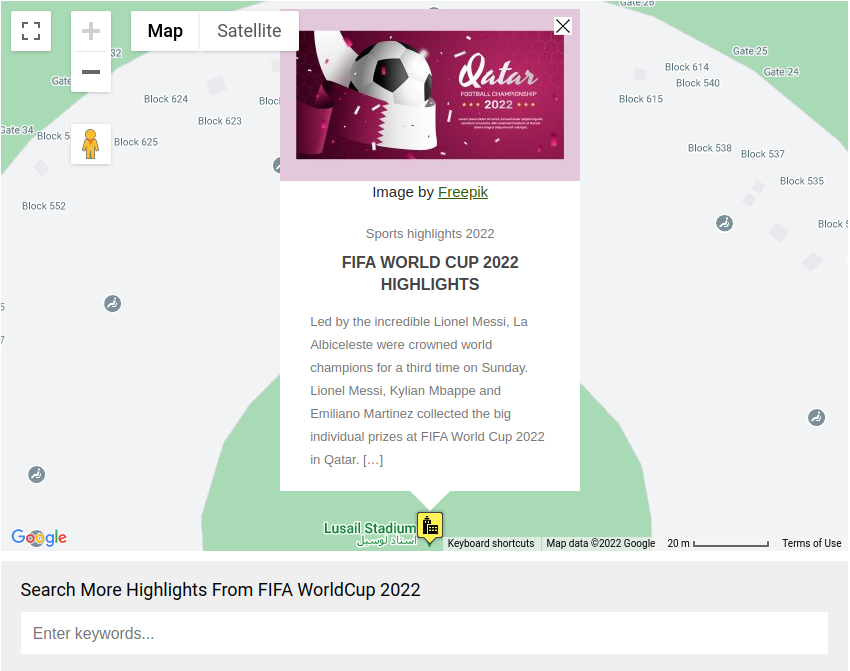
Step 4 Now create a new page, enter the shortcode of that map in the page content which you assigned to this post. Publish the new page. You will see the map on created page and you will also see the post you just created on that map because you’ve assigned that post to this map.
Below is an expected output :
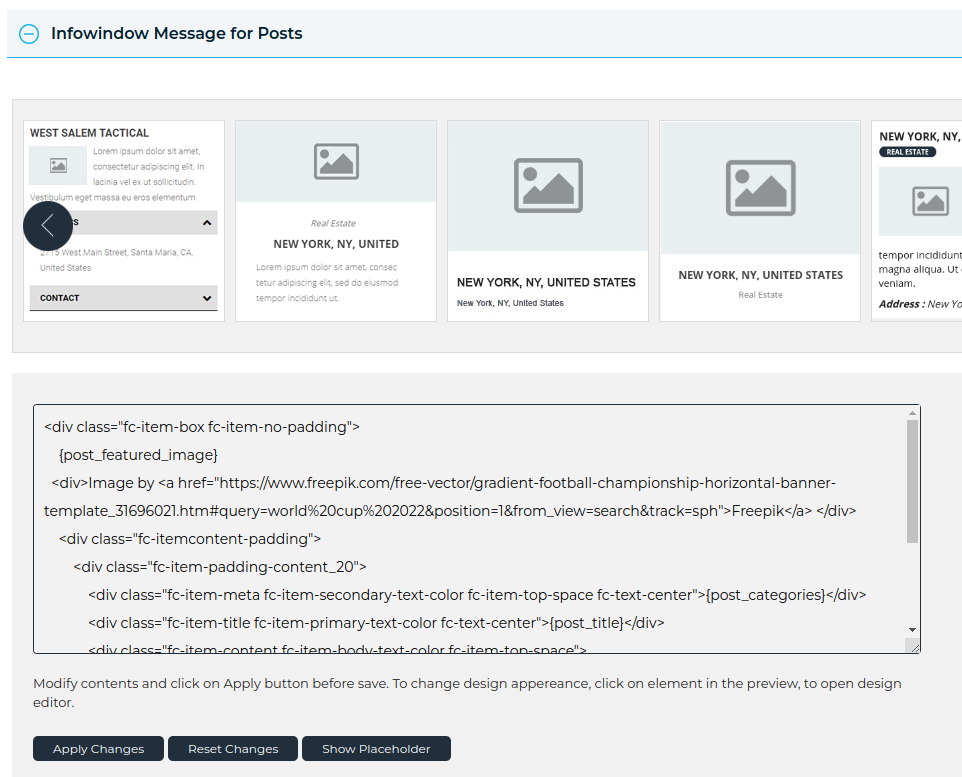
Step 5 Now that your map is finally showing the post, if you now want to further change the content inside the infowindow of this map, Go to WP MAPS PRO > Manage Maps plugin menu. Edit your map.
Go to Infowindow Message for Posts section. From here you can setup posts information to be displayed on the info window message using placeholders. You can use following placeholders :
- {post_title}
- {post_link}
- {post_excerpt}
- {post_content}
- {post_featured_image}
- {post_categories}
- {post_tags}
- {%custom_field_name_here%}
If you want to update the content inside the listing section which appears under the map you need to go to Listing Setting section to enable it and then you need to go to Listing Item Skin section to choose a template for listing and to manage the content inside listing with help of same set of placeholders.
Related Tutorials:
- How to assign location using ACF Plugin
- How to hide metabox from post and pages
- How to show Posts Custom Fields on Google Maps Infowindow
- How to display posts content in google maps
- How to show posts location using custom fields