Docs Archive - Page 2 of 12 - WP Maps Pro

Celeberate 15000th Sales with us

GET YOUR 50% DISCOUNT TODAY

Archives: Docs

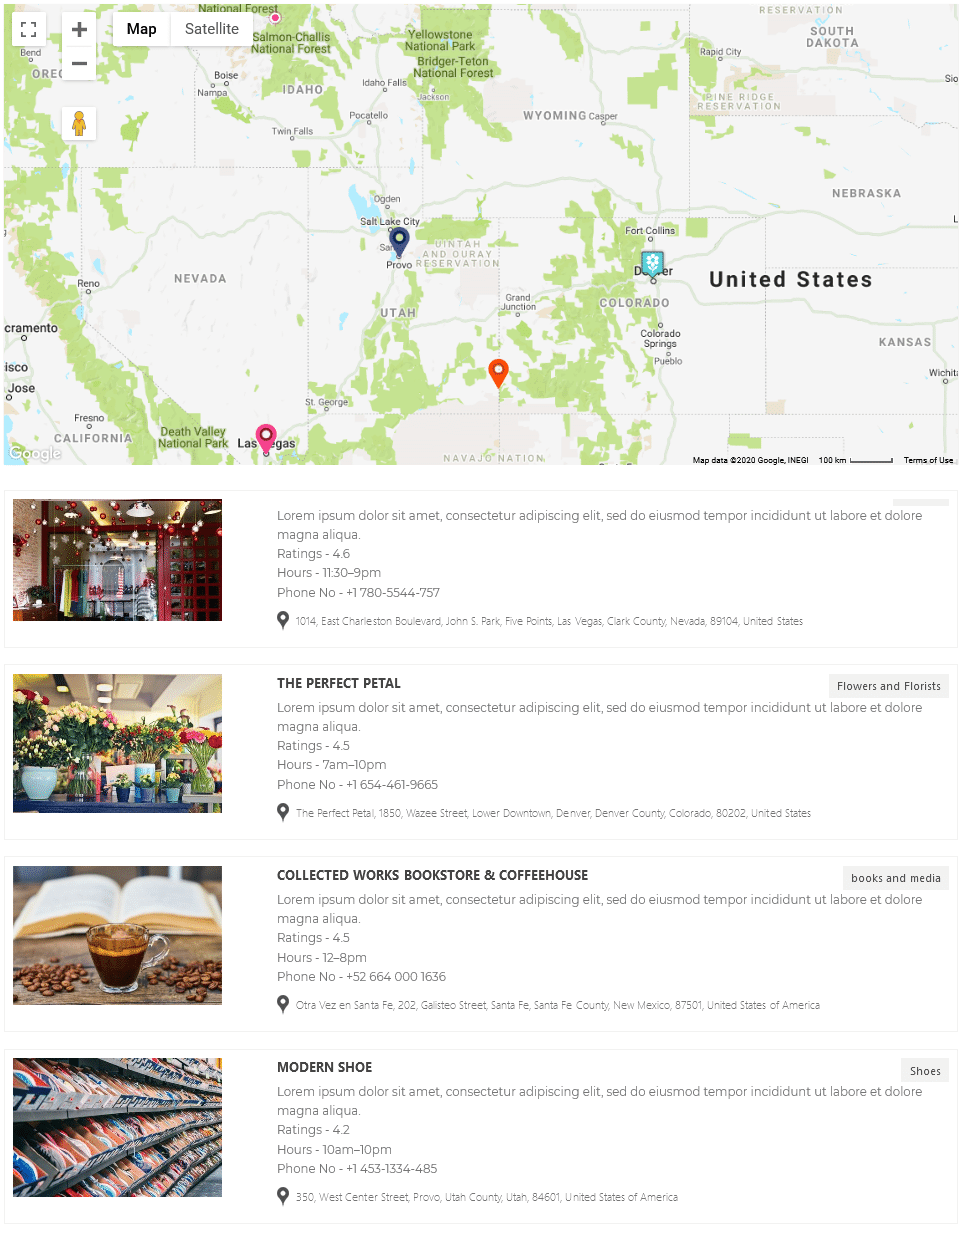
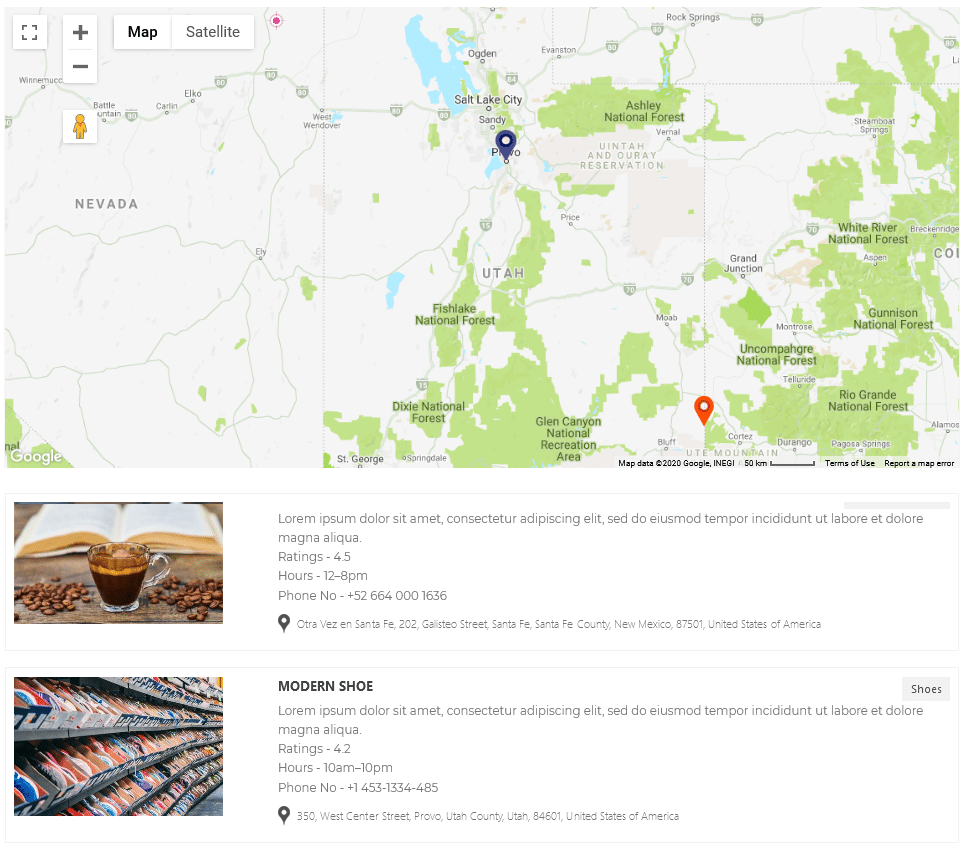
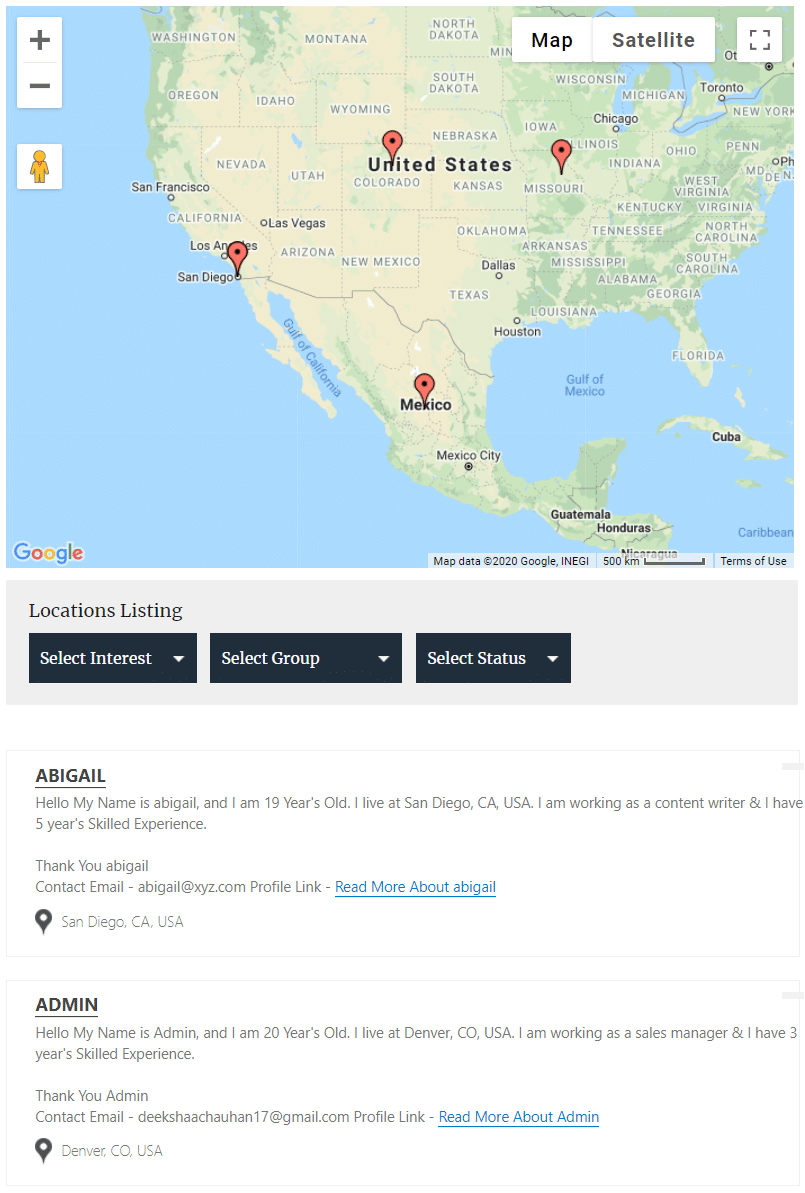
The purpose of creating a location on Google Maps is to display a marker pin / icon on the google map. You are free to create unlimited marker locations and later assign them to the map.

How to create a Location

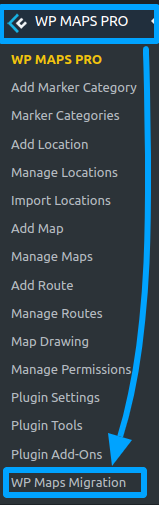
Step 1 First of all navigate to our WP MAPS PRO > Add Location plugin menu.

Step 2 Location Information form will appear. You will need to enter some mandatory and some optional information in the form.

How to create a marker in google map

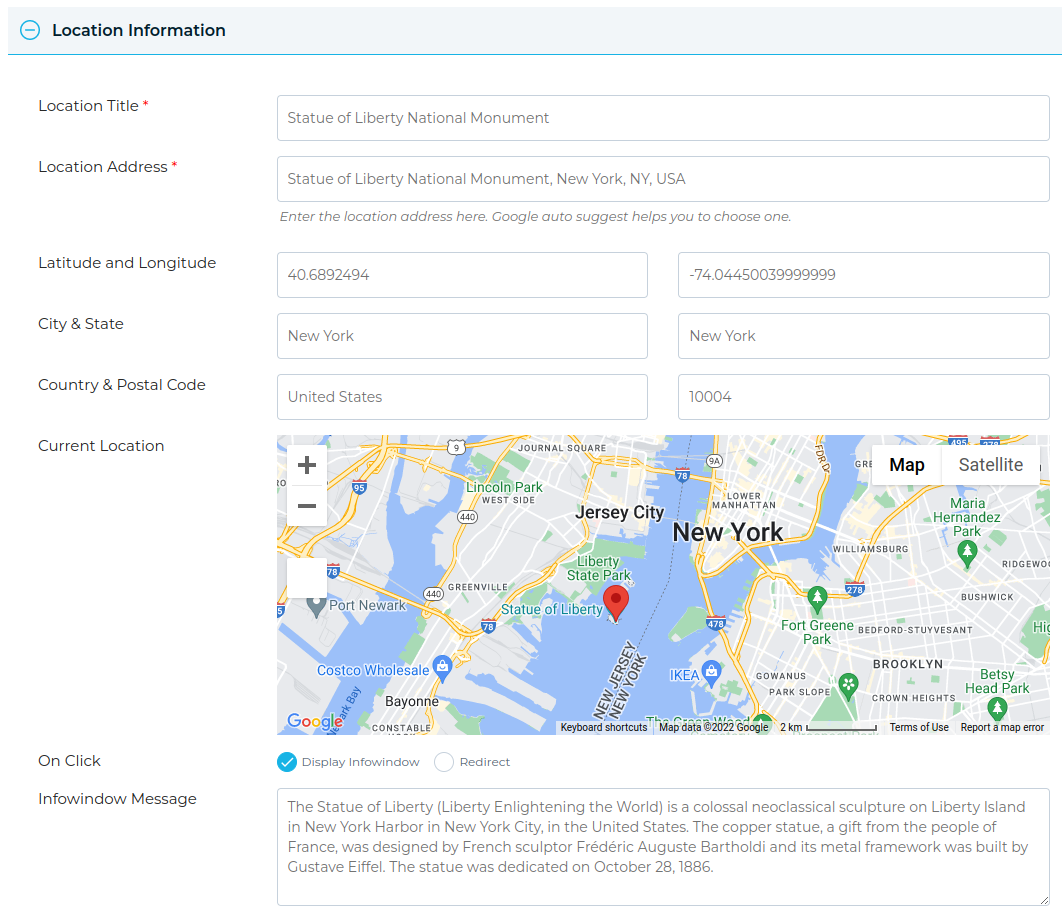
  • Location Title: Enter the title of your new location.
  • Location Address: This is a google auto-suggest enabled text box which helps you to enter/choose any google recognised address where actually you want the marker icon to appear. Type few characters of address and then choose the place from the google auto-suggest list. The marker icon will be displayed on exactly this place on the map.
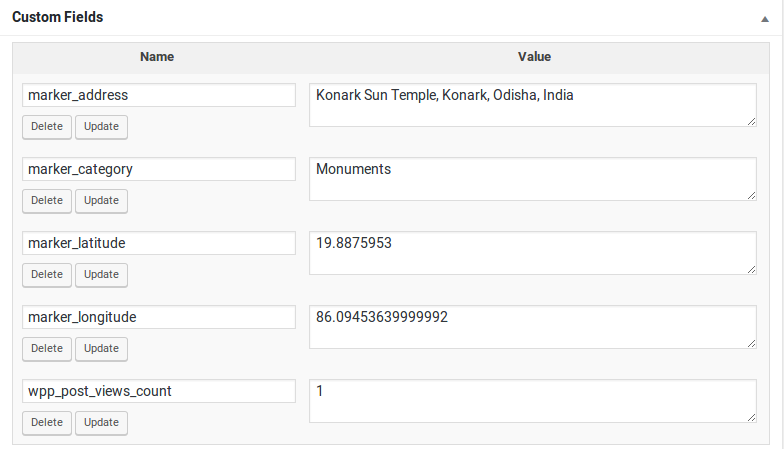
  • Latitude and Longitude: Latitude & longitude will be automatically calculated when you choose a location address from above step but you can change them if you need.
  • City & State: City and State will be also automatically calculated when you assign Location Address in step two, but you can change them.
  • Country & Postal Code: Country and Postal Code will be also automatically calculated when you assign a Location Address in step two but you can change them.
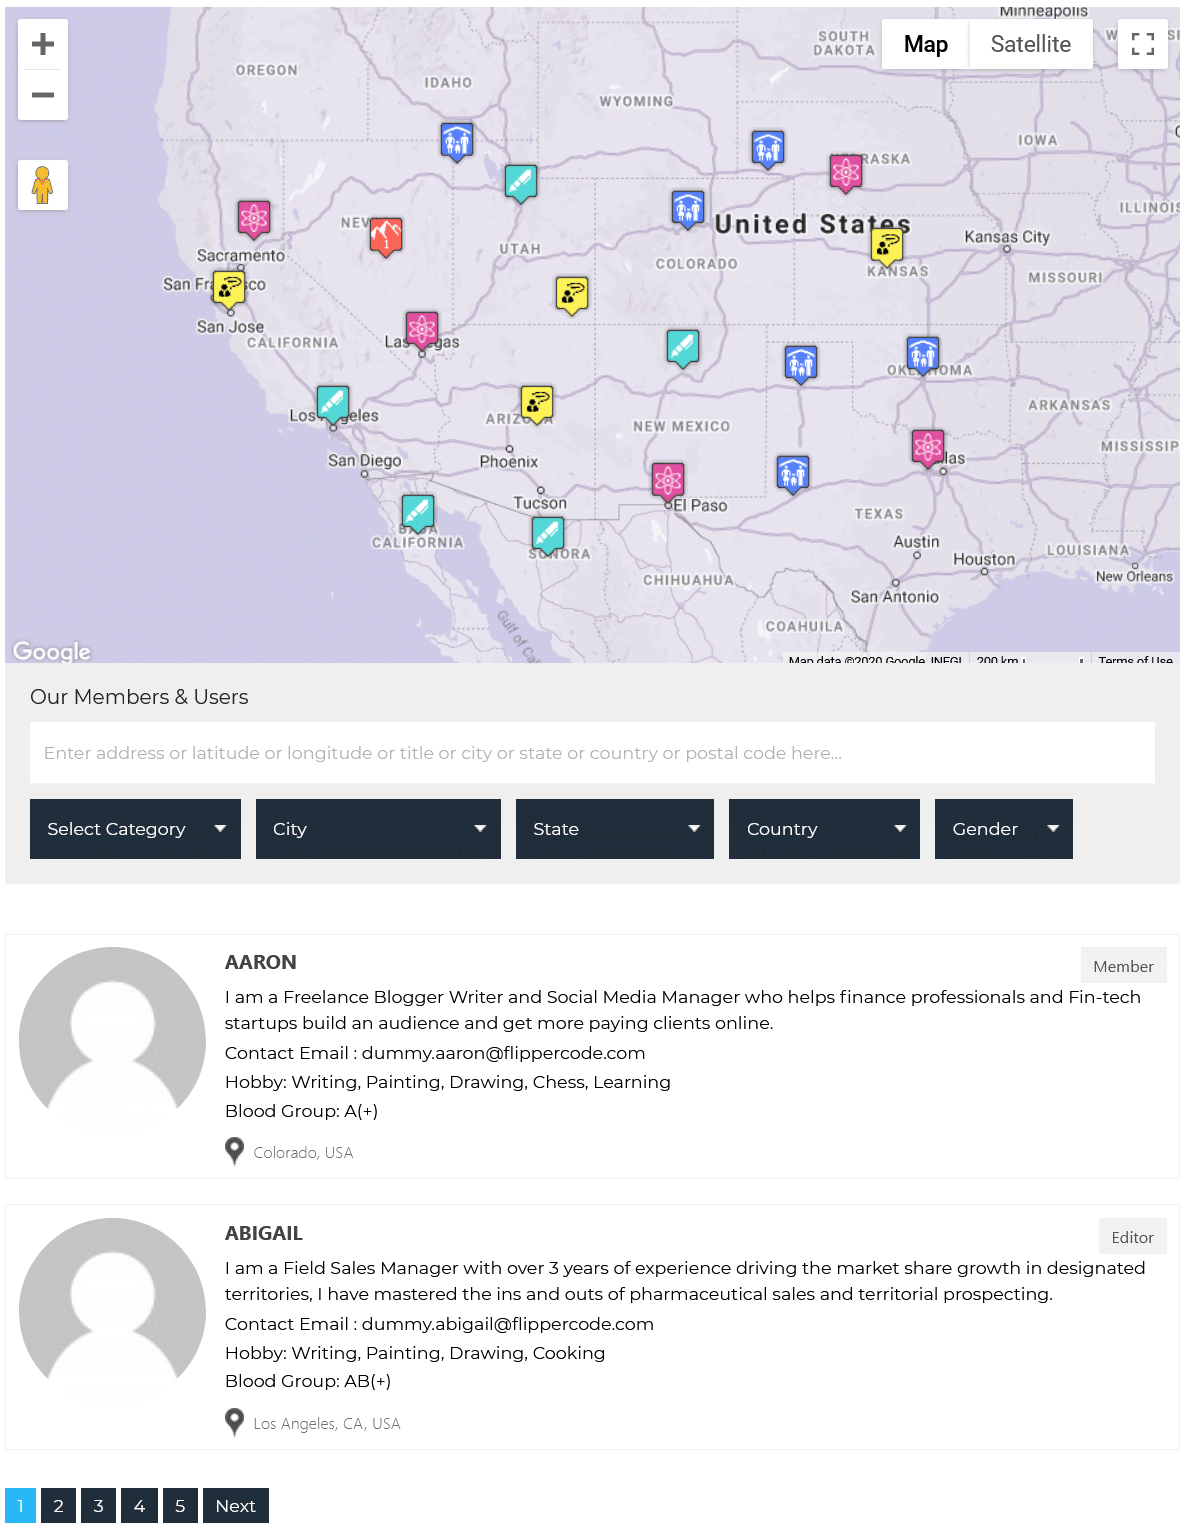
  • Current Location: According to your specified location address in step two, a marker for that location will appear on the map. You can change the marker position by dragging the marker. This map is for preview purpose only. Although we recommend to update the place using Address Location field and let the latitude and longitude to be automatically calculated for you.
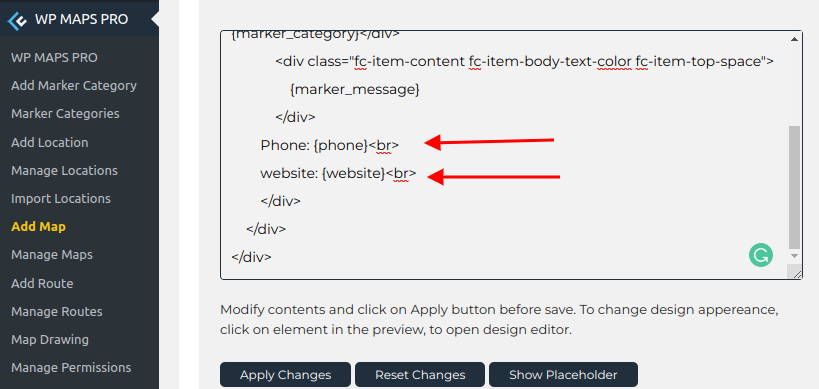
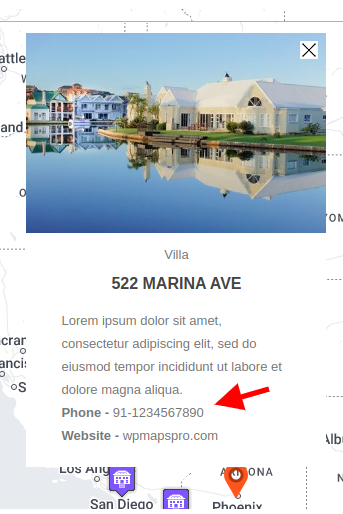
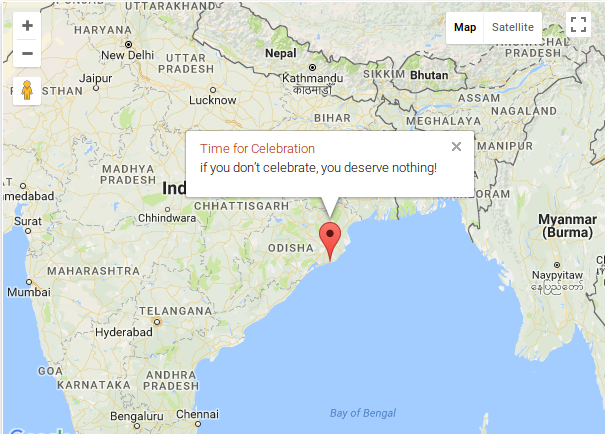
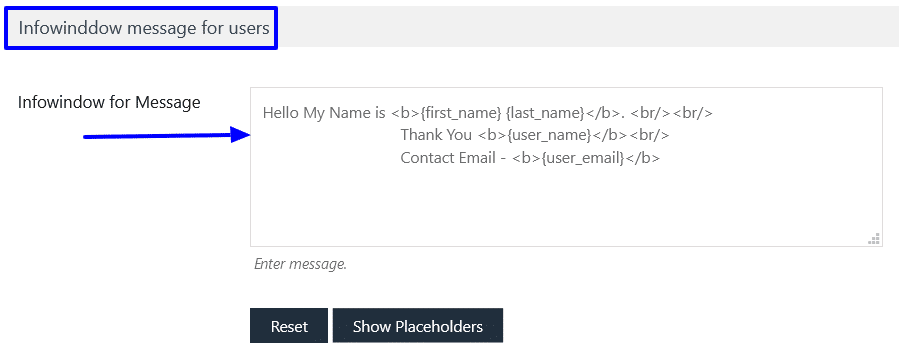
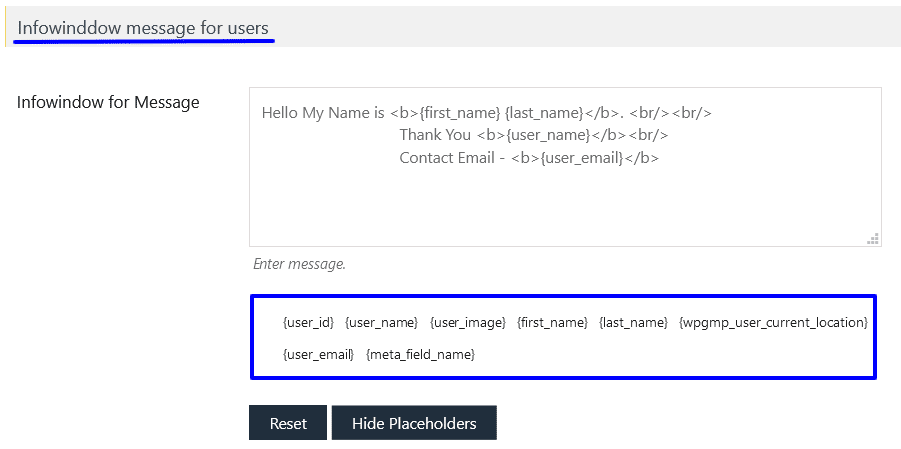
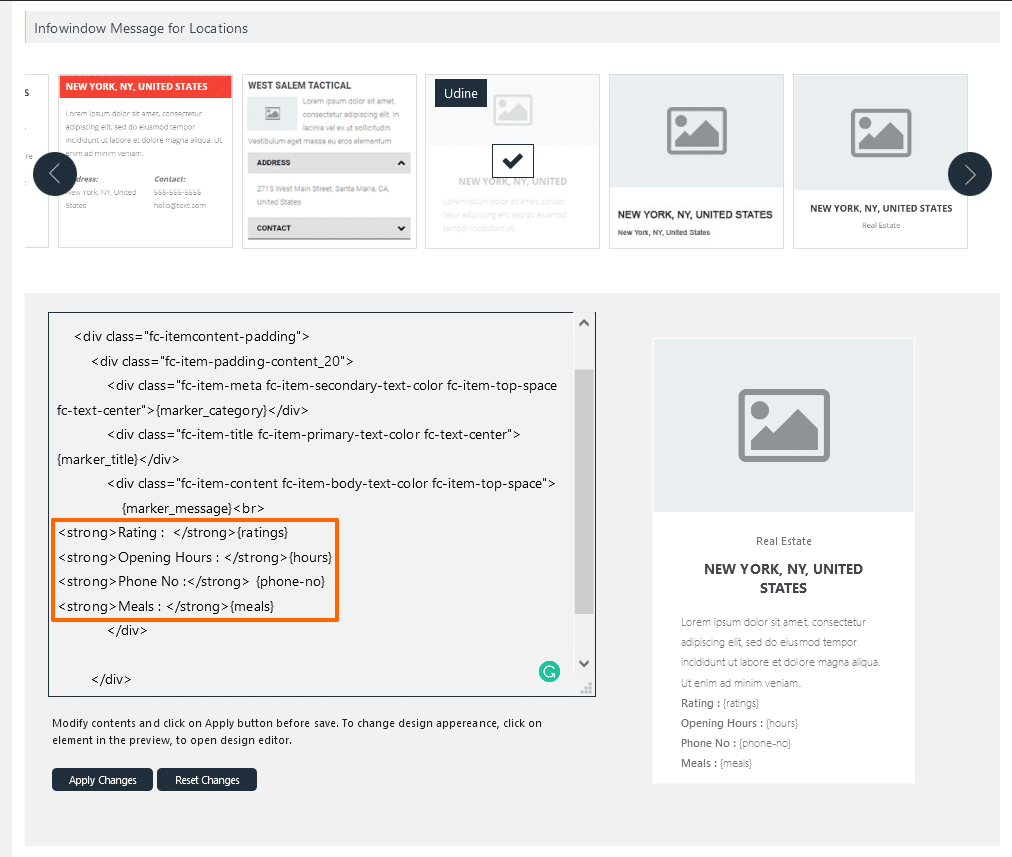
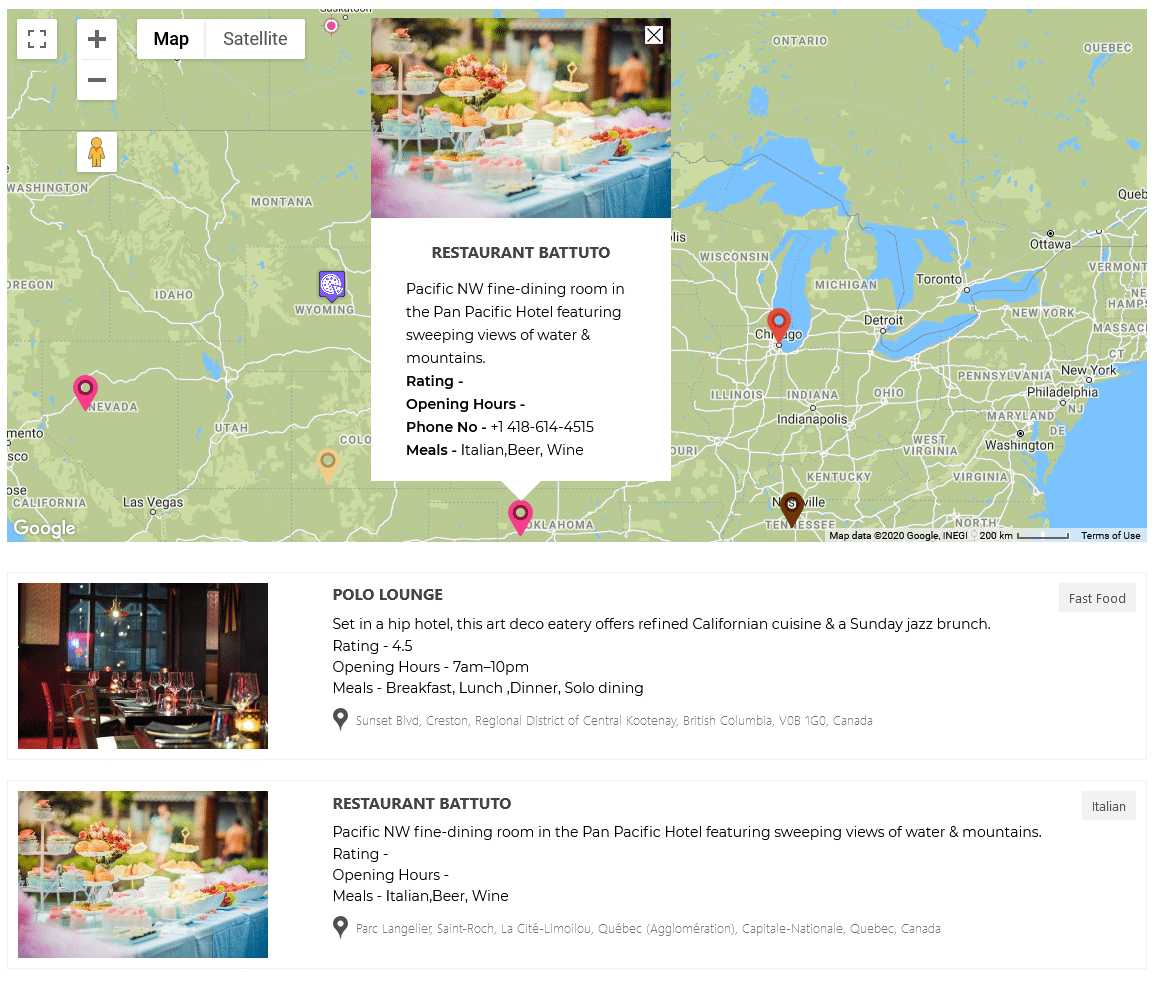
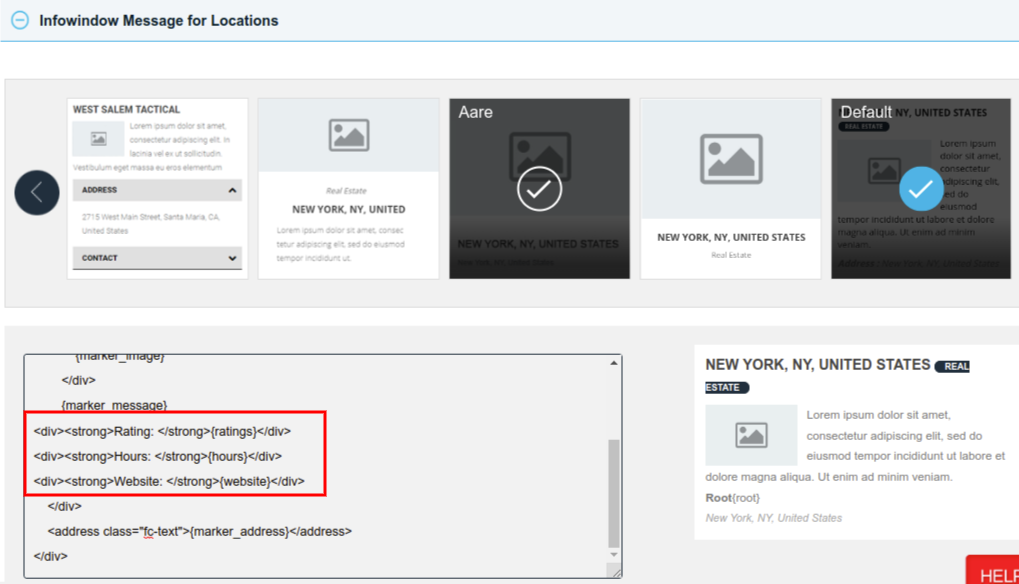
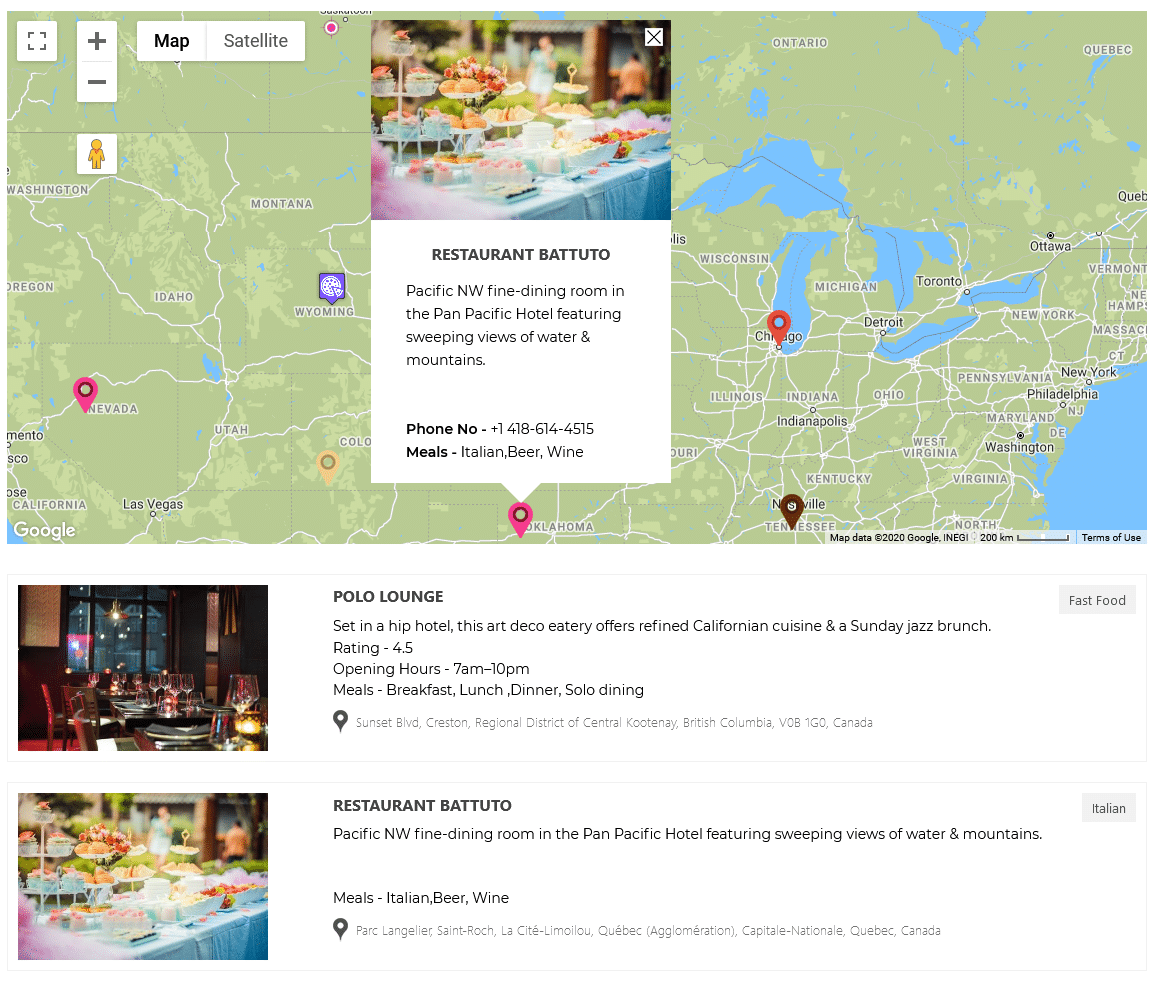
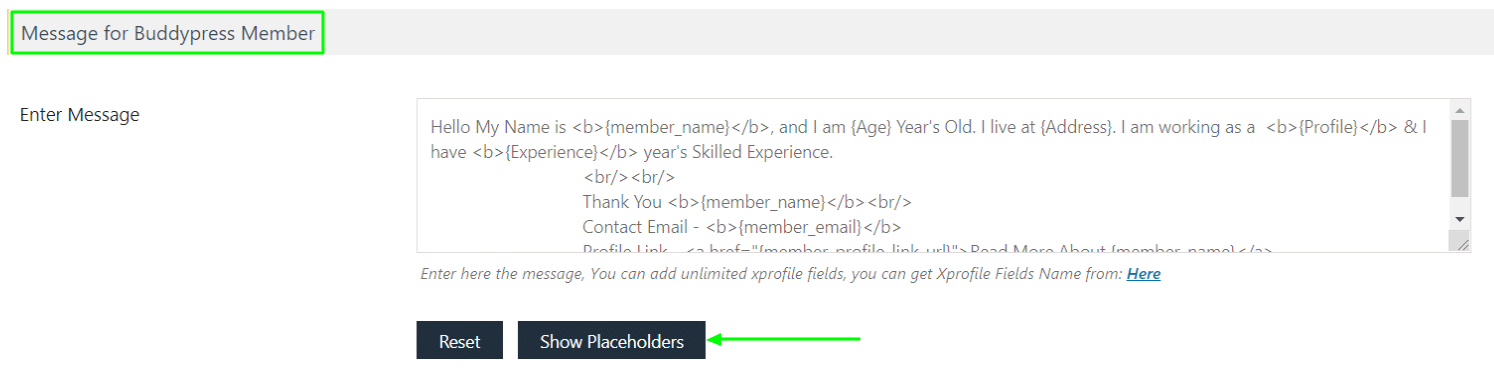
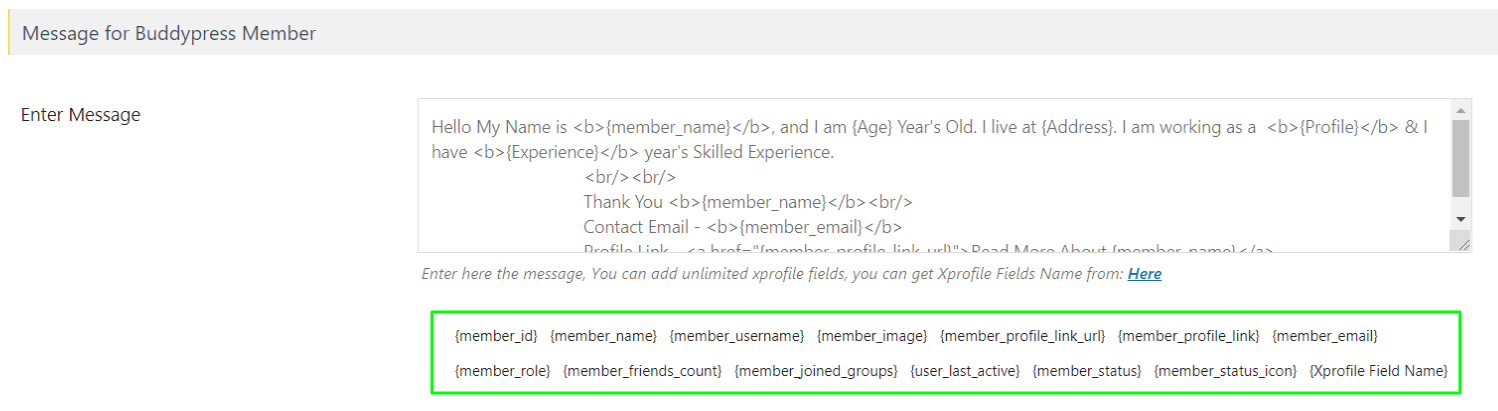
  • Infowindow Message : Enter the message / html supported content that you want to display for this location when someone will click on the marker of this location on the map.
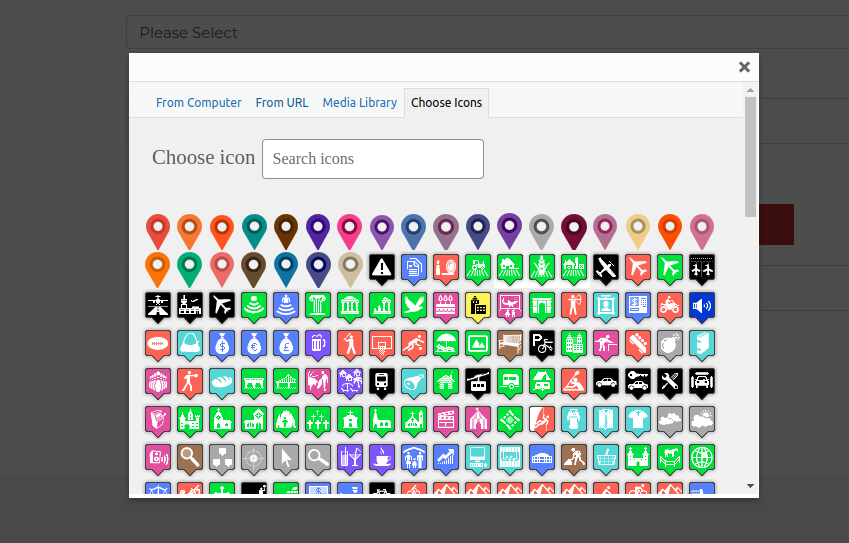
  • Location Image : Please choose and upload an image to appear inside the info-window for this marker location. With images, the infowindow looks good and its a common practice to add an image for each marker location.
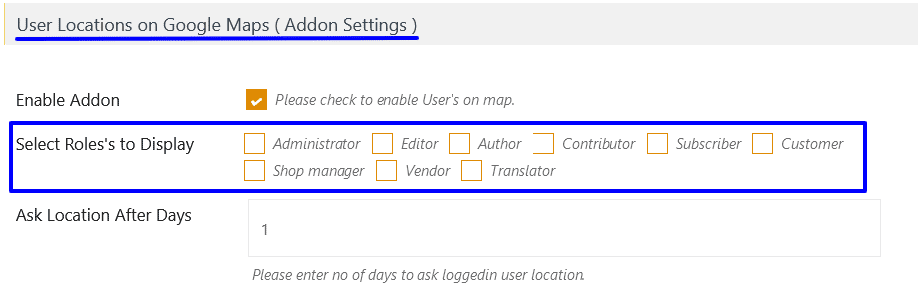
  • Apply Marker Category: In this section, you will see a list of Marker Categories that you created in previous tutorial. Please assign a marker category to the current location you are creating. This will decide which marker icon will appear on the current location. So, assign a marker category to the current location you’re creating.

Step 3 Now scroll down a bit and click on the Save Location button.

You will see a message that you have successfully created the location on Google Maps.

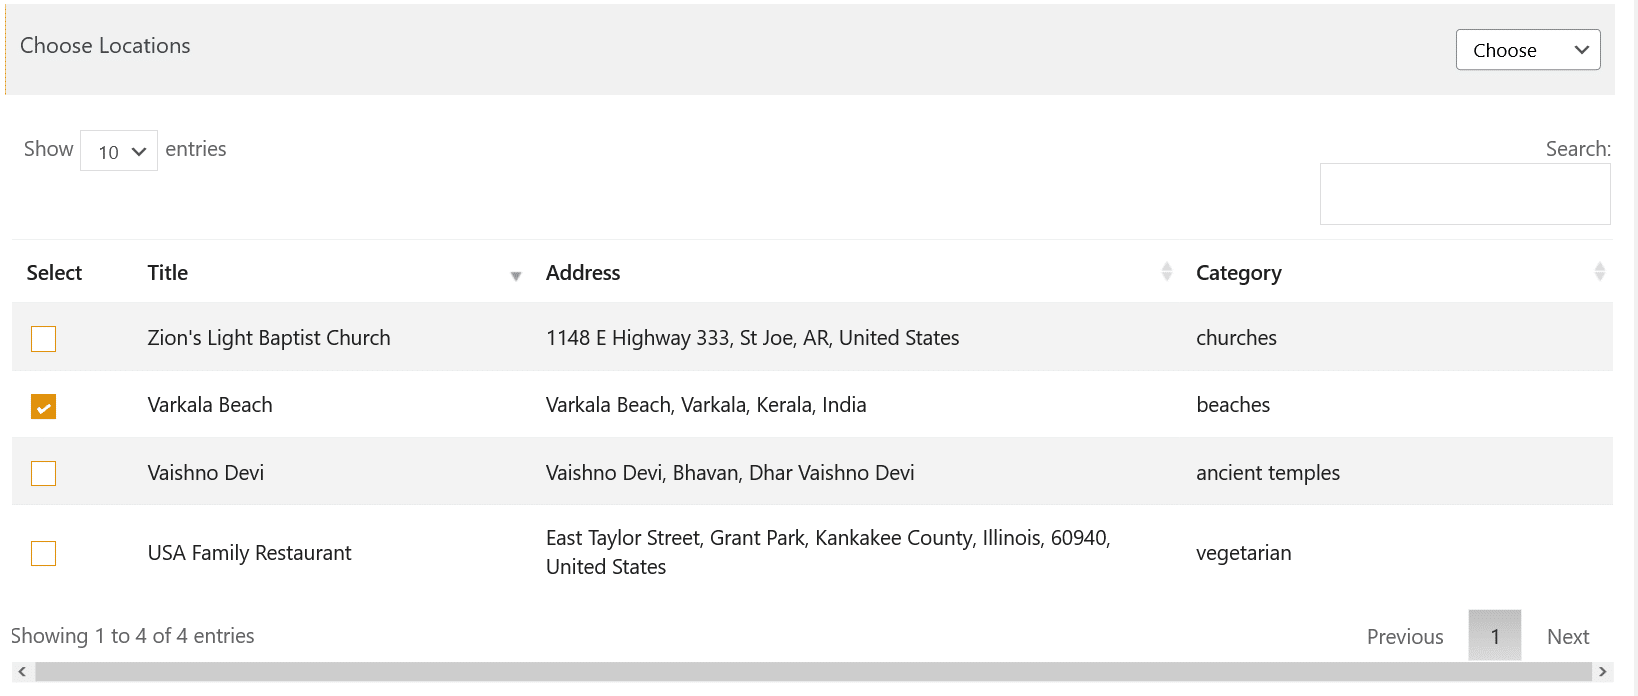
Now you can repeat the above steps for as much as locations / markers you want to add to your map. Once you are done with creating all the locations for your map, now the final step is to assign the created locations to the map.

For that please click on Create A Map tutorial and follow along.

This WP MAPS PRO plugin allows adding extra fields to a location, e.g website, phone, email, etc, besides basic information like title, city, state, longitude, and latitude. These extra fields can be displayed in Infowindow or Listing below Google Maps using placeholders. This plugin allows you to create unlimited extra fields and display them in the infowindow.

Manage Extra Fields

Step 1 Go to Plugin Settings page of WP MAPS PRO and scroll down to the Create Extra Fields section.

Step 2 Add extra fields like Phone, website etc and Click Save Setting.

How to create extra fields and display it on a map info window Wpmapspro

Step 3 Go to Add or Edit Location page and add information in the Extra Fields Values section.

 How to create extra fields and display it on a map info window

Step 4 Then click Save Location.

Step 5 After adding extra fields in location, Go to Add or Edit Map page and scroll down to Infowindow Message for Locations section and use placeholders in the editor input field.

Each extra field will have a unique placeholder. e.g, You can use an extra field as a placeholder like {phone}, {website}, etc. click on the Show Placeholder button to show all available placeholders.

Location Infowindow Wpmapspro

Step 6 Click Save Map and extra fields will be displayed in the infowindow message :

Extra Fields Infowindow

Using the WP MAPS PRO plugin you can insert post location with the help of custom fields and display with the Geo tags.

Show Post location using Custom fields

Step 1 From the WordPress dashboard go to Posts -> Add New.

Step 2 Enter the title , insert the content for post and set the featured image.

Step 3 Now assign location using custom fields. It is hidden by default and you need to use the screen options at the top of the posts and enable Custom Fields.

Show Post location using Custom fields Wpmapspro

After that, the box appears at the bottom of the editor screen.

Step 4 Here, you can easily add any custom field post you like. All you need to do is give it a name and a value.

How to show posts location using Custom fields

Step 5 Go to Manage Maps Page, now Add/Edit your map, and scroll down to the Show Posts Using Custom Fields section.

Step 6 Enable Geo Tags and insert the name of your custom fields in the post type.

GEO Tags WP Google Map

Step 7 Click Save map and open the frontend map page.
Now you will see the Custom Fields Post location will display on your map.

How to show posts location using Custom fields

The main purpose of creating marker categories is to assign different marker icons to different marker locations on the google map that you are going to create with our plugin. So marker category helps in grouping the markers by displaying the same marker icon for them.

Marker categories can also helps in filtering the markers by specifying category and allowing your visitors to see only the right markers that has the selected category assigned.

How to create a Marker Category

Step 1 Go to WP MAPS PRO > Add Marker Category in our plugin menu.

Step 2 Enter the title / name for your marker category.

Step 3 Assign an icon to your marker category. You can upload an icon using Choose button.

Once you click on the Choose button, a popup will be open, go to Choose Icons tab, select any icon for the marker category you are creating, scroll down in the popup and hit on Insert Into Post button. You will see the selected marker icon near you Choose button means it has been selected.

Marker Category

Step 4 Now click on the Save Marker Category button. You will see that your marker category has been successfully created. You can see all the created marker categories on the Marker Categories Page.

With the above process, you can repeat the steps and create as many marker categories for the map that you are going to create after some steps. Create all the marker categories as per your requirements as this point so that you don’t have to come back here again later.

So, with above steps, you have taken the first step of creating a beautiful google map, you have created some marker categories.

The next step is to Create Locations for your google map. With this step, we specify where on the google map we want to see the markers.

With this User Locations On Google Maps extension, you can display WordPress User current locations on google maps beautifully. All the user information displayed in info-window and listing are dynamic and can be managed with help of placeholders from the back-end.

Please make sure you have installed the WP MAPS PRO plugin &and User Locations On Google Maps extension into your website. In case you have not installed it yet. Please download these plugins and configure them first.

Display User’s Current location On GoogleMaps

Step 1 Please navigate to Add or Edit Map and scroll down to the “Users  Location on Google Maps (Addon Settings)” section.

Step 2 Enable the “Enable Addon” checkbox from this ‘Users  Location on Google Maps (Addon Settings)‘ section.

  • Select Roles’s to Display: Here you can select user roles as per your requirement.
  • Ask Location After Days: Enter the number of days to ask logged-in user location.

Step 3 After this small process please click on the save settings button.

Navigate to the map page you can see on page load a location permission popup is displaying, click on allow button now your current location is displaying on the map.

This ‘allow’ button displaying the user’s current location on the map page load. If the SSL layer is not enabled on your site then this ‘location access’ popup will not display on your site map page.

The SSL layer must be implemented on your site to display this location access permission popup. without enabling the SSL layer on your site you can not see this location access popup. HTTPS must be enabled to display this ‘allow’ permission popup on your site.

Display Selected User Role On Map:

Step 1 Please navigate to the “Select Roles’s to Display” option in the “Users  Location on Google Maps (Addon Settings)” section.

Step 2 Select user roles from the “Select Roles’s to Display” option as per your need.

Step 3 After this small process please click on the save settings button.

Navigate to the map page you will see all logged in user’s location is displaying on the map.

Manage Infowindow message for users:

Step 4 Please navigate to the “Infowindow message for users” section on this page.

Step 5 Go to the “Infowindow For Message” textbox and insert text as per your requirement.

Step 6 You can also you can use the given placeholders to manage infowindow information, Please click on the “Show Placeholders” button.

Step 7 After this small process please click on the save settings button.

Please click here to view a working demo.

Placeholders are used to display extra information about the location in the info-window. WP MAPS PRO allows you to create unlimited extra fields and display them in the info window.

Sometimes we have many placeholders according to different types of locations and we have the same info window to display all information so when we display this information on the map listing window and marker info window using placeholders we write it with the label and which is not related to some location or don’t have data its label is displaying in the location info window without information.

Problem :

Often we write placeholder like as in the below given example.

In this e.g, we are writing extra field like as:
Rating – {ratings}
Hours – {hours}
Website – {website}

You can see in the below given info window image how we wrote placeholders that are not displaying properly on the frontend.

Using the above method will display blank labels in the info window if the related placeholder value is not available. It will display a blank label when we don’t have related placeholder values.

Solution :

Please wrap up the placeholders label in <div> tag in the listing and location info window as shown in the below given image.

*  Please use placeholder labels to display extra fields like as given below in the example.
In this example, we are wrapping label and value in <div> tag like as:
<div><strong>Rating –</strong> {ratings}</div>
<div><strong>Hours –</strong> {hours}</div>
<div><strong>Website – </strong>{website}</div>

Hide Empty Labels in WP Maps Pro

Using the above method it will hide the labels from the info window if the related placeholder value is not available.


With this NearBy Amenities Listing On Google Maps extension, site admins can display nearby amenities that are present around a location specified from the backend on the google maps. Site visitors will see the amenities data on the map in form of markers & in the listing just like they see it in case of assigned locations/places.

Please make sure you have installed the WP MAPS PRO plugin &and NearBy Amenities Listing On Google Maps extension into your website. In case you have not installed it yet. Please download these plugins and configure them first.

Display Nearby Features on Google Maps

Step 1 Please navigate to Add / Edit Map page create a map and select the location as per your need.

Step 2 In this page scroll down to the “Google Maps Amenities” section.

Step 3 Enable the “Show Amenities” checkbox given in this section.

Step 4 Select “Miles / KM” as per your need from the ‘Dimension’ option, then insert radius in ‘Radius Options’ to display search result according to the given radius.

Step 5 After that please select amenities which you want to display on the map as per your requirements.

Step 4 Please scroll down to the “Display Nearby Amenities Google Maps ( Addon Settings )” section.

Step 5 Enable the “Display Amenities Data on map” checkbox given in this section.

Step 6 After enabling this, insert the number of seconds in the given “Amenities Load Time” textbox.

Step 7 If you want to show nearby amenities according to the user’s current location then, please enable this “Nearby Amenities By User Current Location” checkbox. Once the user allows the location access listing will be updated.

Step 8 Please go to the “Amenities Listing Result” section, and select result criteria from the given option “Listing Result Criteria” as per your requirments.


Step 9 After this small process please click on the “Save” button.

You will see on the frontend your selected amenities are displaying on the map and listing.

To view a demo please click here.

With this Filter Map Listing By ViewPort extension, your site visitors can more quickly find the places / listing records just by zooming in more and more towards the supposed direction. Only displays those listing records whose markers are visible on google maps after zoom in / drag process, hides the rest of listing records whose markers are also out of the current viewport.

Please make sure you have installed the WP MAPS PRO plugin and Filter Map Listing By ViewPort extension into your website. In case you have not installed it yet. Please download these plugins and configure them first.

Filters Maps Listing Records Based On Visible Markers On Current ViewPort Of Map

Step 1 Please navigate to Add or Edit Map and scroll down to the “Filters Maps Listing By Viewport” section.

Step 2 Enable “Enable Viewport Filter” from the ‘Filters Maps Listing By Viewport’ given section.

Step 3 After this small process please click on the ‘Save‘ button.

Now refresh your frontend map page and drag the map to see the record only displays those listing records whose markers are visible on google maps after zoom in / drag process.

Before:

After:

Please click here to view a working demo.

With this WP MAPS Migration add-on, site owners can migrate google maps created with our main plugin, WP MAPS PRO from one WordPress website to another WP website in seconds. Site admin will only need to download the backup file from the source WordPress website and then import that backup file into the target WordPress website.

Please make sure you have installed the WP MAPS PRO plugin & WP MAPS Migration Addon into your website. In case you have not installed it yet. Please download these plugins and configure them first.

Migrate Google Maps from One Site To Another Site

Step 1 Please navigate to the WP MAPS PRO -> WP Maps Migration”.


Export To Other Website:

Step 2 Please select the “Export To Website” option from the ‘Select Process’.

Step 3 After that, click on the “Download Backup” button to download your all maps with all settings. It imports all the maps with their locations, routes, categories, additional fields, markers, and location images.

Now we have a backup .txt file. we import this website map data using this .txt file on our new website

Import From Other Website:

Step 1 Please select the “Import From Other Website” option from the ‘Select Process’.

Step 2 If you already created a map on the new website and wanted to overwrite all old WP MAPS PRO data with new data then, please enable this checkbox. Otherwise, go to step 3.

Step 3 Please upload the backup .txt file.

Step 4 Click on the ‘Import Backup‘ button.

It’ll take a few seconds to complete the migration process and all of your maps data will be migrated successfully.

An WP MAPS PRO plugin extension that displays registered BuddyPress members of your site on Google Maps easily with all the member information in the info window and listing.
Using this extension admin can display their registered BuddyPress members on Google Maps by user roles or BuddyPress group.
You can create and display an unlimited custom filter as per your need using BuddyPress user’s profile information to filter the map.

Please make sure you have installed the WP MAPS PRO plugin & maps plugin extension into your website. In case you have not installed it yet. Please download these plugins and configure them first.

Display Unlimited Filters Using BuddyPress Google Map Extension

Step 1 Please navigate to Add or Edit Map and scroll down to the “BuddyPress Members Google Maps (Addon Settings)” section.

Step 2 Enable “Enable Buddypress” from the ‘Buddypress Members Google Maps (Addon Settings)‘ given section and save it.

Step 3 Please navigate to the User->Profile Fields.

Step 4 On this page you will see your created profile fields, please copy the displayed field name from here as per your need.

Step 5 Please navigate to the ‘Add / Edit Map’ and scroll down to the “Custom Filters”, and enable “Display Custom Filters” button.

Step 6 After enabling it, you paste your copied field name in the field box as shown below.

Step 7 After this save that changes, you will see in frontend your filters are displayed.

You can also create filters using placeholders, which are given in the addon setting.

Step 1 Please navigate to the Add or Edit Map and scroll down to the “Message for Buddypress Member” section, and click on “Show Placeholders”.

Step 2 Copy the placeholder as per your requirement and paste it in the field box of the “Custom Filters” section.

Step 3 After this small process please click on the ‘Save’ button.

Now you will see your filter is created on the frontend.

To view the demo please click here.

Install Plugin Now!

This plugin is exclusively available at codecanyon.net. You'll get free updates and full support to use this plugin.