With this WP MAPS PRO and Airtable Data To maps plugin, site admins can display airtable’s spreadsheet data on google maps very easily and with flexibility. Site admins can easily decide what information pieces ( out of different columns in table) they want to display on google maps. The airtable table columns can be easily selected and mapped from back-end to serve as title, content and images in the info-window and listing.
Please make sure you have installed WP MAPS PRO plugin into your website. In case you have not installed it yet. Please download these plugins and configure them first. Here are the following steps to install the WP MAPS PRO plugin.
Generate Airtable Base ID and Personal Access Tokens
You need to Airtable Base ID and API Key to display airtable data on google map, please follow these steps to get an ‘Airtable Base ID’ & ‘Airtable Access Tokens’:
Airtable Personal Access Token:
Step 1: Please visit airtable website and log in with the account details, open the Create Token page(Account Page -> Go to developer hub -> Create Token) there is a button Create New Token. Click on this button.
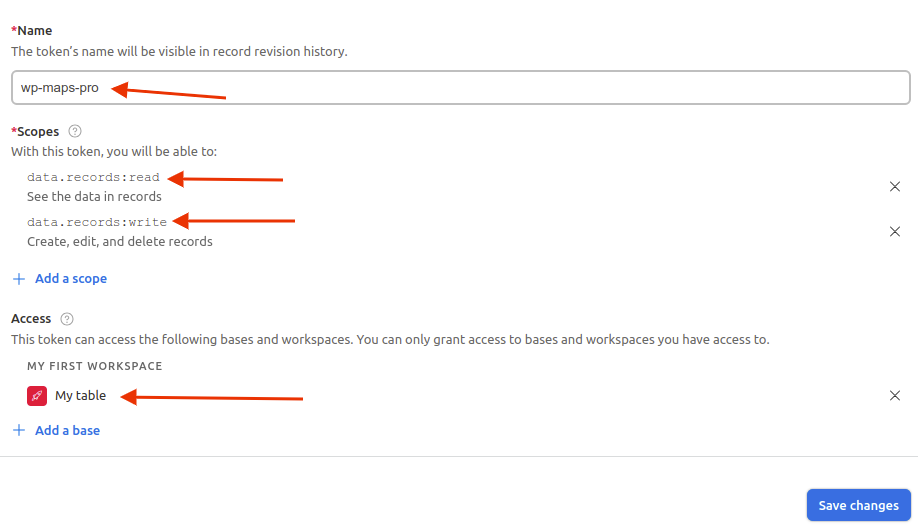
Please add the unique token name and select these 2 scopes.
1. data.records:read
2. data.records:write
then select your base/workspace, where your table exists, and click on Save Changes.
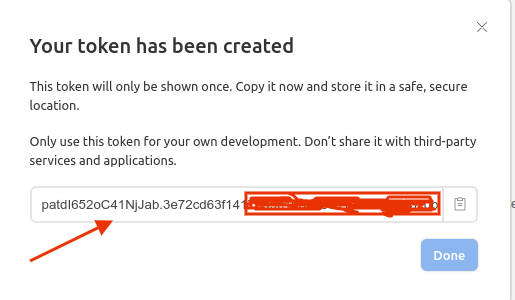
A new pop-up will display, please copy your Personal Access Token.
Airtable Base ID:
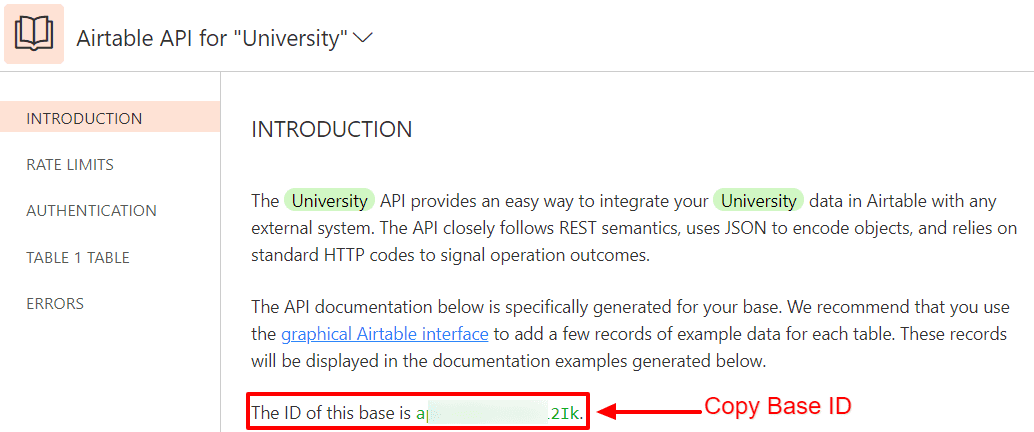
Step 2: Please click on the ‘Airtable API‘ link is given in API description in generate the API page.
Step 3: In this API page click on your base which base data you want to show on the map, now you are in your base api page in this page your selected base ID is displaying here.
Step 4: Please navigate to the “WP MAPS PRO -> Configure Airtable” insert your airtable Base ID and access token in the ‘Configure Airtable Details’ section.

Step 5: After a small process please click on “save settings”.
Display Airtable data on Google Map
Here is the following process to configure Airtable Data To maps plugin add-on:
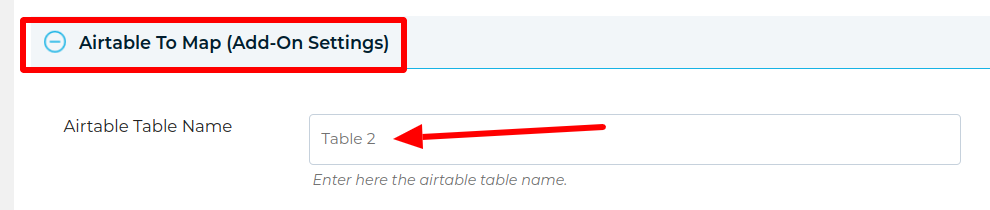
Step 1: Please navigate to the “WP MAPS PRO -> Add Map” create a map and scroll down to the “Airtable To Map (Add-On Settings)”.
Step 2: Please navigate to the Airtable Table Name textbox insert here your airtable database table name which you want to show on a map.
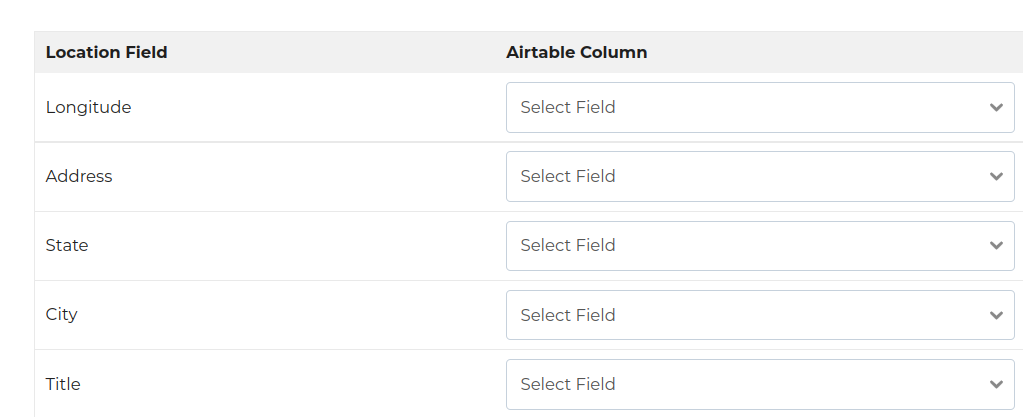
Step 3: Please go to the “Airtable To Map (Add-On Settings)” section, enter the name of the column of your table, the table name you have entered in the ‘Airtable Table Name’.
Step 4: After a small process click on save map.
To see the working demo please click here.
Related Tutorials:
- How to migrate Google Maps from one site to another site
- How to display WordPress users on Google Maps
- Displays CF7 form submissions on Google Maps
- How to map excel data in Google Maps
- Display customer trip route on Google Maps