Google Map API, is one of the best and most interactive methods, which is beneficial in adding more interactive features to Google Maps. With the help of the Google Map API, it becomes very much easier to display Google maps on the website and Google Map API offers a real-time update in the map. Moreover, Google map api add latest inventions into it to overcome all the needs of developers.
Google Map API is very much beneficial for website owners including travel websites as it helps travelers in creating itineraries. Moreover, a delivery boy can also find the best route to reach their destination. Secondly, it keeps on refreshing the data in real-time to give the best, and time-saving traffic experience.
There are many ways to embed maps into a website or mobile application and Google map API is the major one. So, let’s understand all about Google Map API and how it gets started it.
What is Google Map API?
Google Map API or application programming interface, which makes the developers in adding google map data to their website or application. In other words, if someone wants to add Google Maps to their website, then they need to have Google Maps API.
There are many API available in the Google Map Platform and they are having multiple features. For example, Maps Static API is made to add embed code into the website. Directions API is important in offering routes to the location, and Javascript API helps make maps more customized and interactive.
Steps to add Google Maps API for Free
Here are the steps, that will ease you in adding Google Map API for free
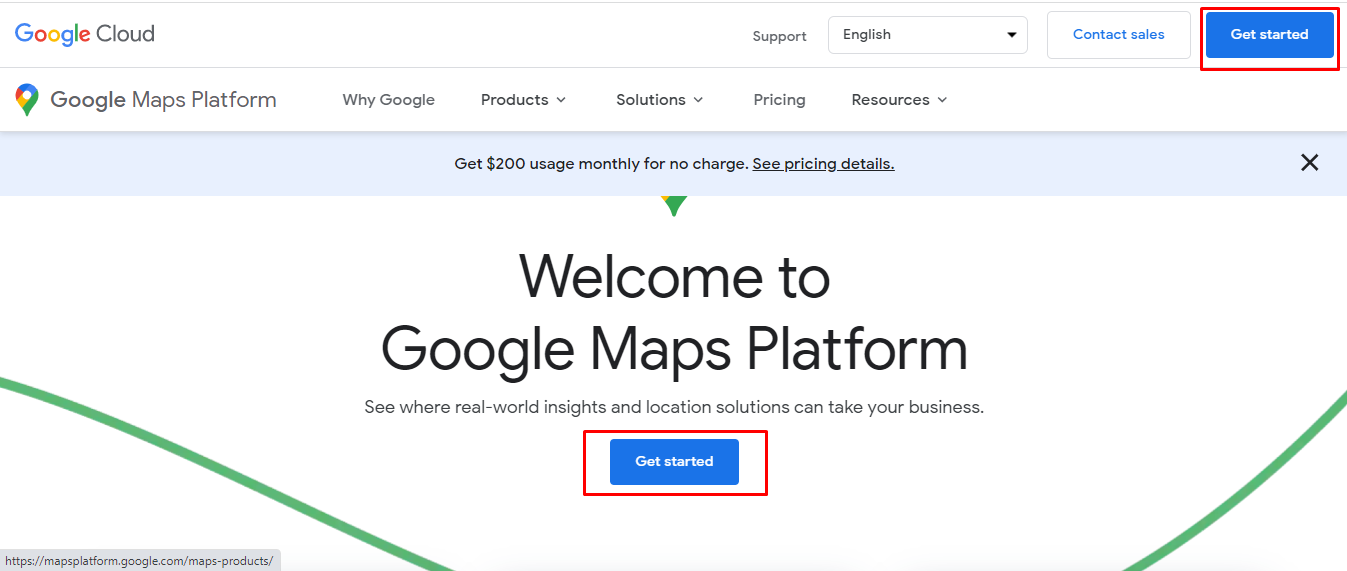
Step 1: Visit the Google maps Platform homepage and click on get started
 Step 2: If you are not signed in to your Google account, then you have to create your account.
Step 3: After Signing in, you will take forward to the steps that will sign up for the Google Maps platform. Read out all the terms and conditions and click continue.
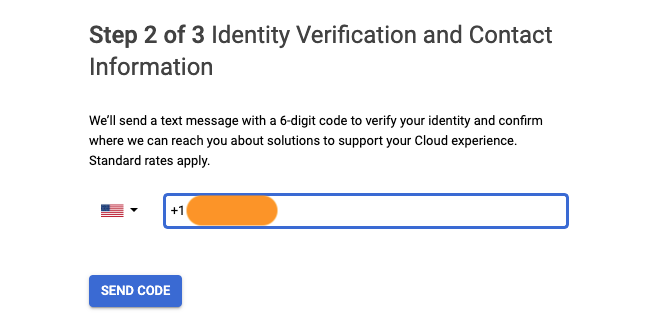
Step 4: In the next step, confirm your identity and enter the details of your phone number. Click on send code and enter the details on the verification code that you will receive on the next screen. Click on the verify option.
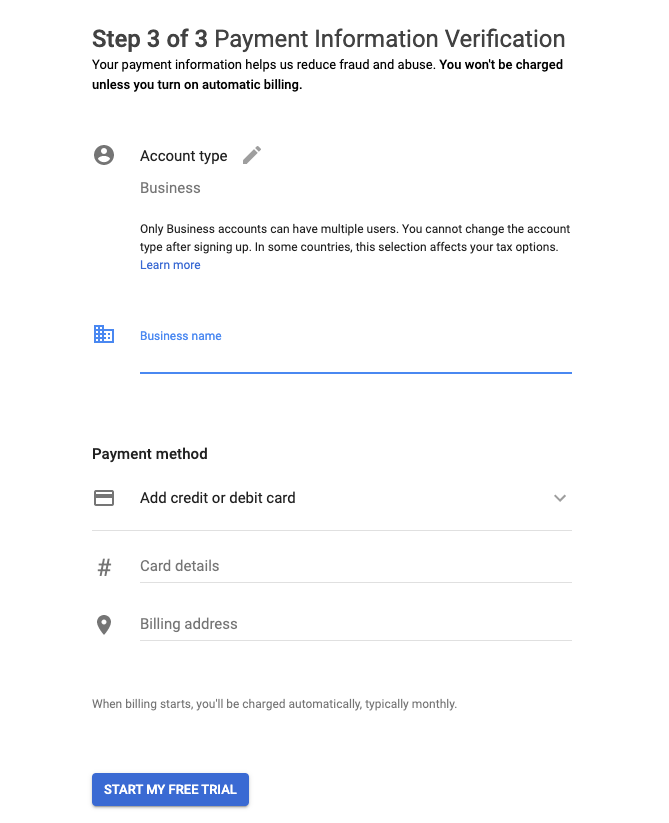
 Step 5: In the next step, check for your account type, whether it is business or individual. If you are a business, then enter your business name. Add all the details of your credit card or debit card. If you are choosing the automatic payment option, then Google will not charge anything to you.
 Step 6: After this, you will receive an API key, that you have not copied to your clipboard. Make sure that you should store it in a safe place and that you should not share it with others.
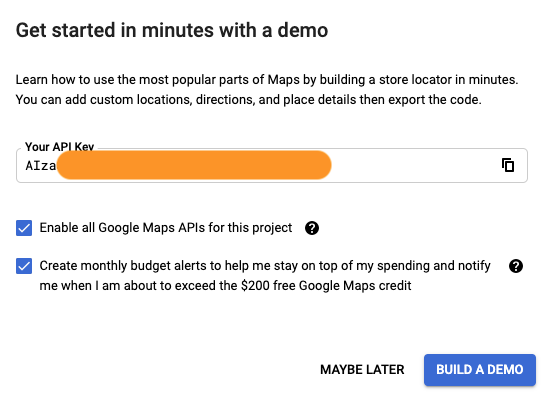 Step 7: To learn about how to use the Google API, then you have to book a demo, where you will learn all about the basics of API. You can also leave it while clicking on May Be later.
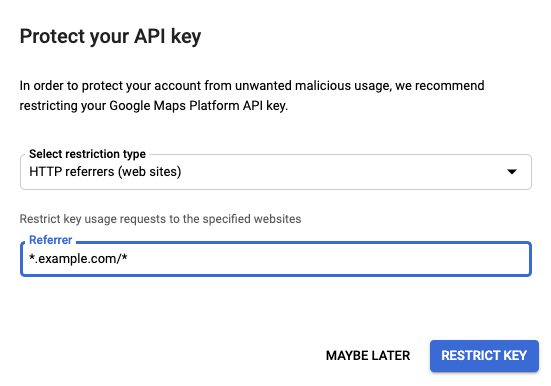
Step 8: You can also restrict requests to prevent their usage. To do so, you can choose to select the restriction type and then click on the restrict key.
Pricing for Google Maps API
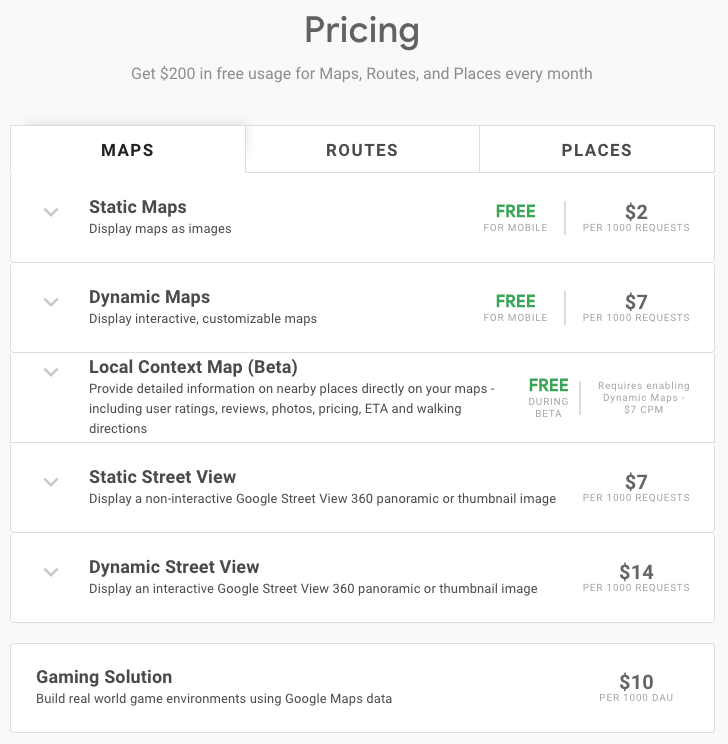
The major advantage of the Google Maps platform, will not charge anything from us unless you will not turn on the auto-billing option. During registration, you will receive $300 as a credit and it lasts for 90 days. Google will charge pricing for the API according to the requests. You can visit the google map API pricing page to have a better idea about it.
 Integrate Google Maps on your website right now!
Adding Google Maps to your website is not difficult unless you do not know how to do so. If you are using a WordPress website, then you can also add a Google map WordPress plugin to make things easier for you.
