Docs Archive - Page 11 of 12 - WP Maps Pro

15000+ live websites are using this google maps wordpress plugin.

Archives: Docs

hide markers on page

Want to hide markersHow to hide markers on page loadon a map on page load? This guide will show you how! By hiding coordinates or markers on the page, you can keep your data and layout private until you’re ready to share it.

Step 1 Go to Add or Edit Map and Scroll down to the ‘Infowindow Settings’ section.

Step 2 Enable the box of ‘Hide Markers on Page Load’ option.

How to hide markers on page load Wpmapspro

Step 3 Click on Save Map and open it in browser.

Then you will see location markers will not display on your assigned map.

Hide Markers on Map Wpmapspro

Are you looking for a way to create routes on Google Maps? Creating routes on Google Maps is easy and can be customized to your particular needs for your visitors. You can choose the color, line width and opacity of your route as well as its direction, so that you have full control over how it’s presented on the map!

How to create routes on Google Maps

Note :  Before you can create a route on Google Maps, you need to make sure that you have created some location using the “Add location” feature. If not, please add the locations that you are going to add in the route. 

Step 1 Go to WP MAPS PRO > Add Route from plugin menu.

Step 2 Under the Route Information section, enter the Route Title. You can change Route Direction color by Stroke Color and change the Stroke Opacity and Stroke Weight of direction stroke.

Travel Modes-For the calculation of distances, you may specify the transportation mode to use. By default, distances are calculated for driving directions.

Create Routes on Google Maps

Step 3 Now specify the Start Location & End Location for the route. After specifying that, specify the waypoints that will connect the start and end location of the route from the WayPoints table. You can choose a maximum of 8 waypoints in a route. Now scroll down a bit and click on the Save Route button.

Step 4Go to WP MAPS PRO > Manage Maps screen & click on the Edit icon to edit the map. Scroll down to Route Direction Settings section.

Step 5 Enable the Turn On Map Route Directions checkbox & then select the map route to display in your map.

Route Direction Wpmapspro

Step 6 Then click Save Map.

You’ll see the selected routes on the map.

Create Routes on Google Maps

The WP Maps Pro plugin allows you to assign one or more existing locations to a map — enabling you to display location markers directly on the frontend. Once assigned, these markers become part of your interactive map.


📌 Before You Begin

Ensure you have already created locations. If not, follow that tutorial first.


🛠️ Steps to Assign Locations to a Map

Step 1: Go to Manage Maps and click Add/Edit Map.
Scroll down to the Assign Locations to Map section.

Step 2: All the locations you’ve created will appear here in a list.
Use the search box to filter by title and then check the boxes for the locations you want to assign.

Assign Locations to Map

Step 3: Click Save Map.
Now open your map on the frontend — you’ll see your selected locations displayed as markers.


💡 Pro Tips

  • You can assign unlimited locations to a single map.
  • Use categories to group locations and apply filters.
  • Use the map shortcode to embed the map anywhere.

Need assistance? Submit a support ticket and we’ll guide you.

The Google Map here illustrates a normal 2D roadmap with overlays bound to certain latitude/longitude coordinates. The WP MAPS PRO wordpress plugin allows you to customize the overlays with options like border color, border style, overlay width, overlay height, font size etc.

How to apply overlays on a map

Step 1 Go to Add or Edit Map and scroll down to ‘Overlays Settings’ section.

Step 2 Enable or tick ‘Apply Overlays’ tab as below.

Display Overlay Setting

Check the option to activate overlay

  • Overlay Border Color: Select a border color for overlay.
  • Overlay Width: Insert overlay width.
  • Overlay Height: Set height of overlay.
  • Overlay Font Size: Add desired font size.
  • Overlay Border Width: Set a border width.
  • Overlay Border Style: Choose a style from available options.

Step 3 Click save map and open it in browser.
You’ll see overlay lines on a map.

How to apply an overlay layer on a map WP Maps Pro

Before displaying the search Form, category sorting filter, and Radius filter first you need to display listings below the map. Previously we have seen tutorial Display listings below the map. Refer to How to Display listings below the map.

In this tutorial, we will use a search form, category sorting filter, and Radius filter.

Search Form

Search Form is used to search any location and display it on a map.

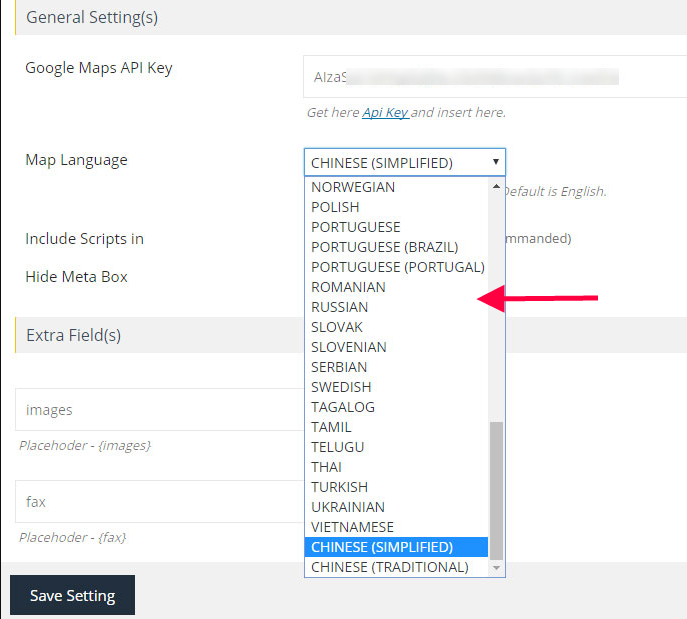
Step 1 Enable the Display Search Form option in the Listing Settings section as below.

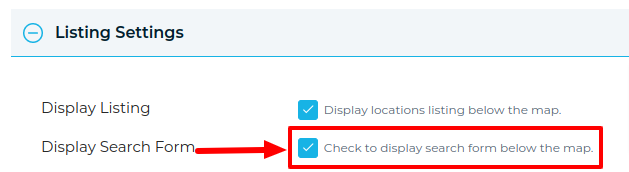
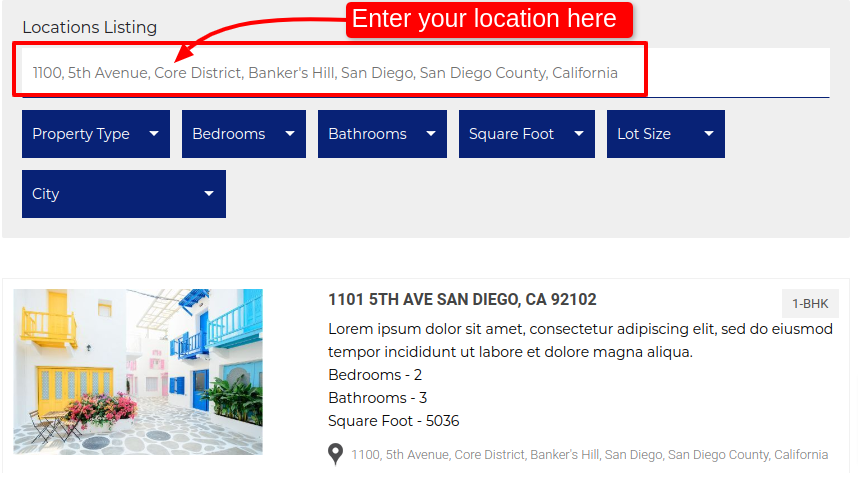
then you’ll see the search field below the map on the front end.

Step 2 Enter a search location into the search box. Search results will appear automatically in listing the location’s Filters as you type.

Category Sorting Filter

Sort locations by title, category name, or address, alphabetically, in both ascending and descending order.

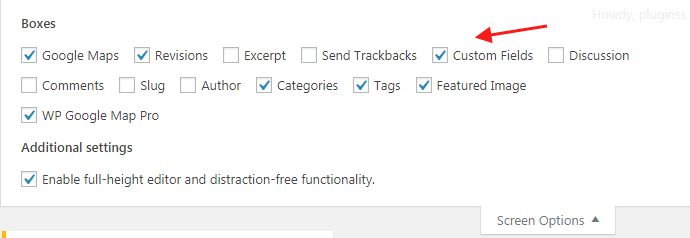
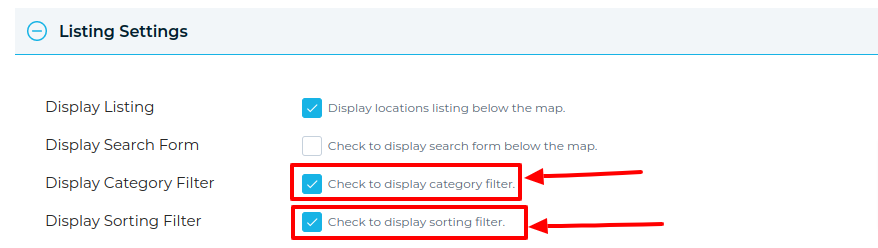
Step 1 In the Listing Settings section enable the Display Category Filter option and also enable the Display Sorting Filter tab.

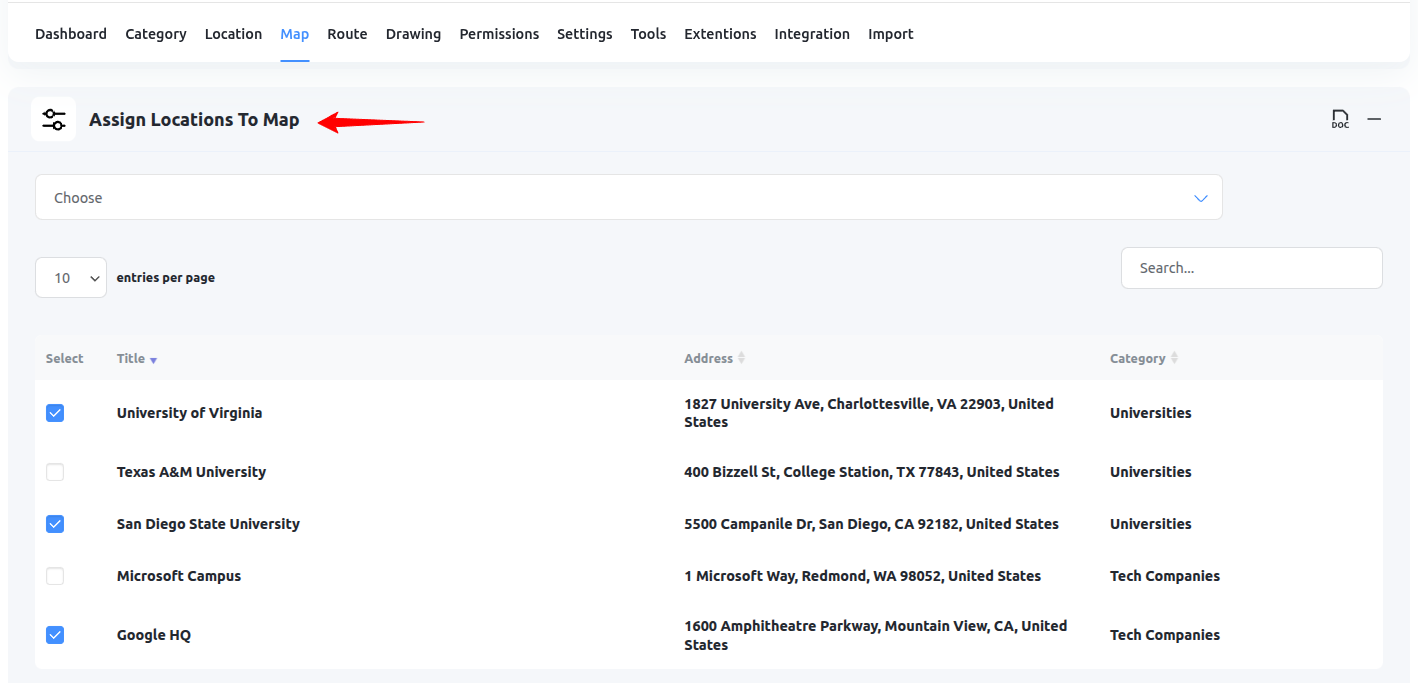
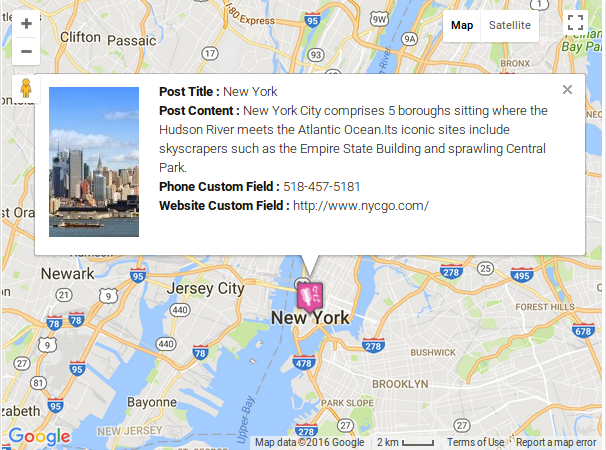
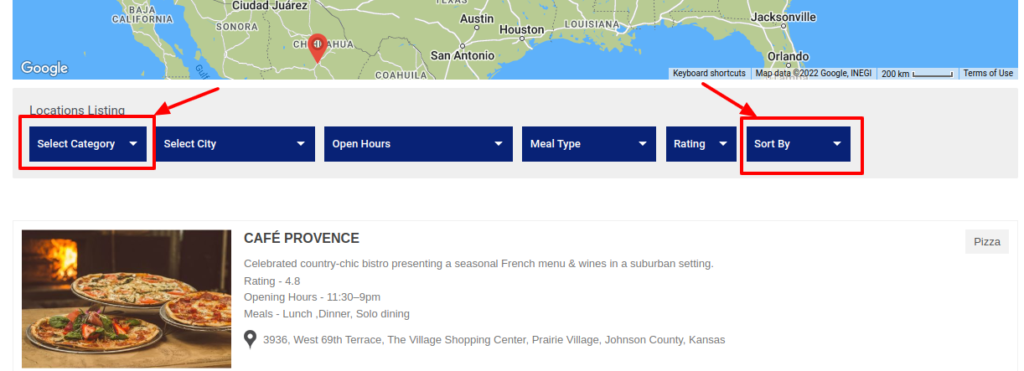
Step 2 Move to the browser and select any category and sorting filter from the listing. You’ll see a location display according to your category sorting. (See image)

Radius Filter

Mapping for single points on a map and filtering within a specific mile radius.

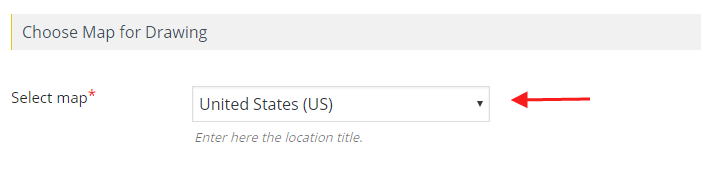
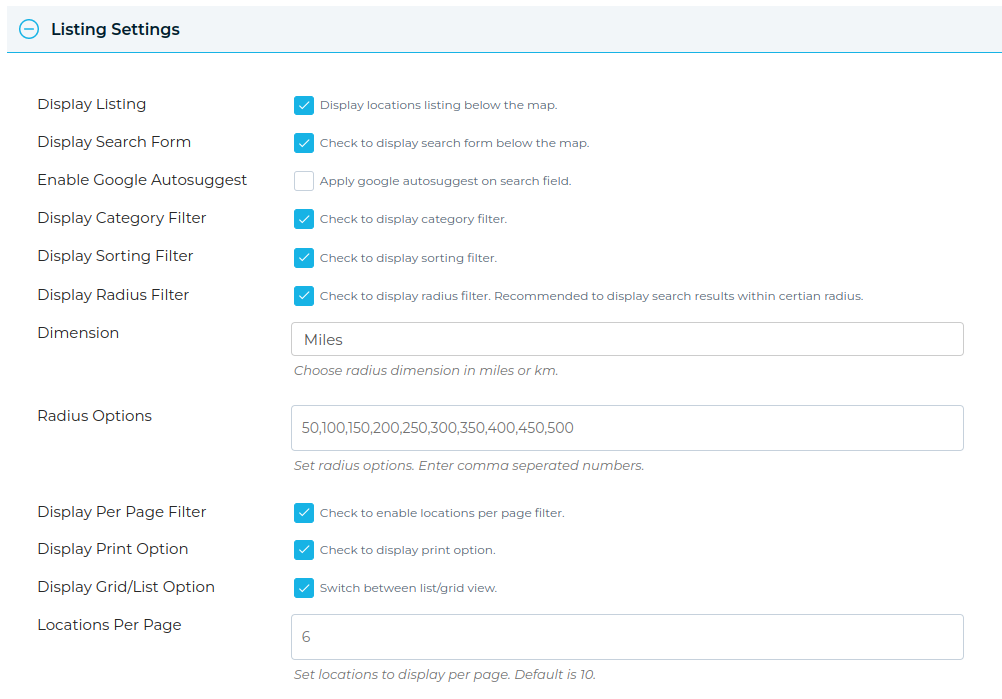
Step 1 Enable the Display Radius Filter option in the Listing Settings section.

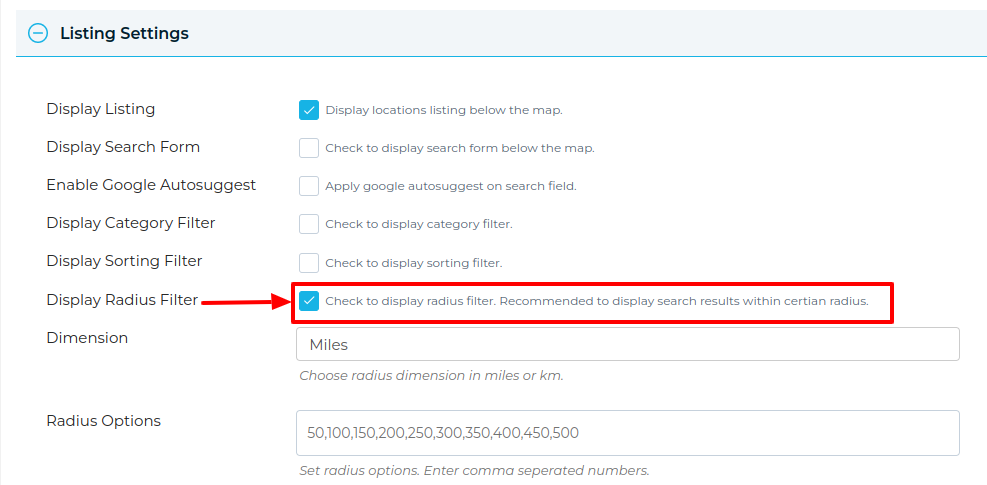
Dimension: Dimension is the unit of distance, you can choose kilometers, or miles. The calculator will immediately calculate with the selected distance unit.
Radius Options: You can use this tool to find the radius around a point on the map.

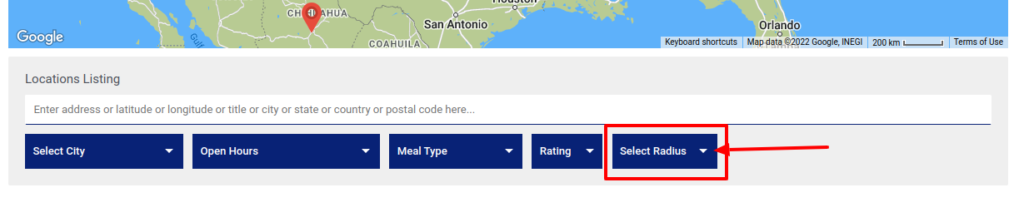
Step 2 You can create as many radius using the comma(,). Then you’ll see the radius dropdown below the map on the front end.

Miscellaneous Options

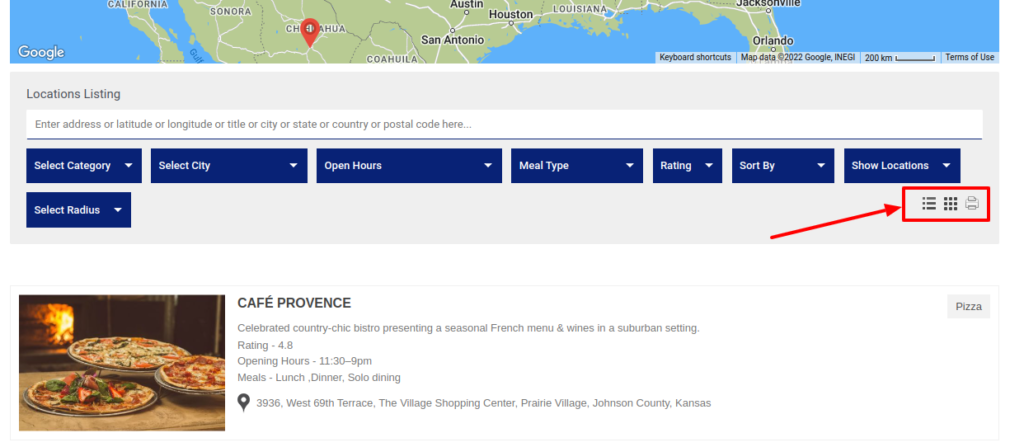
You can display sorting, switch between grid & list view, and print listing options as well. If you tick all of them, it will give you an all-in-one solution.

then you’ll see awesome locations listing, with filters, below the map on the front end.

Want to make your map more visually engaging? WP Maps Pro lets you assign unique icons to each marker category. You can choose from pre-designed icons, A–Z alphabets, numbers 1–9, or upload your own image or SVG. You can even resize marker icons dynamically using our built-in filter!


Step 1: Choose an Icon While Creating or Editing a Marker Category

Go to WP MAPS PRO → Add Marker Category, and click the Choose button next to the icon field.

Add Marker Category in WP Maps Pro

A popup will appear with multiple tabs to select your marker:


Option 1: Upload from Computer

  1. Click on the From Computer tab.
  2. Select any image or SVG from your system — it will be added to the Media Library.
  3. Switch to the Media Library tab and click Show for the image you want to use.
  4. (Optional) Click Edit Image to adjust size.
  5. Click Insert Into Post.

Choose Marker Category Icon


Option 2: Use Image from URL

  1. Click on the From URL tab.
  2. Paste the direct URL of the marker icon.
  3. Click Insert Into Post to use it.

From URL Marker


Option 3: Select from Media Library

All images you upload will also be available in the Media Library tab. Click Show and then Insert Into Post to select.


Option 4: Choose from Predefined Icons

Switch to the Choose Icons tab to explore a diverse collection of ready-to-use marker icons. These are perfect for quickly assigning visual identity to your categories without uploading custom images.

  • Alphabet Icons (A–Z): Assign letters to your marker categories to represent store names, service types, or regions — fully customizable to match your brand.

    A to Z Marker Category Icons

  • Number Icons (1–9): Use numbered markers to indicate steps, locations in a sequence, or priority-based points of interest.

    1 to 25 Marker Categories icons

  • Pre-made Location-Specific Icons: We’ve designed a variety of unique icons tailored for specific industries and use cases — ideal for real estate, restaurants, services, and more.

    Unique Marker Category Icons Collection


📐 Bonus: Resize Marker Dynamically by Device

You can use our developer filter wpgmp_marker_size to change marker size based on screen size (mobile, tablet, desktop).

Example: Display smaller markers on mobile and larger ones on desktops for better UX. This is especially useful with SVG icons!


📌 Final Step

After selecting or uploading your icon, click Save Marker Category. Your custom marker icon will now appear on all locations assigned to this category.

Need help with icons or filters? Submit a support ticket — we’ll assist you quickly!

If you are using WP Maps Pro as your main plugin for viewing and creating maps, it is quite straightforward to change the language on your Google Maps. To do this, go to Settings within the plugin and the click map language tab. Here you can select from a list of languages, which will then be applied to all your maps.

To change the language of your map you should do the following steps :

Step 1 To change the language of Google Maps, navigate to the Settings page.

Step 2 To change the language of your Google Maps, locate the ‘Map Language’ tab and select your desired language from the dropdown list.

how-to-change-language-in-a-map

Step 3 Click on the Save Setting button to confirm your choice.

This WP MAPS PRO plugin allows displaying the post’s custom field information in the infowindow message easily.  Custom Fields can be associated with Pages, Posts, or custom post types. You can create unlimited custom fields and display them in the info window message.

Manage Custom Fields

Step 1 WordPress allows adding custom fields by default. If this is not visible on your edit post page then you need to use the Screen Options at the top of the posts/pages and enable custom fields.

How to show post info window using custom field Wpmapspro

After that, the custom fields meta box appears at the bottom of the post editor screen.

Custom Field Box Wpmapspro

Step 2 Here, you can add custom fields. All you need to do is give it a name and value.

Add Custom Field Wpmapspro


Show Custom Fields

First, make sure you have assigned posts to your maps.

Step 1  Go to Add or Edit Map page and scroll down to Infowindow Message for Posts and use custom field placeholders.

Follow {%custom_field_name_here%} format to display custom fields in the infowindow content. e.g Use {%phone%}, {%website%} placeholders to display phone and website custom fields values.

Infowindow Message Post Wpmapspro

Step 4 Click on Save Map.

Below is the expected output which shows custom field values in infowindow message.

How to show post info window using custom field Wpmapspro

You can create multiple shapes and display them on the map. You can Highlight areas on google maps with your own colors and display custom information on click. The following shapes are available: lines, polygons, circles and rectangles. You can also configure your shapes so that users can edit or drag them.

How to Draw in Google Map

Step 1 Go to Drawing page and select your map.

How to Draw in google maps Wpmapspro

Step 2 First Choose the shape you want to draw from top middle of the map.

How to Draw in google maps

Step 3 Then click on the map and drag mouse to create a shape. You can create any number of shapes on the map.

Map Display Wpmapspro

Step 4 To modify a shapes properties, click on the shape and you’ll see options on the right side.

Shape properties

  • Stroke Color: A stroke is an outline. It describes the edges of a shape or it can be a simple line.
  • Fill Color : A fill is a solid shape, often contained or surrounded by a stroke. It is the surface area of a shape.
  • Stroke Weight : Sets the thickness of all lines and outlines drawn by stroke.
  • Stroke Opacity : The stroke-opacity attribute specifies the opacity of the outline on the current shape.
  • Fill Opacity :This attribute specifies the opacity of the color.

How to Draw in google maps

Step 5 Then Click Save Drawing.

If you have a huge collection of location information to display on maps and it’s time-consuming to enter them one by one. Our import tool enables you to import locations in bulk, and you can then assign those locations to any number of maps.

CSV is a simple file format used to store tabular data, such as a spreadsheet or database. CSV stands for comma-separated-values.

Import CSV File

Step 1 Go to the Import Locations page from WP MAPS PRO Plugin.

Step 2 Then click on the Choose a File button and valid the CSV file.

Step 3 Then click on the Continue button.

Step 4 You will see the Column Mapping section. Here you will see all your CSV file Fields where you have to select fields according to the CSV Field like a screenshot below.

Note: Leave the ID field empty if you’re adding new records. The ID field is used to update existing locations.


Step 5 Now click on Manage Locations. Here you will see all your added / update CSV file locations.

Install Plugin Now!

WP MAPS PRO helps you create dynamic, customizable maps using Google Maps or Leaflet — no coding required. Includes free updates, premium support, and a 30-day money-back guarantee.