The Gravity Form Submissions on Google Maps add-on lets you capture user entries via Gravity Forms and display them as interactive markers on Google Maps using WP MAPS PRO. This is perfect for showing user-submitted locations, customer addresses, or event entries directly on your site’s map.
Requirements
– Gravity Forms plugin installed & activated
– WP MAPS PRO plugin installed & activated
If not installed, please follow the setup guide first.
Steps to Setup Gravity Form Submissions on Google Maps
Step 1: Create or edit a Gravity Form from Forms → New Form.
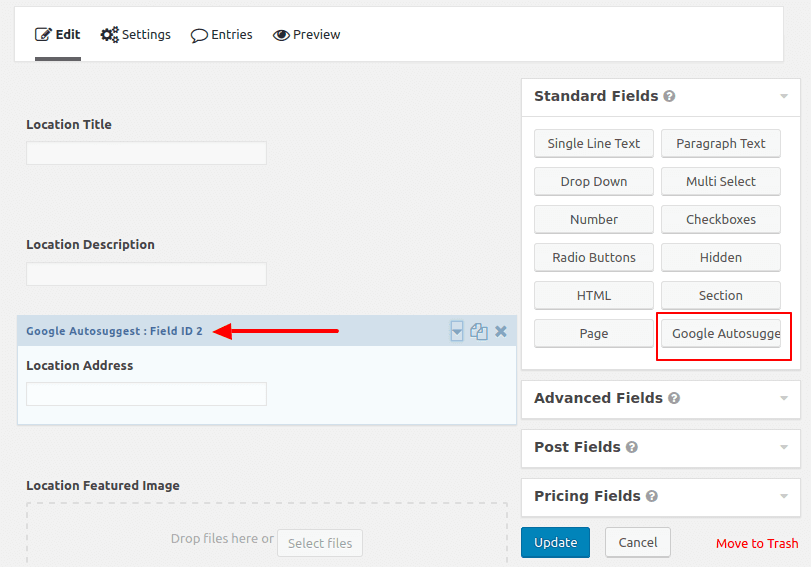
Step 2: Add the Google Autosuggest field (provided by WP MAPS PRO) from the Standard Fields section so users can enter their location.
Step 3: Save/Update your form.
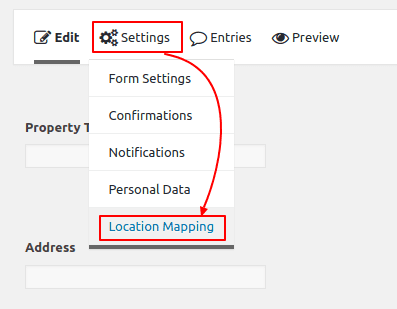
Step 4: Go to Form Settings → Location Mapping and enable mapping for this form.
Step 5: In the mapping screen, enable “Enable Mapping” and connect form fields (like name, address, phone) to map fields (like title, content).

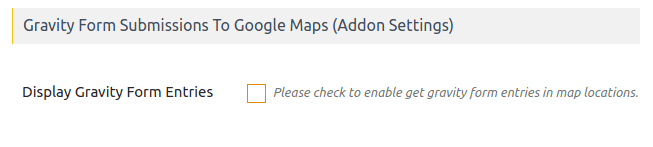
Step 6: Go to WP MAPS PRO → Add/Edit Map. Find “Gravity Form Submissions To Google Maps (Addon Settings)” and enable it.
Step 7: Select your Gravity Form from the dropdown list to display its entries on the map.

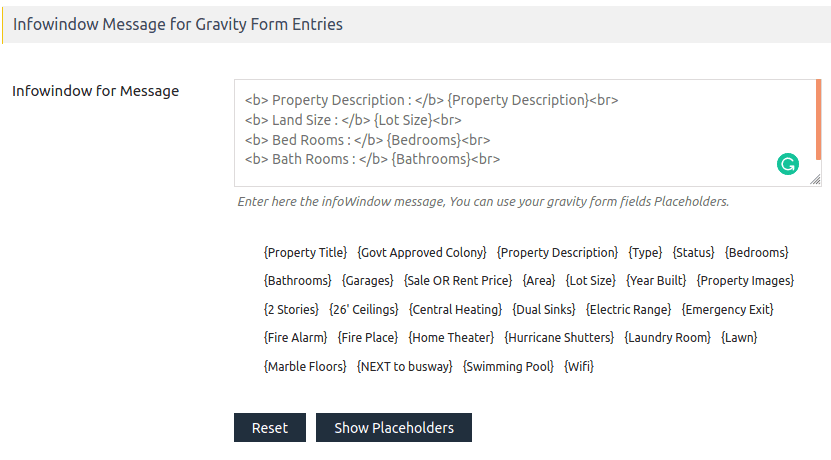
Step 8: Customize your Info Window design by using placeholders in “Infowindow Message for Gravity Form Entries.”
Step 9: Save the map. Copy the generated shortcode and place it in any page/post.
Step 10: When users submit the Gravity Form, their entries will instantly appear as markers on your Google Map 🎉.
👉 See a working demo here.
Need Help?
For any issues, please reach out via our support center.
Related Tutorials:
- How to display WordPress users on Google Maps
- Display WordPress User Roles and Locations on Maps
- How to set custom colors on Google Maps skin
- Display Custom MySQL Data on Google Maps
- Display Json data on Google Maps