Introduction:
In this tutorial, we will see the custom controls in Google Map API.
You may develop your own controls to manage user interaction in addition to altering the design and location of existing API components. In contrast to overlays, which move with the underlying map, controls are immobile widgets that float on top of a map at absolute coordinates. A control, in its most basic form, is a <div> element that has an absolute location on the map, shows some UI to the user, and handles interaction with either the user or the map, often via an event handler.
A few guidelines are required to develop your own custom control. The following suggestions, however, can serve as best practices:
- Define the CSS that will be used to show the control element(s).
- Handle user or map interaction using event handlers for map property changes or user events (for example, ‘click’ events).
- Make a <div> element to contain the control and add it to the Map’s controls attribute.
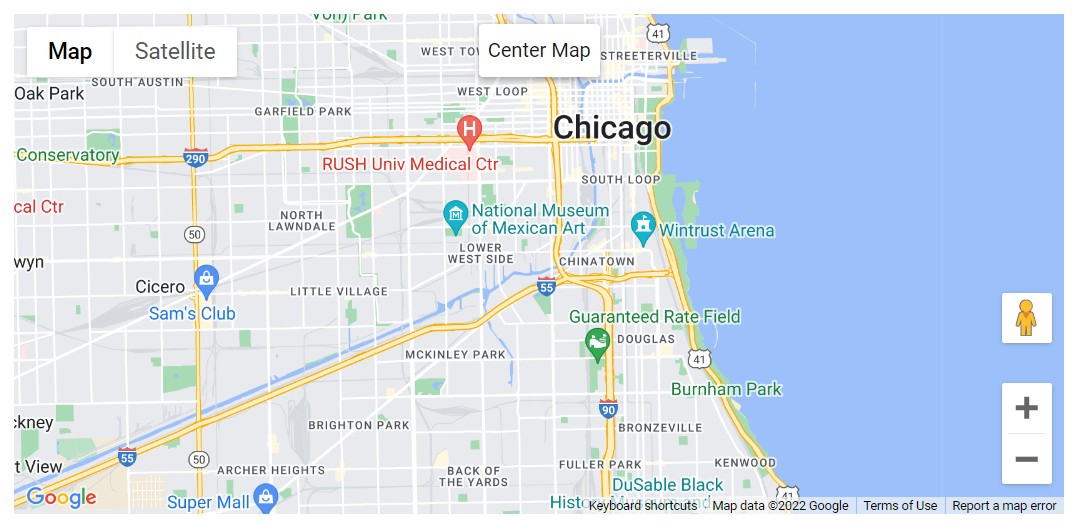
This example makes a map with a “Center Map” button that pans the map to centre it on Chicago.
Code:
let map: google.maps.Map;

const chicago = { lat: 41.85, lng: -87.65 };

/**
 * Creates a control that recenters the map on Chicago.
 */
function createCenterControl(map) {
  const controlButton = document.createElement("button");

  // Set CSS for the control.
  controlButton.style.backgroundColor = "#fff";
  controlButton.style.border = "2px solid #fff";
  controlButton.style.borderRadius = "3px";
  controlButton.style.boxShadow = "0 2px 6px rgba(0,0,0,.3)";
  controlButton.style.color = "rgb(25,25,25)";
  controlButton.style.cursor = "pointer";
  controlButton.style.fontFamily = "Roboto,Arial,sans-serif";
  controlButton.style.fontSize = "16px";
  controlButton.style.lineHeight = "38px";
  controlButton.style.margin = "8px 0 22px";
  controlButton.style.padding = "0 5px";
  controlButton.style.textAlign = "center";

  controlButton.textContent = "Center Map";
  controlButton.title = "Click to recenter the map";
  controlButton.type = "button";

  // Setup the click event listeners: simply set the map to Chicago.
  controlButton.addEventListener("click", () => {
    map.setCenter(chicago);
  });

  return controlButton;
}

function initMap() {
  map = new google.maps.Map(document.getElementById("map") as HTMLElement, {
    zoom: 12,
    center: chicago,
  });

  // Create the DIV to hold the control.
  const centerControlDiv = document.createElement("div");
  // Create the control.
  const centerControl = createCenterControl(map);
  // Append the control to the DIV.
  centerControlDiv.appendChild(centerControl);

  map.controls[google.maps.ControlPosition.TOP_CENTER].push(centerControlDiv);
}

declare global {
  interface Window {
    initMap: () => void;
  }
}
window.initMap = initMap;
export {};
Explanation:
- Firstly, the longitude and the latitude are set to variable Chicago.
const chicago = { lat: 41.85, lng: -87.65 };
- Next, the function names createcentreControl is created and defined with the required properties of the map.
function createCenterControl(map) {
  const controlButton = document.createElement("button");

  // Set CSS for the control.
  controlButton.style.backgroundColor = "#fff";
  controlButton.style.border = "2px solid #fff";
  controlButton.style.borderRadius = "3px";
  controlButton.style.boxShadow = "0 2px 6px rgba(0,0,0,.3)";
  controlButton.style.color = "rgb(25,25,25)";
  controlButton.style.cursor = "pointer";
  controlButton.style.fontFamily = "Roboto,Arial,sans-serif";
  controlButton.style.fontSize = "16px";
  controlButton.style.lineHeight = "38px";
  controlButton.style.margin = "8px 0 22px";
  controlButton.style.padding = "0 5px";
  controlButton.style.textAlign = "center";

  controlButton.textContent = "Center Map";
  controlButton.title = "Click to recenter the map";
  controlButton.type = "button";
  // Setup the click event listeners: simply set the map to Chicago.
  controlButton.addEventListener("click", () => {
    map.setCenter(chicago);
  });

  return controlButton;
}
- Createcentralcontrol is a function that creates a control which in turn recenters the map to Chicago.
- The setting of the click event listeners is done by simply setting it to the map of Chicago.
controlButton.addEventListener("click", () => {
    map.setCenter(chicago);
  });
- The function initMap() is created and it consists of the map properties.
- The line, “map = new google.maps.Map(document.getElementById(“map”)”; creates a new map inside the <div> element with the help of the mentioned id which is ‘map’ as an HTMLElement.
map = new google.maps.Map(document.getElementById("map") as HTMLElement,
- The ‘centre’ attribute defines where the map should be centered with the help of the latitude and longitude coordinates.
center: chicago,
- The ‘zoom’ attribute specifies the map’s zoom level.
zoom: 12,
- Next, the DIV is created to hold on to the control.
const centerControlDiv = document.createElement("div");
- Followed by the DIV, the control is created.
- Next, the control is appended to the created DIV.
centerControlDiv.appendChild(centerControl);
- Map controls are set to TOP_CENTER position.
map.controls[google.maps.ControlPosition.TOP_CENTER].push(centerControlDiv);
- Lastly, the function is called and executed.
window.initMap = initMap;
Conclusion:
In this tutorial, we learned how to use custom controls in Google Maps. We also saw an example that created a map with a “Center Map” button, which will pan the map to be centered on Chicago.