In WP Maps Pro, the Infowindow is the popup that appears when a user clicks a marker. With full HTML support and dynamic placeholders, you can design infowindows that match your brand and deliver key information visually.
🛠️ Where to Customize Infowindow
- Go to WP MAPS PRO → Manage Maps.
- Edit the desired map.
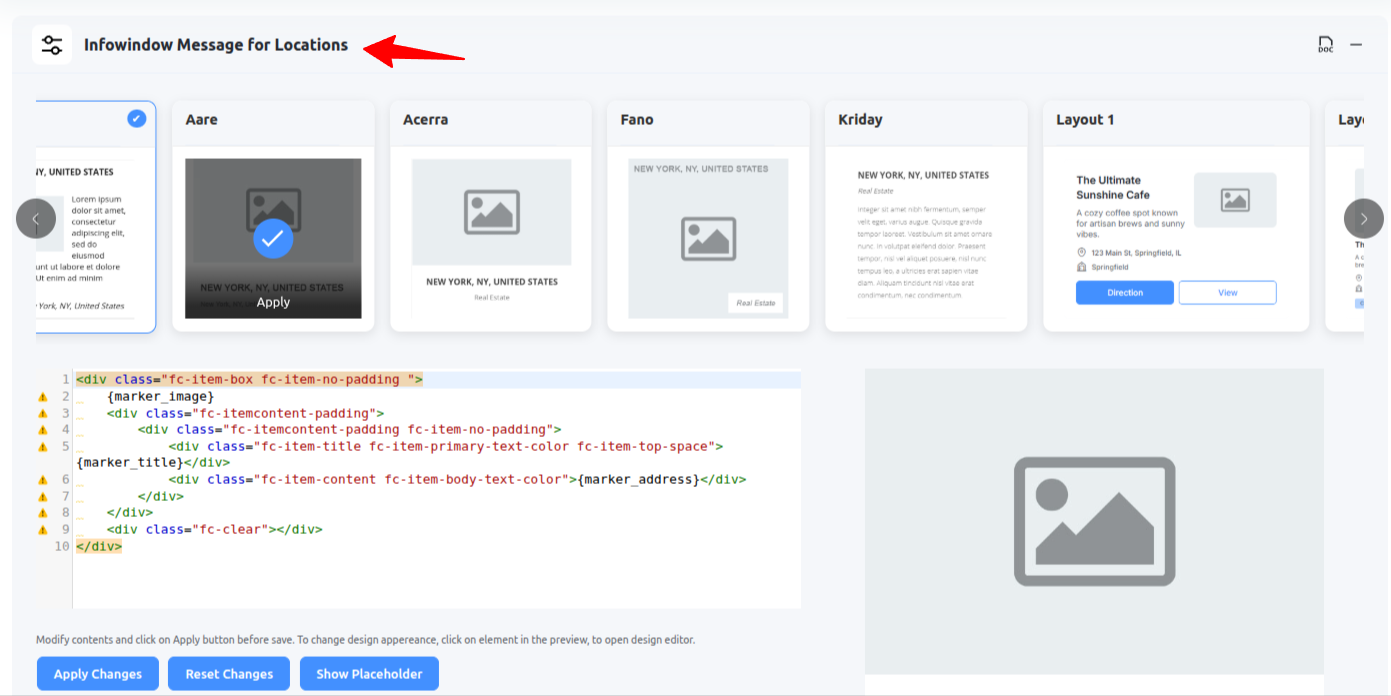
- Scroll to the Infowindow Message for Locations section.

- Select a layout template — you can choose from multiple pre-built options.
- Customize the content using the HTML editor provided.
- Click on Apply Changes button to preview the changes.
🔧 Use HTML + Placeholders
You can add anything using HTML — text, images, links, buttons, videos, or tables.
📌 Available Placeholders
Use these placeholders to dynamically populate your infowindow content:
{marker_id},{marker_title},{marker_image}{marker_address},{marker_message},{marker_category}{marker_icon},{marker_latitude},{marker_longitude}{marker_city},{marker_state},{marker_country},{marker_postal_code}{marker_zoom},{get_directions_link}
Conditional Logic:
You can even use conditional tags like:
{#if marker_city} <p>City: {marker_city}</p> {/if}🧩 Show Extra Information in Infowindow
In addition to the core details (like title, address, or image), you can display unlimited custom data in the infowindow using Extra Fields.
Here’s how to do it:
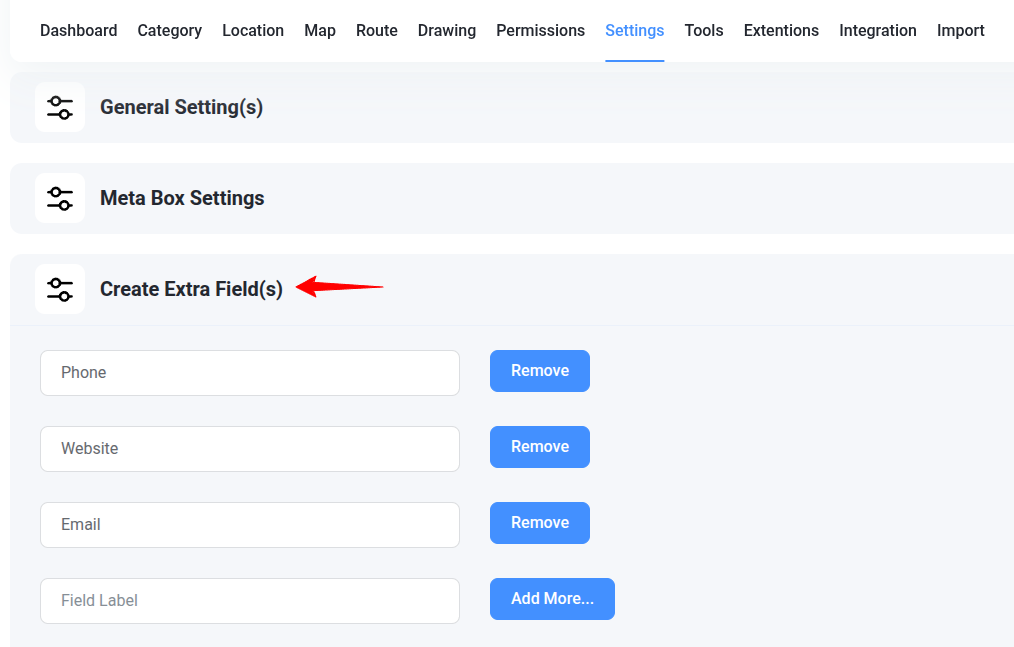
- Go to WP MAPS PRO → Settings and scroll to the Create Extra Fields section.

- Create a new field — for example, Website, Phone, or Email.
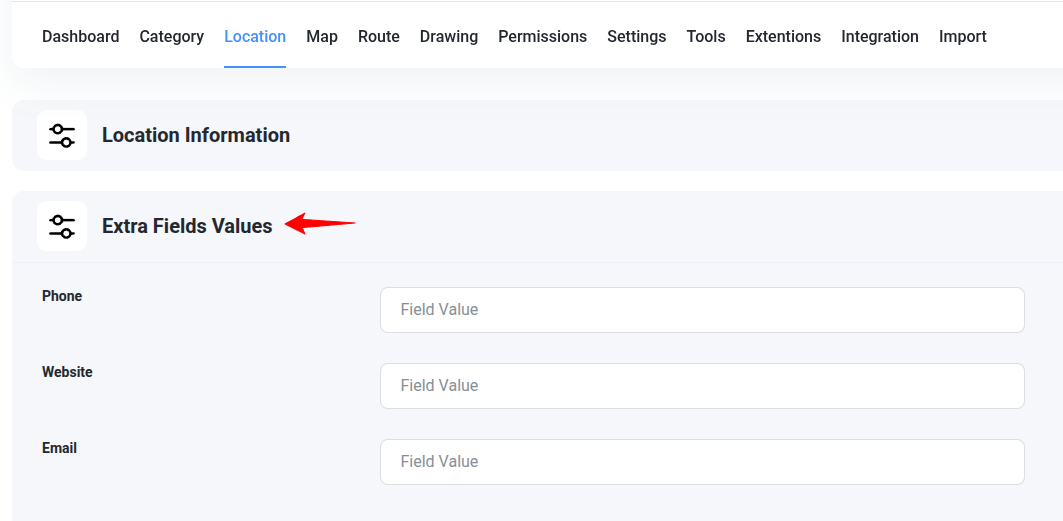
- Next, edit your location and assign values to those extra fields.

- Finally, use the field’s placeholder in the infowindow editor — for example,
{website}, {phone}, {email}.
You can also wrap extra fields in conditional logic to prevent displaying empty values:
{#if website}
  <a href="{website}" target="_blank">Visit Website</a>
{/if}
This approach helps you keep infowindows clean, dynamic, and personalized for each location.
Need help? Submit a support ticket — we’d love to help you style your infowindows perfectly!