An ApiTargetBlockedMapError occurs when an API target is blocked. This can happen for some reasons, such as when the target is behind a firewall or when the network is down. When this happens, the API will return an error message, and the application will not continue.
You’re not alone if you’ve ever encountered the “ApiTargetBlocked MapError” when using the Google Maps API. This error can be frustrating and confusing. There are a few fixes to can implement. You can know what causes the ApiTargetBlocked MapError and how to fix it.
What Causes An ApitargetblockedMaperror?
The ApiTargetBlocked MapError occurs when an API target is blocked. This can happen for some reasons, including:
- The API target is no longer available.
- The API target has been deleted.
- The API target has been moved to a different location.
- Your account does not have access to the API target.
If you encounter this error, check the status of the API target and ensure that your account has the appropriate permissions.
Steps to Resolve an ApiTargetBlockedMapError
If you see the error message ApiTargetBlockedMapError, this means that the Google Maps API has been disabled for your website. Enable the API in the Google Developer Console to resolve this.
1. Go to the Google Cloud Platform Console https://console.developers.google.com/

The Google Developer Console is a powerful tool that allows you to manage your Google API credentials, set up new projects, and track your API usage.
2. Select Your Project.

In the GCP Console, select the project drop-down menu and select the project you want to enable the API.
When you create a project in the Google API Console, select the project for which you want to enable the API. To do this, click on the project name in the project drop-down list. If you’ve never developed a project, click “Create a new project…”.
3. In The Sidebar On The Left, Select Apis & Service>Dashboard

4. On The Dashboard Page, Select Enable Apis And Services.

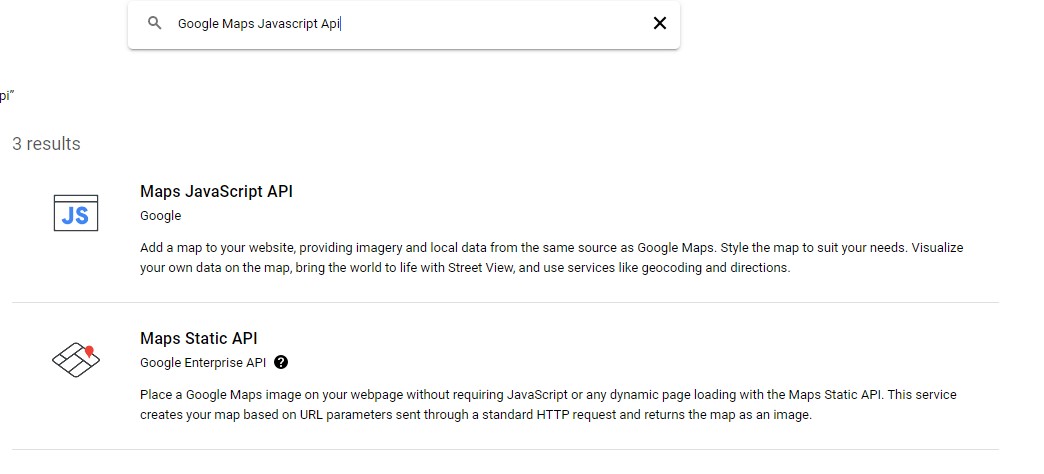
5. Search For “Google Maps Javascript Api” And Select It From The Results List.


6. Select Enable To Enable The Api For Your Project.

Select the blue “Enable API” button on the page’s top to save your changes and enable the API. This will allow you to access the API and make calls to it.
