Filter by Topics

WP MAPS PRO gives you the flexibility to enrich your map locations with custom data like phone numbers, websites, emails, or any other field beyond the default ones. These extra fields can be easily added to the infowindow using dynamic placeholders.
🛠 Step-by-Step Guide
🔧 Step 1: Create Extra Fields
Go to WP MAPS PRO → Plugin Settings and scroll down to the Create Extra Fields section.
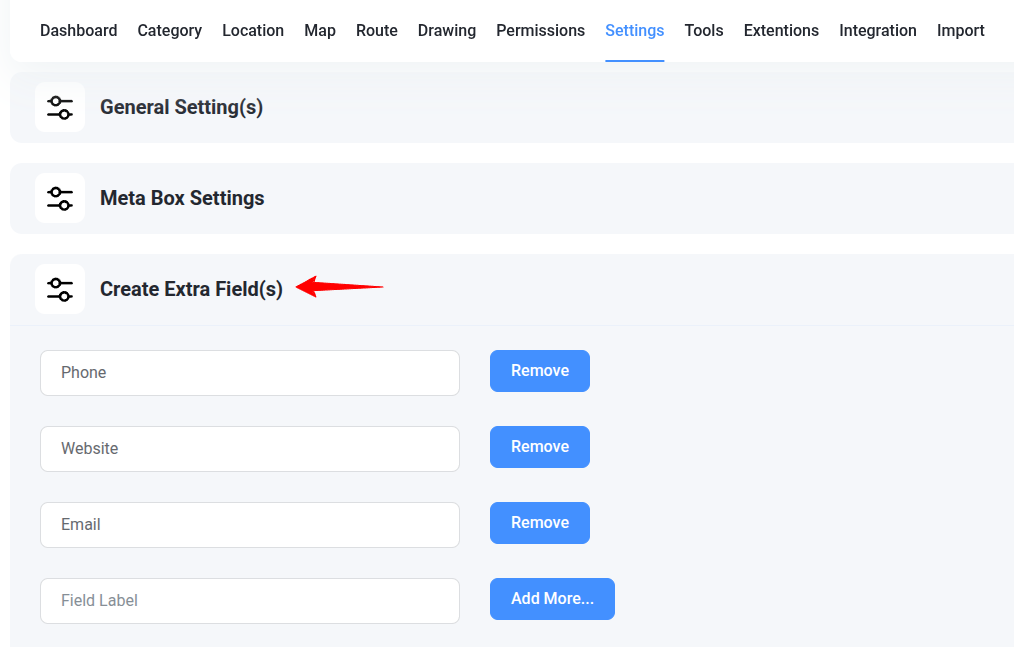
Add fields like Phone, Website, or any custom label you want, then click Save Settings.
📍 Step 2: Assign Extra Field Values
Go to Add or Edit Location and scroll to the Extra Fields Values section.
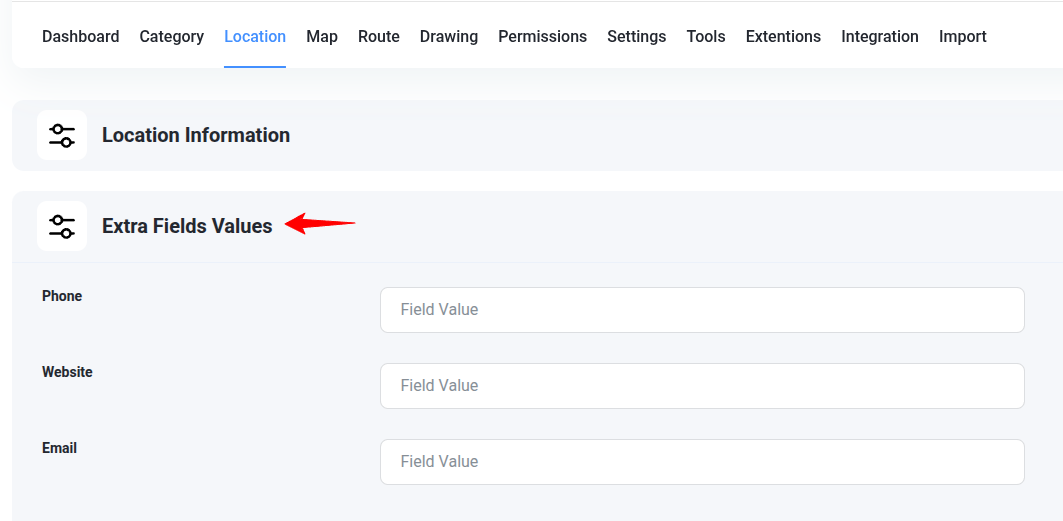
Enter the values for each extra field (like phone number or website URL) and click Save Location.
💬 Step 3: Display Extra Fields in Infowindow
Now go to Add or Edit Map, scroll down to Infowindow Message for Locations.
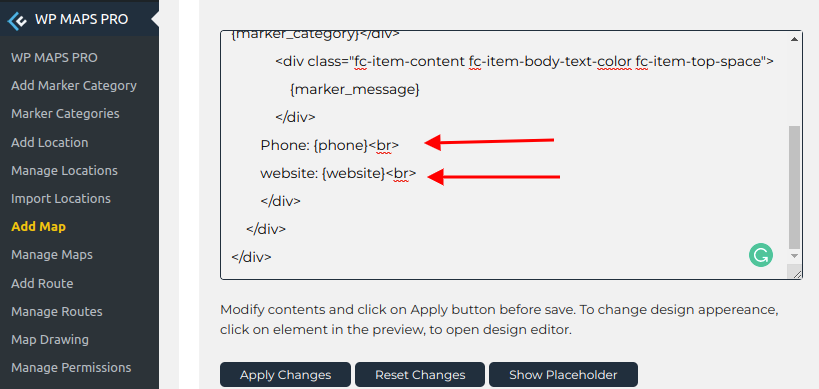
- Use placeholders like
{phone},{website},{email}to insert your custom field values. - Click the Show Placeholder button to view all available placeholders.
You can add links, bold text, images, and even use conditional logic like:
{#if phone}
Call Us
{/if}
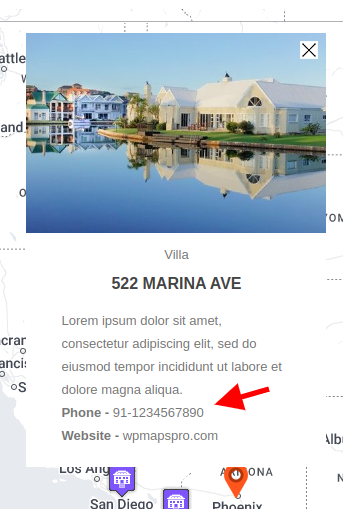
✅ Step 4: Save and Preview
Click Save Map. Visit your frontend page where the map shortcode is added. You’ll now see your extra field values in the Infowindow like this:
📌 Summary
- Create unlimited custom fields for locations.
- Display them using placeholders like
{email},{website}, etc. - Fully supports HTML and conditional display logic.
Want to display these in the listing section too? Check our tutorial: How to Customize Location Listings.
Need help? Submit a support ticket.