Filter by Topics

Marker categories in WP Maps Pro help you group similar locations and assign custom marker icons — including SVG support — to enhance your map’s clarity and visual appeal. They also enable category-based filtering so visitors can view only what they’re interested in.
Before proceeding, make sure you’ve already created your map and chosen a map provider (Google Maps or OpenStreetMap).
🎯 Step-by-Step: Add a Marker Category
Step 1: Go to WP MAPS PRO → Add Marker Category from the WordPress dashboard.
Step 2: Enter a name for your marker category. This will be used to group and filter markers on your map.
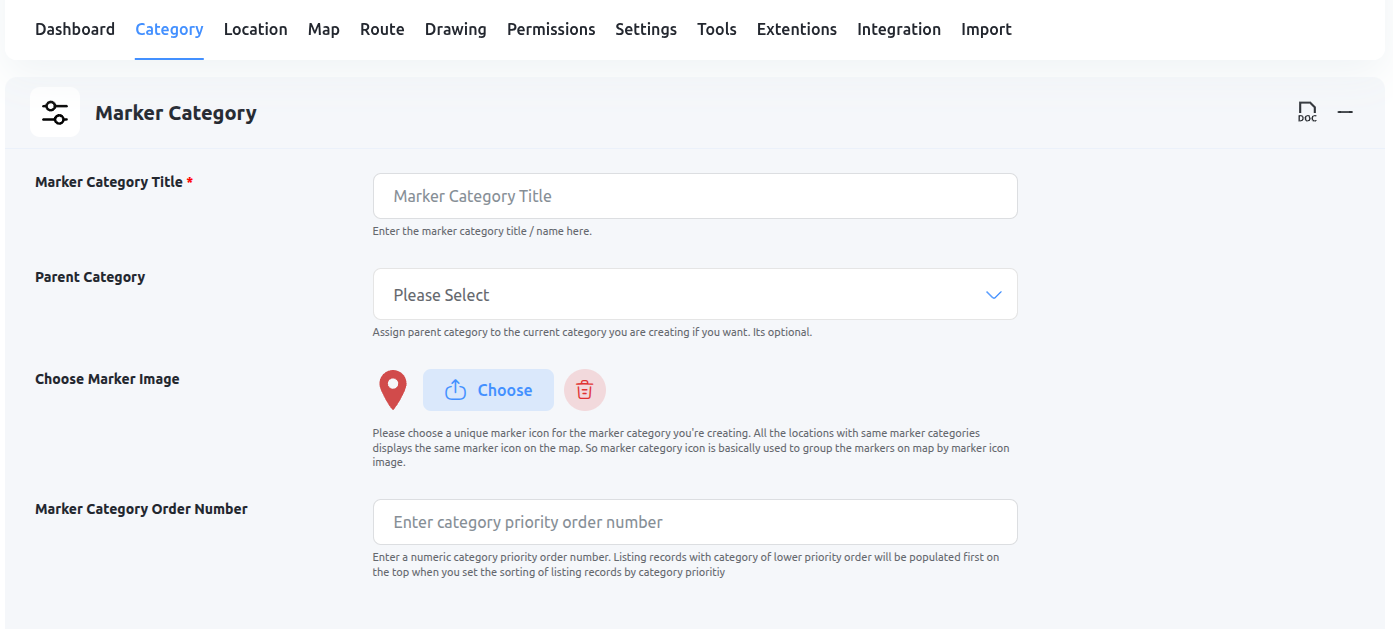
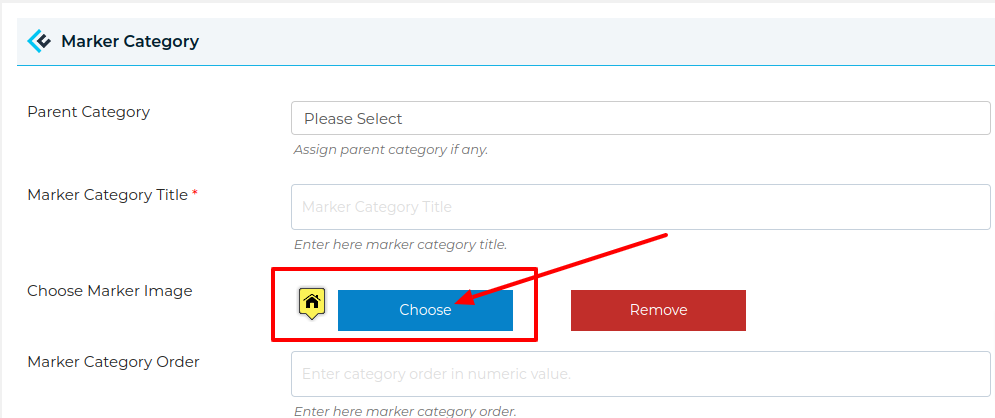
Step 3: Assign a marker icon to this category.
- Click the Choose button next to the icon field.
- In the popup, go to the Choose Icons tab.
- Select your desired icon (including SVG icons).
- Scroll down and click Insert Into Post.
![]()
💡 Tip: SVG icons allow for scalable, crisp, and fast-loading custom markers — perfect for modern map design.
Step 4: Click the Save Marker Category button.
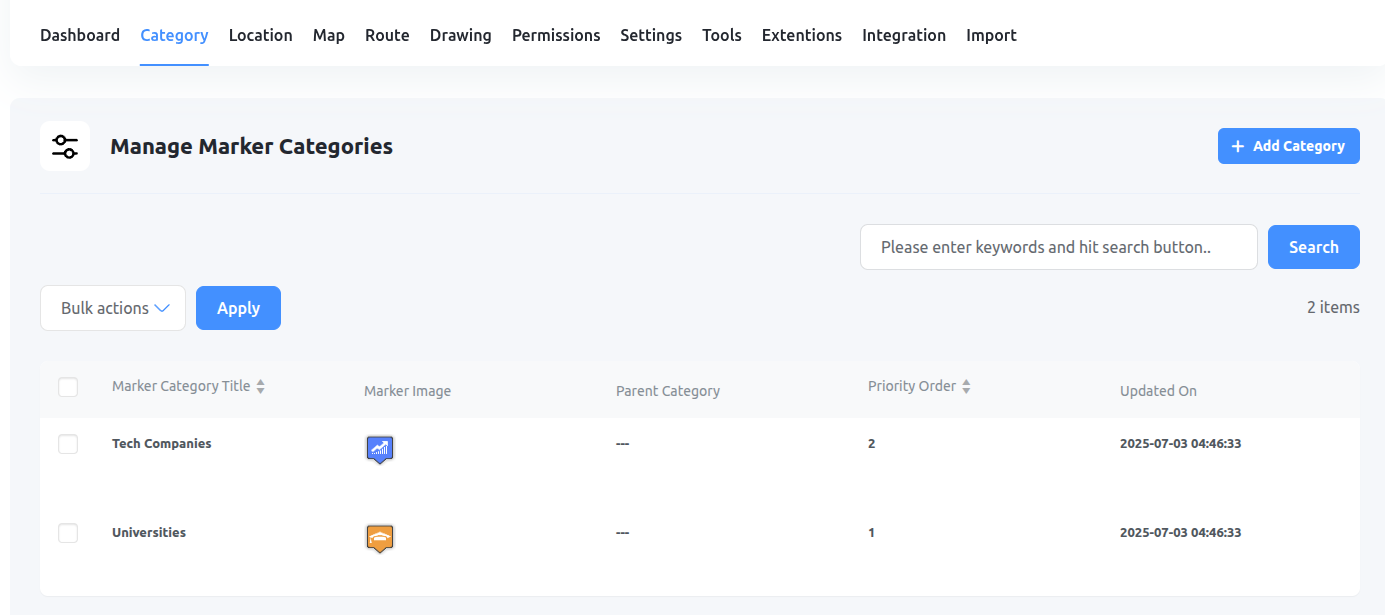
🔁 Repeat As Needed
You can create unlimited marker categories for different types of locations (e.g. Branches, Dealers, Events). Creating all categories in advance saves time when adding locations later.
🧭 What’s Next?
Now that you’ve created marker categories, the next step is to create and assign locations to your map. This tells the map where to place each marker and which category icon to use.
Need help? Submit a support ticket here — we’re here to assist!