Filter by Topics
The Frontend Submissions on Google Maps extension for WP MAPS PRO allows members or guests to submit new map locations (markers) directly from the frontend of your website. Users can enter their address details, and all submitted locations can be displayed on the map as well as in a submission listing table.
This is perfect for community-driven maps, event submissions, store locators, and more.
Requirements: Before starting, ensure you have installed and activated:
1. WP MAPS PRO Plugin
2. Frontend Submissions on Google Maps Add-on
If WP MAPS PRO is not yet installed, follow this guide to install and configure it.
1) Display the Frontend Submission Form
Use the shortcode
Step 1: Paste the shortcode where you want the form to appear.
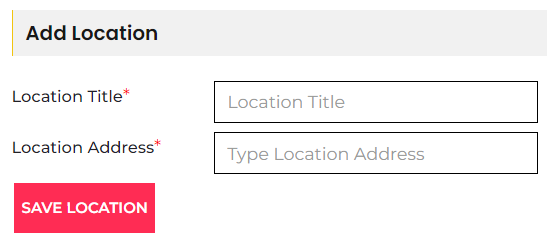
Step 2: Save the page and view it — the form will display like this:

2) Manage the Frontend Submission Form
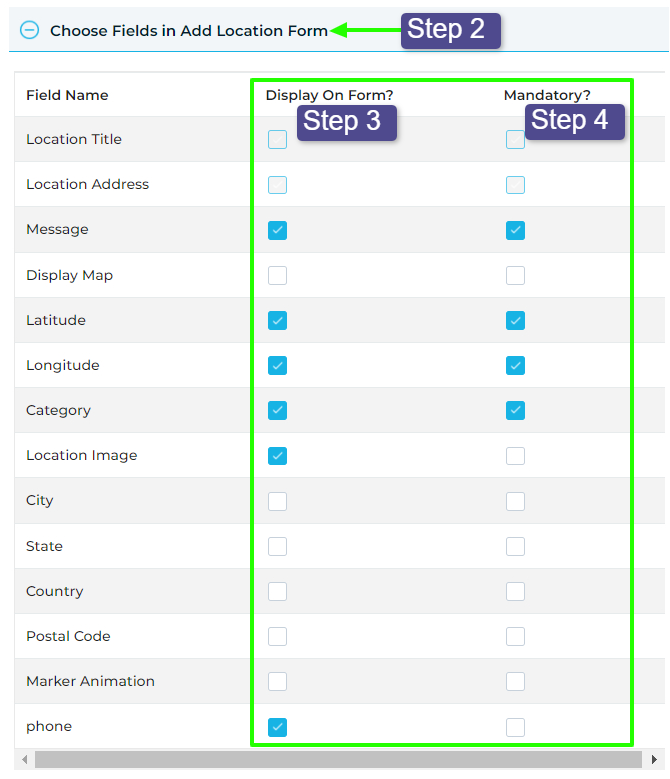
Step 1: Go to WP MAPS PRO → Frontend Form Submission.

Step 2: Open the “Choose Fields in Add Location Form” tab.
Step 3: Enable the checkboxes under “Display On Form” for the fields you want to show.
Step 4: Mark any required fields by checking “Mandatory?”.

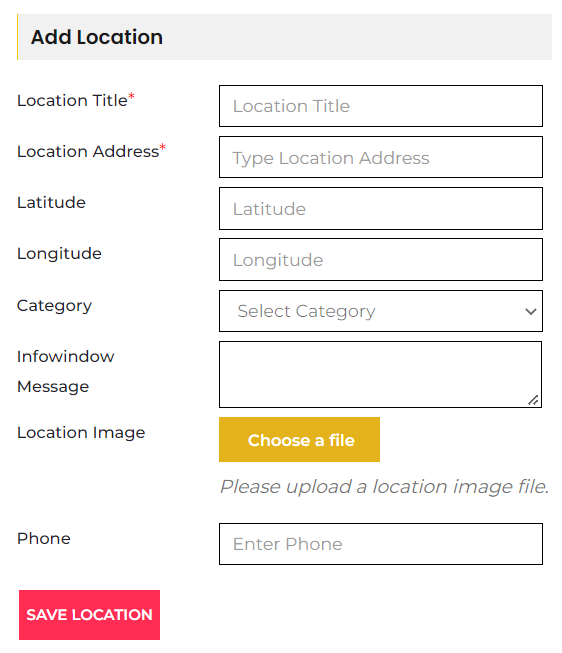
Step 5: Save your changes — the selected fields will now appear on the frontend form.

3) Add Extra Data Fields to the Form
You can include additional information fields if you’ve already created extra fields in WP MAPS PRO.
If you haven’t created extra fields yet, see this guide.
Once extra fields are created, follow the steps in section 2) Manage Frontend Submission Form to enable them.

4) Display Selected Categories on the Frontend Form
You can limit the category dropdown to specific categories.
If you haven’t created categories yet, follow this guide.
Step 1: Go to the “Select Category to Display on Frontend Form” tab.
Step 2: Choose categories from the dropdown and save.

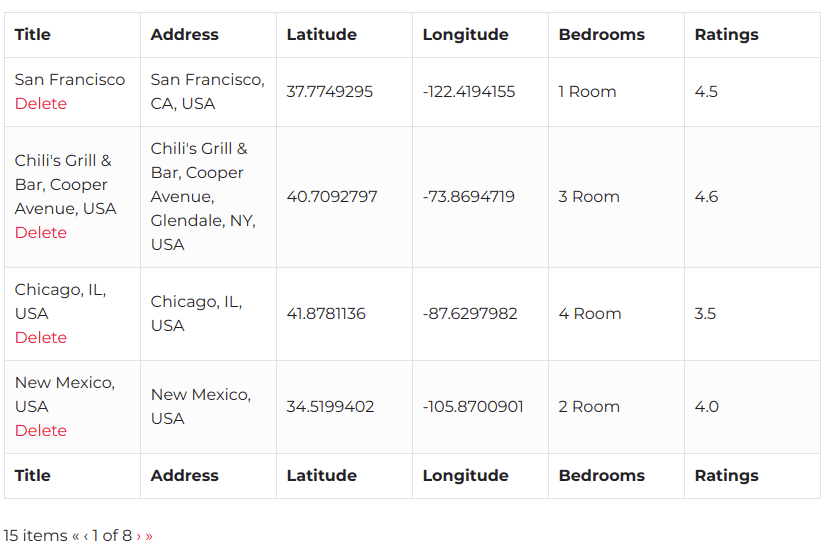
5) Display Submitted Locations in a Listing Table
Use the shortcode [fngmp_location_listing] to display a table of all locations submitted by the logged-in user.
Example demo: Click here.

6) Display Selected Extra Fields in the Listing Table
Step 1: Go to the “Display Extra Fields On Table” tab.
Step 2: Select the extra fields you want to show in the listing table.
Step 3: Save your settings — now only selected fields will appear in the table.

7) Display Import Location Form on the Frontend
Use the shortcode [fngmp_import_location] to display an import form where users can upload multiple locations from the frontend.
8) Manage Add-on Settings
From the Frontend Form Submissions settings page, you can:
- Control who can submit locations
- Control who can view submitted locations
- Control who can import locations
- Require users to log in before accessing submission or listing forms
- Add a custom message for non-logged-in users
Need Help?
If you have any questions or need assistance, please contact our support team.
