Filter by Topics

Creating a location allows you to place a marker pin on your map at a specific address. With WP Maps Pro, you can add unlimited locations and assign each one to a specific map and marker category. Here’s how to get started.
📍 Step-by-Step: Add a New Location
Step 1: Go to WP MAPS PRO → Add Location in the plugin menu.
Step 2: Fill out the Location Information form:
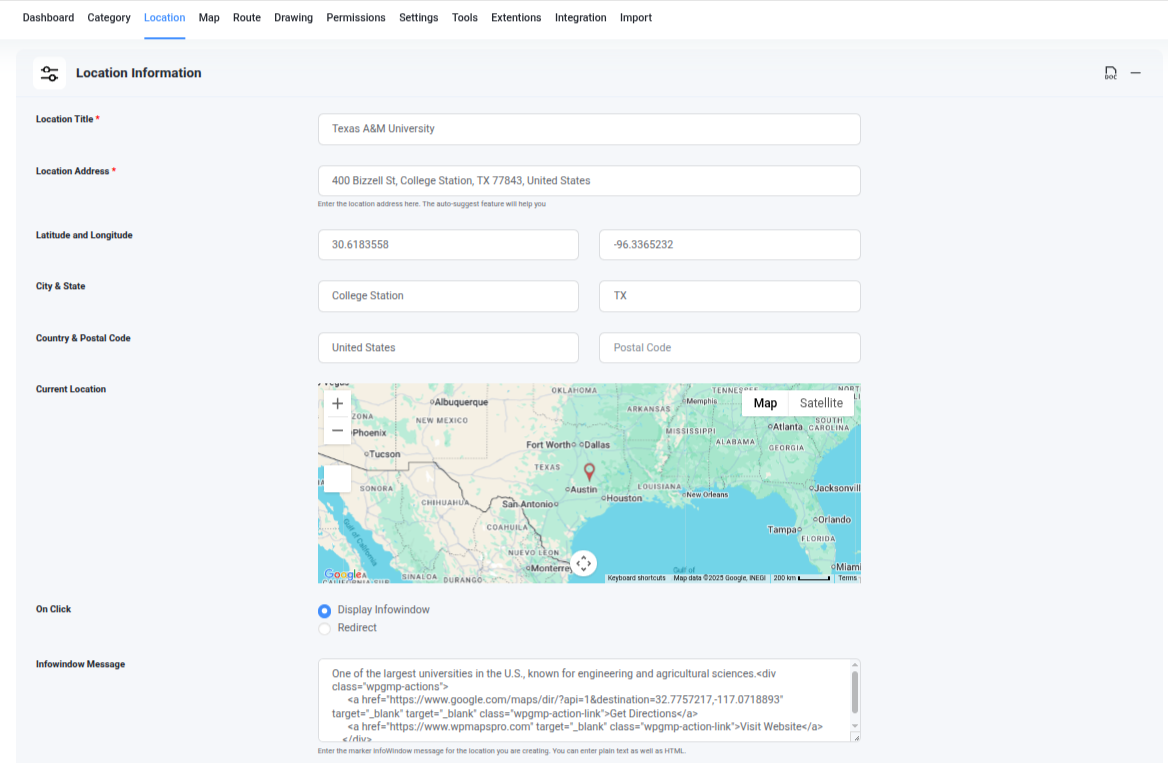
- Location Title: A label or name for the marker.
- Location Address: Use the Google-powered auto-suggest box to search and select a valid location.
- Latitude & Longitude: These are auto-filled but can be edited manually if needed.
- City, State, Country, Postal Code: These are also auto-filled and editable.
- Current Location (Preview Map): Drag the marker to adjust position, or rely on the address field.
- Infowindow Message: Add content (HTML supported) to show when the marker is clicked.
- Location Image: Upload an image to display inside the infowindow for a better visual experience.
- Apply Marker Category: Select a category created in the Add Marker Category tutorial. This determines the marker icon for the location.
Step 3
Scroll down and click the Save Location button.
🧩 Add Extra Fields in Location
Want to store more data like phone number, website link, or operating hours with your locations? WP Maps Pro lets you add unlimited custom fields using our Extra Fields feature.
This is helpful when you want to show unique details in the infowindow or listing below the map that aren’t part of the default location form.
🔧 How to Create Extra Fields:
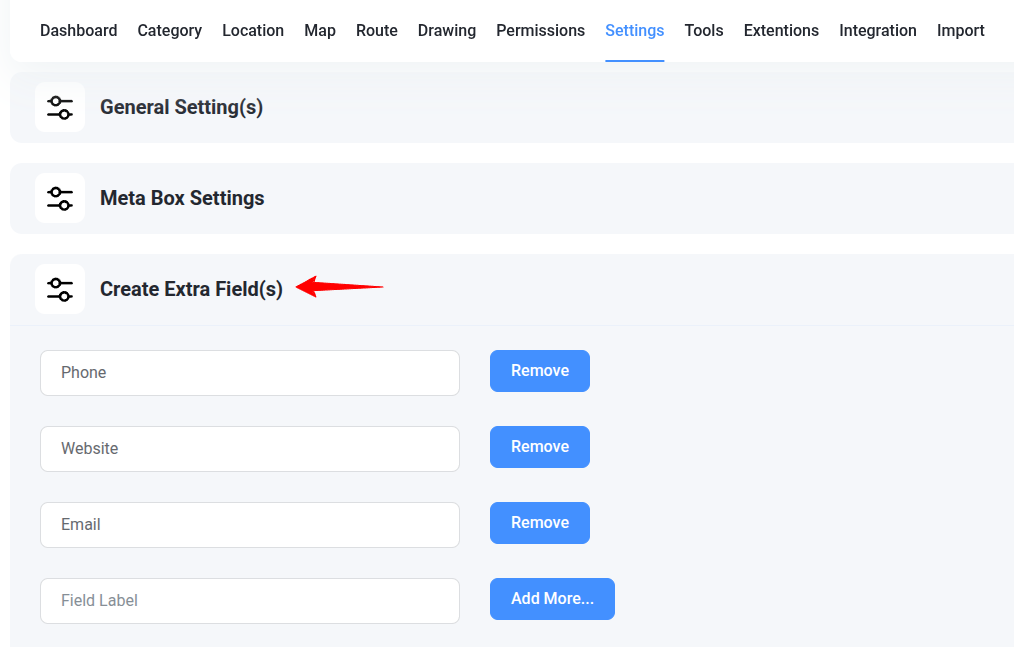
- Go to WP MAPS PRO → Settings.
- Scroll down to the Create Extra Fields section.
- Add the label (e.g., “Phone Number”), choose a field type (Text, URL, etc.), and save.
📝 How to Use Extra Fields:
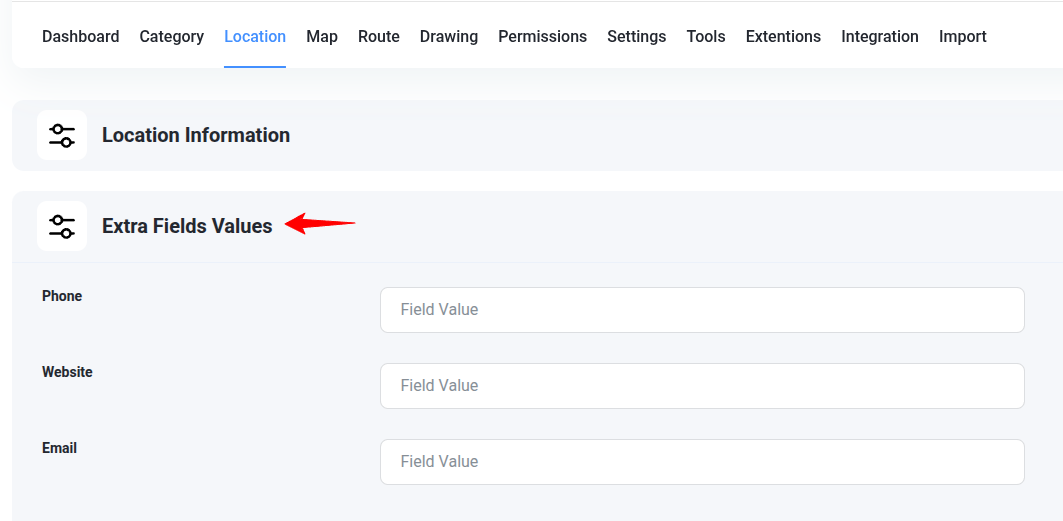
- Once created, extra fields will automatically appear in the Add/Edit Location form.
- Fill them in while creating or updating a location.
- Use their shortcode tags (e.g.,
{phone}) in your infowindow or listing templates from map settings.
Example: Add an extra field named “Phone Number” and use {phone} inside your infowindow HTML to display it dynamically.
💡 Tip: This is perfect for adding unique content like appointment links, opening hours, or even custom buttons!
🎉 Location Created Successfully!
You’ll now see a success message. Your new marker location has been added.
You can repeat this process to create as many locations as you need. After adding all your locations, the final step is to assign them to a map. If you haven’t done that yet, follow our guide on How to Create a Map.
Need help? Submit a support ticket and we’ll assist you!